In the previous two articles of this article series, I have explained about how to create an Excel-based BI report using the SharePoint List data OData Service in Part 1 and then discussed how to establish the connection between lists using the Power Pivot in Part 2. In this last article of this article series, I will provide the instructions on how to Publish and present the report from within the SharePoint for the end user consumption.
Before I begin with the next steps in this article, I would like to point out the important observation. In the very 1st article, I have made a statement that it is possible to have a Realtime synchronization of the data from SharePoint list in the Excel files published to SharePoint. However, for an unknown reason, this works only when the Reports are created in Excel 2013, You will notice a connection error if you use the Excel 2016 or Excel Office 365 (MSO).
This was really disappointing for me when I tried to refresh connection in the published report which was created using these latest versions of the excel. The error you will notice is when you try to refresh the connection is as below.
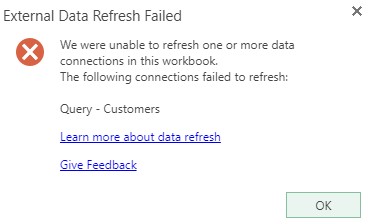
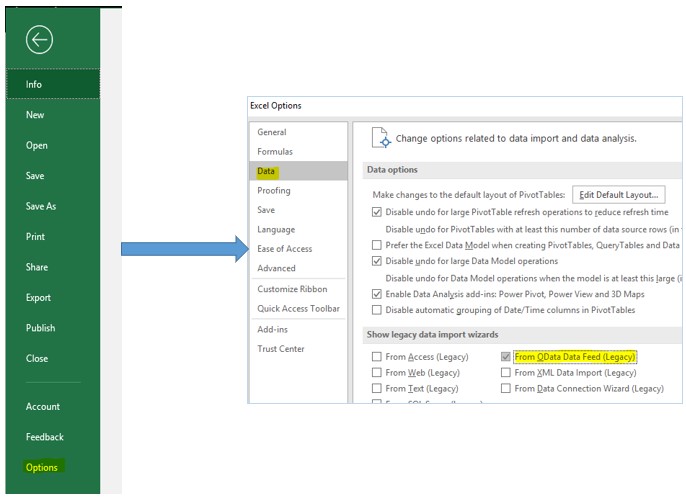
There is a workaround in case if you are using the latest versions of Excel for such BI reports. You just need to ensure to enable the legacy data import wizard and use this legacy wizard instead of the data import wizard in the latest version of Excel. Refer below for the steps.
Step 1: Click on File > Options and
Step 2: Click on The Data Tab
Step 3: Now, select the From OData Data Feed (Legacy) option under Show legacy import wizards section.
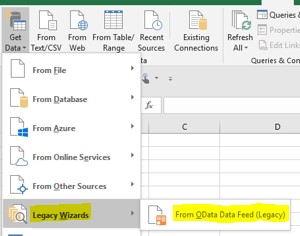
Step 4 : Now, When you click on Get Data button within Data Tab in the excel file, you will notice the Legacy Wizards option, and this option should be used to establish the connection with SharePoint list(s) as explained in my 1st article Excel for BI Reporting and Publishing Through SharePoint – Part 1 .
Now, back to the original topic of this article i.e. how to publish and display the BI report to the end users. The first and foremost step is to upload the excel report to the document library within SharePoint. I am skipping these steps and jumping straight to how the uploaded report can be made available to the end users.
Mentioned below are few of the most common options.
1. Directly open the uploaded excel report:
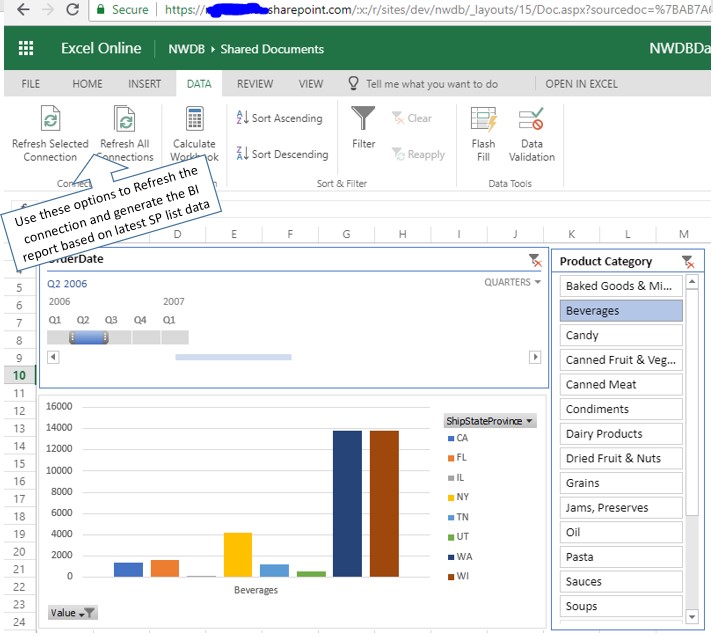
- When users open the excel report from within SharePoint document library, the file is opened online, and you will be able to refresh the connection using the options under the DATA tab. (Ref the picture below).
- As a report owner you can directly share the URL of this file with the end users
- It is important to note here that, only the users who have at least Read access to the connected lists will be able to refresh the connection, otherwise they will receive the error
2. Classical Excel Web Access Webpart can be used to publish this report within the SharePoint site page.
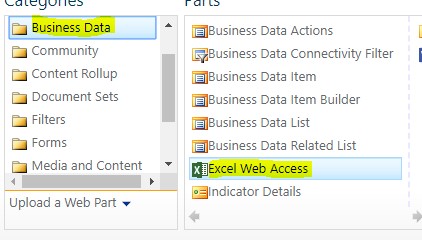
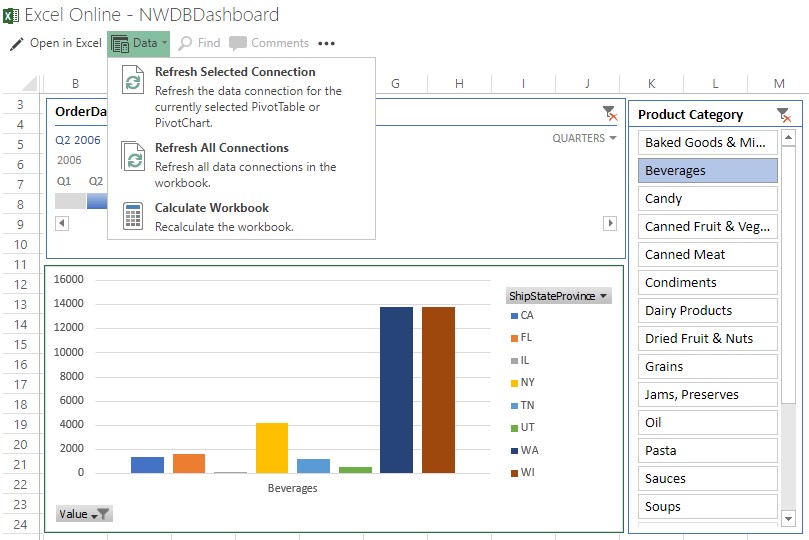
This webpart provides the options for users to Refresh the connection and consume the latest list data on this published page, users need not browse back to the original file to refresh the connection. Please be noted that it is possible to make use of this webpart only in the classic site pages only.
3. In the modern pages, there is no specific webpart to display excel report, however, File Viewer webpart can be used to present the report. Refer to steps and pictures below.
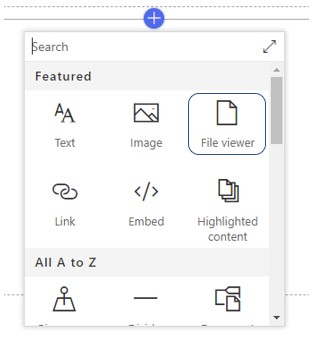
This web part provides the option to display one of the four options mentioned below, you can use one of these options or combination of these options displayed in different webparts as per your requirement.
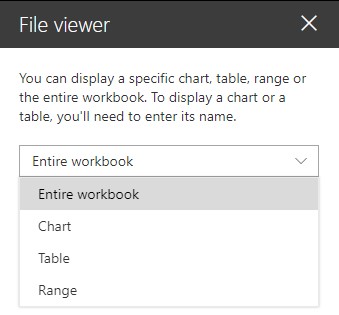
In this, there are no options to refresh the connection. In order to refresh the connection user or the document owner has to open the file directly and then refresh the connection. Or use the option of “Refresh Data when opening the file” option in the connection properties as explained below.
Connection Refresh options:
Here we notice that there are multiple options to refresh the connection so that the latest data is displayed on the excel file. Out of all the four options, I have explained two options below.
Step 1 : Click on a Data Tab and then click on Properties.
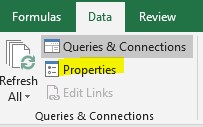
Step 2 : Then you will notice a small box with Queries & Connections, Now click on Properties button again
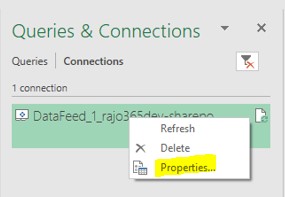
Then the dialog box with Connection properties is opened:
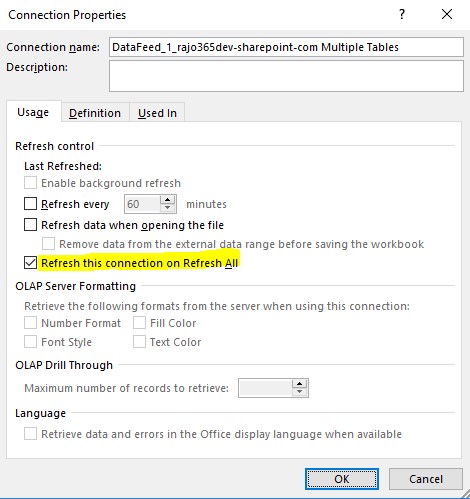
On this dialog box you will see multiple options, out of which I have picked two options and the explanation as follows.
- Refresh data when opening the file: In this option, the connection will refresh every time we try to open the document and the user will always see the latest information from the connected lists.
- Refresh this connection on Refresh All: in this option, the connection will refresh on the click of a Refresh All button.
Out of all the options above, my favorite is Refresh the connection on Refresh All as it will give the flexibility for users to refresh the connection as per their will. The option “Refresh data when opening the file” is not recommended for the reasons mentioned below.
- If the background data has too many records. The connection will refresh every time the page is opened, even if there are no updates to the actual records.
- If multiple people are opening the same page it refreshes the connection for all of them which is not necessary.
With the option “Refresh the connection on Refresh All”, Even if one user refreshes the connection the other users will be able to see the latest data as the source file would have refreshed and users will always be able to refresh the connection and see the latest data through the excel.
Overall this excel based BI reporting through SharePoint may not be equivalent to Power BI in terms of its BI reporting capabilities, but this can be used for SharePoint based mini-applications as it will not cost any additional penny.
Please refer to my previous articles on the same subject here:
Excel for BI Reporting and Publishing Through SharePoint – Part 1
Excel for BI Reporting and Publishing Through SharePoint – Part 2

