Introduction:
We received a requirement from a customer on the intranet portal dashboard, they wanted to have an Adaptive Card to show the ServiceNow Incidents information. This blog takes you through in detail the steps we followed to implement the above requirement:
- Configuration Activities from ServiceNow
- Configure App Registry
- Generate OAuth Token
- Create a custom Adaptive Card Extension using SPFx
- Passing OAuth token from your SPFx code
Configuration Activities from ServiceNow
Follow the steps below to configure App Registry
- Go to ‘Application Registry’ in your service management
- Click on ‘New’ button on the right top
- Select ‘Create an OAuth API endpoint for external client’
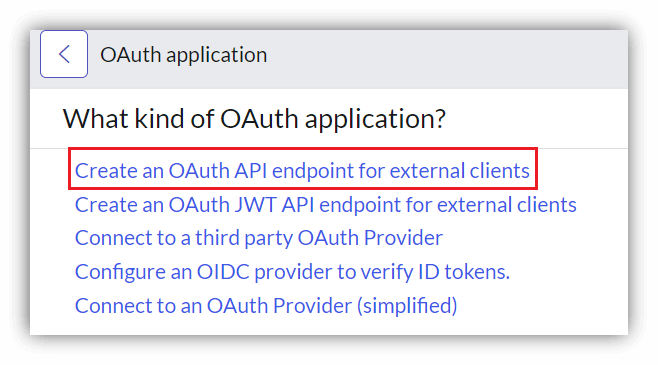
- Enter the name you would like to have for your reference
- The Client ID will be generated automatically, therefore nothing needs to be done.
- Provide the Client Secret and note for your reference which will be required while generating OAuth token
- Points to note:
- Refresh token Lifespan to be given for 100 days
- Access token Lifespan to be given for 30 minutes
- For security reasons, ServiceNow gives the above timespan for these tokens, by default. Based on your requirement and preferences you may need to change the duration or implementation to generate the token dynamically.

- Click ‘Save’.
Generate OAuth Token
Below are the steps to generate OAuth Token:
The following URL helps to generate OAuth token and where we need to pass the required parameters- https://docs.servicenow.com/bundle/sandiego-platform-administration/page/administer/security/reference/r_OAuthAPIRequestParameters.html
- POSTMAN was used to hit this URL to generate the token. Here is the screenshot:
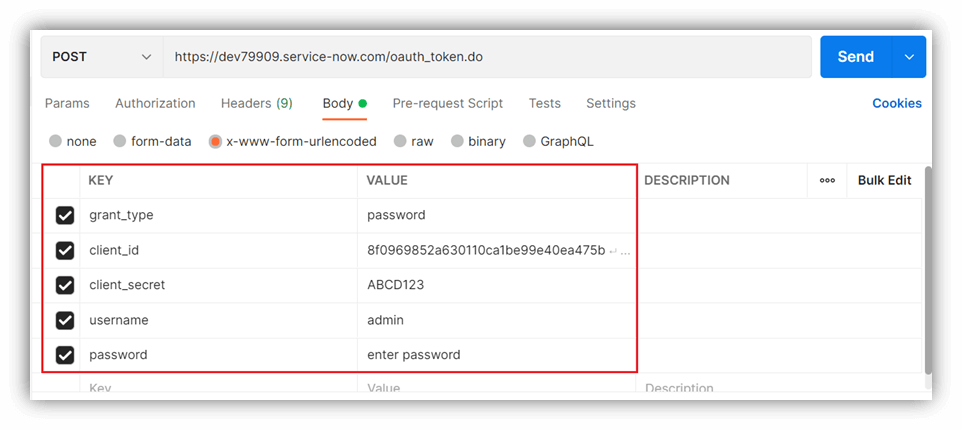
- Click on ‘Send’ to return the refresh and access token.
Take note of these two tokens
- Access token – used for API authorization
- Refresh token- used for generating the fresh access token.

You may like to read our blog : ServiceNow Integration with SharePoint Online using Microsoft Graph
Create custom Adaptive Card Extension using SPFx
Follow these steps to create a SPFx solution and select ’Adaptive Card Extension’ option for the client-side component

Once the solution is created, open code in VS code and call the API using ‘httpClient’ object as show below.
  const requestHeaders: Headers = new Headers();
        requestHeaders.append('Content-type', 'application/json');
        requestHeaders.append('Accept', 'application/json');
        requestHeaders.append('Access-Control-Allow-Origin', '*');
        //For an OAuth token
        requestHeaders.append('Authorization', 'Bearer ' + this.SNOAuthToken);

        const httpClientOptions: IHttpClientOptions = {
          headers: requestHeaders,
          method: 'GET',
        };

        this._httpClient
          .get(
            'https://dev79909.service-now.com/api/now/table/incident?',
            HttpClient.configurations.v1,
            httpClientOptions
          )
          .then((response: HttpClientResponse) => {

            if (response.ok) {
              return response.json();
            } else {
              return null;
            }
          })
Once coding is complete, deploy the solution.
Here is the Adaptive Card that interacts with ServiceNow API to pull the incidents information on Intranet portal dashboard for your reference.
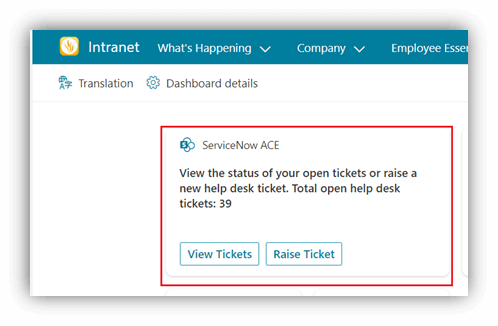
Click on View Tickets to show ‘Quick View’.
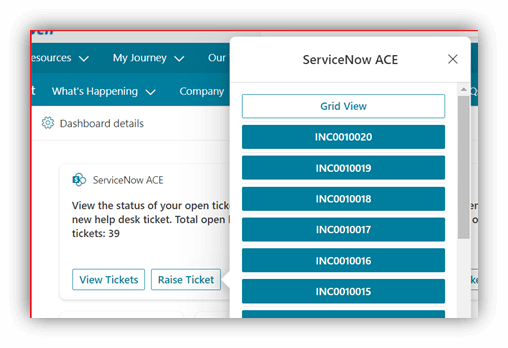
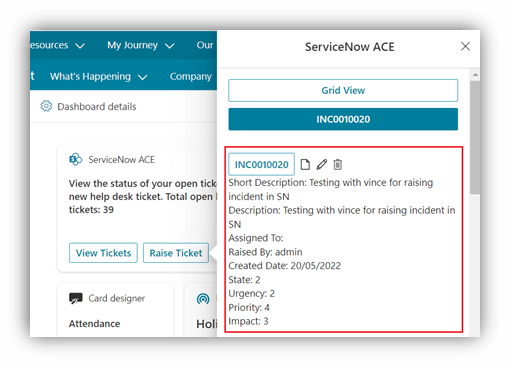
Click on the incident to show basic details of ‘Incidents’.
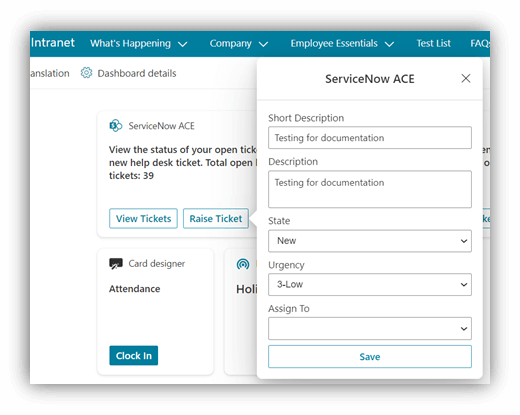
Click on ‘Raise Ticket’ to raise a new incident in ServiceNow.
The new incident will show on view tickets quick view.
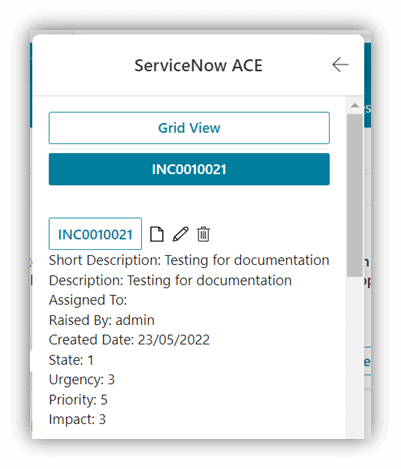
Likewise, you can do all CRUD operations.
We hope you found this blog useful in learning how to get an Adaptive Card to show the ServiceNow Incidents information. Please reach out to us so that we can put our decades of Microsoft 365 expertise and experience to work for your organization’s Digital Transformation journey.

