

Introduction
USB drives, while convenient, pose a significant security risk, as they can easily introduce malware or facilitate data exfiltration. For organizations using Microsoft Intune and Microsoft Defender, it’s possible to set up a robust system to restrict USB drive access. This guide will walk you through the steps to achieve this.
Prerequisites
Before you start, ensure you have the following:
Microsoft Intune Subscription
Intune is part of Microsoft’s Enterprise Mobility + Security (EMS) suite. It allows you to manage devices and apps, including setting policies for device access.
Microsoft Defender for Endpoint
Defender provides advanced security features and integration with Intune to enhance endpoint protection.
Administrative Access
You need to have administrative rights on both Intune and Defender to configure these settings.
Create “Attack Surface Reduction Rules”
1. Create Approved USB Mass Storage Device List
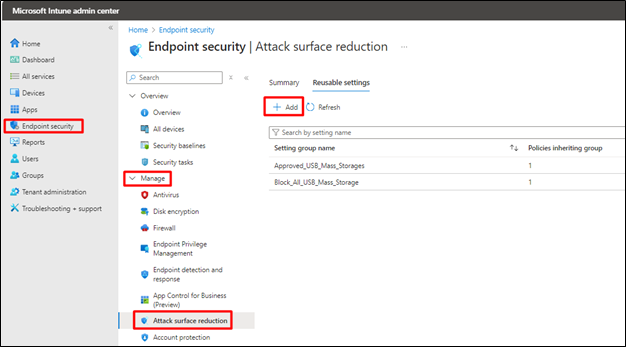
- Sign in to the Microsoft Intune admin center.
- Go to Endpoint Security
- Select Attack Surface Reduction under Manage
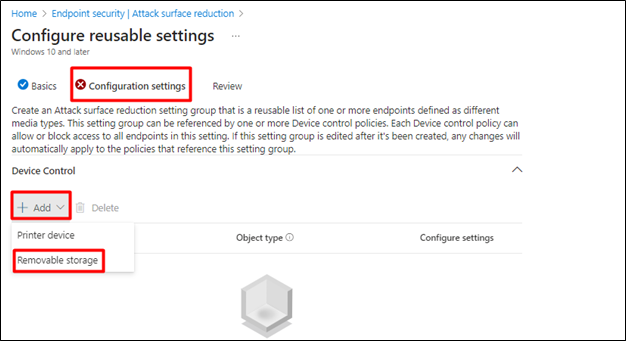
- Select Reusable Settings and click on Add

- Provide a policy name and description (optional)
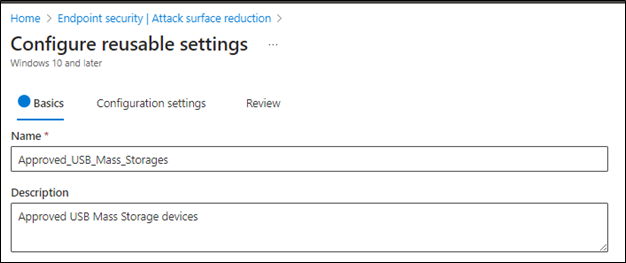
- Click Next
- Under Configuration Settings click Add and select Removable Storage

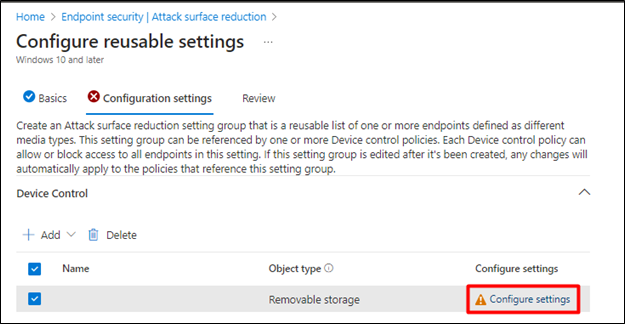
- Click on Configure Settings

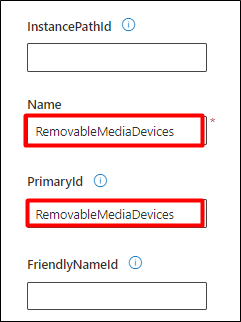
- In the next pop-up window set the USB Mass Storage device details
Note: In this document, we have used serial no.
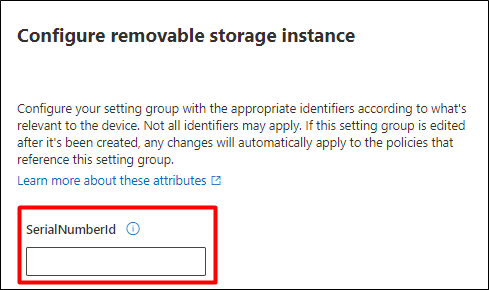
- Click on Save
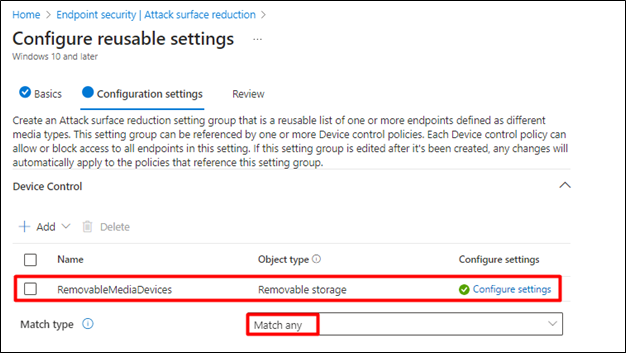
- The list should now show the device that you have added
- For Match Type select Match Any
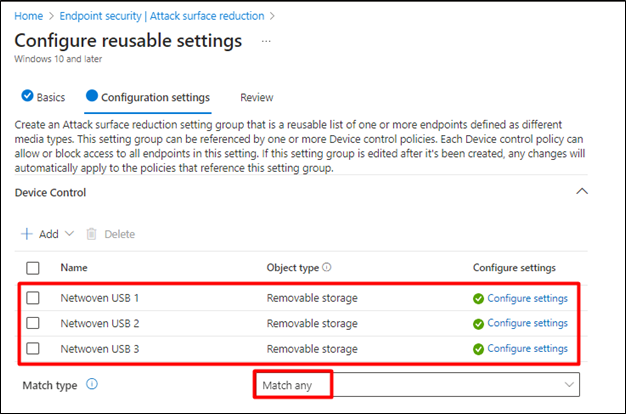
- Click Next to go to Review section and click Save
2. Create “Block All USB Mass Storage Policy”
- Sign in to the Microsoft Intune admin center.
- Go to Endpoint Security
- Select Attack Surface Reduction under Manage
- Select Reusable Settings and click on Add
- Provide a policy name and description (optional)

- Click Next
- Under Configuration Settings click Add and select Removable Storage
- Click on Configure Settings
- In the next pop-up window enter this text string “RemovableMediaDevices” in Name and Primary ID field and click Save
- For Match Type select Match Any
- Click Next to go to Review section and click Save
Create “Attack Surface Reduction rule”
- Sign in to the Microsoft Intune admin center.
- Go to Endpoint Security
- Select Attack Surface Reduction under Manage
- Go to Summary tab (by default selected)
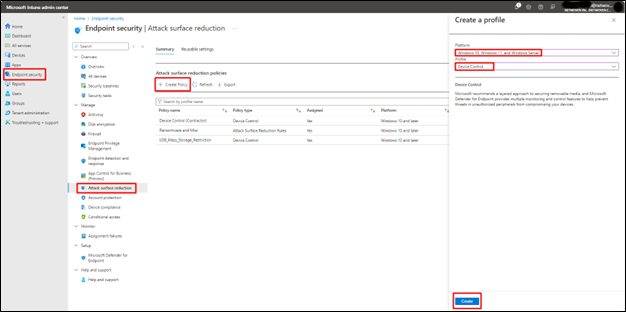
- Click on Create Policy
- In the Create a Profile pop-up window select Platform as Windows 10, Windows 11, and Windows Server
- In Profile select Device Control
- Click Create
- Provide Name and Description (optional) of the policy
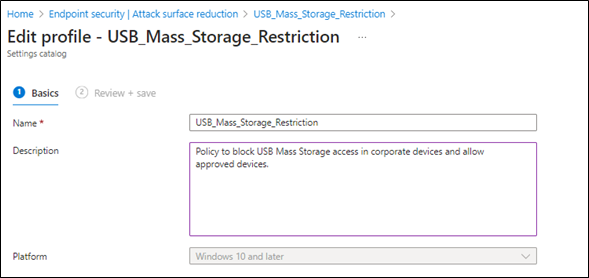
- Click Next
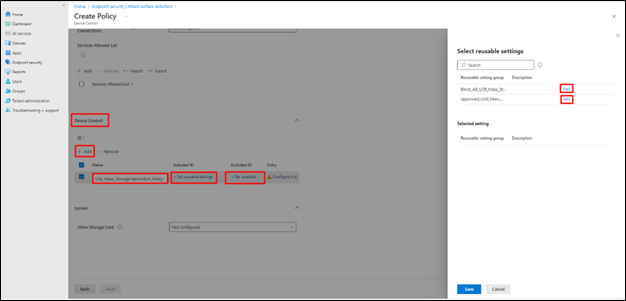
- In the next window scroll down and go to Device Control
- Click on Add
- Provide a policy name.
- Click on Set Reusable Setting under Included ID and Excluded ID one by one
- Add the block all USB Mas storage policy created in earlier under Included ID and Add the Approved USB Mass Storage policy created in earlier under Excluded ID
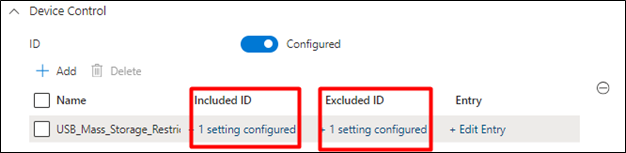
- Save
- The policy should look like this if configured correctly
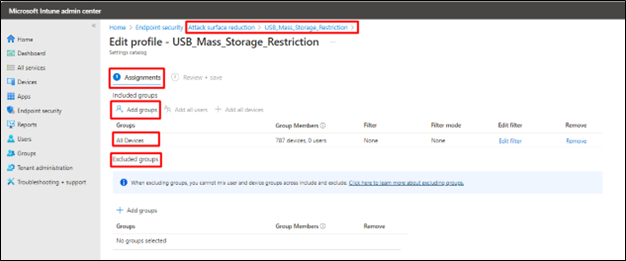
Policy Assignment
Once the Attack Surface Rule is configured it should be targeted to device groups.
Click on the ASR policy we have created
- Navigate to Assignments
- Add the desired group under Included Groups
- If any device group needs to be excluded, then add it under Excluded Groups (Optional)
- Click Save
Download Tools and Reference Links
Download USB Mass Storage Details Viewer
References
There are several ways available to achieve the USB Mass Storage restriction with exclusion. Below are some links for configuring the policy as per business needs.
- https://learn.microsoft.com/en-us/defender-endpoint/device-control-overview?view=o365-worldwide
- https://techcommunity.microsoft.com/t5/core-infrastructure-and-security/mde-device-control-leveraging-reusable-settings-in-intune/ba-p/3905072
- https://learn.microsoft.com/en-us/defender-endpoint/device-control-deploy-manage-intune?view=o365-worldwide
Conclusion
Securing your organization from unauthorized USB devices is a critical aspect of maintaining data integrity and protecting the organization from malware. By using Microsoft Intune to block all USB drives and Microsoft Defender to allow only approved devices, you create a robust security posture that minimizes risk while ensuring productivity remains unaffected.
Netwoven provides expert guidance to enterprises throughout the migration process, ensuring meticulous execution from tenant configuration to scenario validation. Our comprehensive testing phase plays a pivotal role in validating the migration strategy, ensuring smooth and seamless functionality in the new Intune environment. If you’re looking to block USB storage access and set exclusions using Intune, feel free to contact us for expert assistance.