Introduction:
Microsoft Teams, the most popular collaboration application, supports creation of a personal tab to get separate content for each user. SPFx applications can be made available in SharePoint online as well as Microsoft Teams (without having to log in to SharePoint).
In the first blog in this series, ‘How to create Microsoft Teams Personal Tab Using SPFx- Part 1’ we learnt how to successfully create Microsoft Teams Personal Tab application using SPFx automatically. In this part, we will look at how to manually create Microsoft Teams Personal Tab Using SPFx.
Manual Deployment
This is the better option between Automatic and Manual deployment, as we have more control on Teams App. To do this, we need more configuration.
- Open Microsoft Teams and add an app called App Studio.
- Click on Manifest Editor tab.
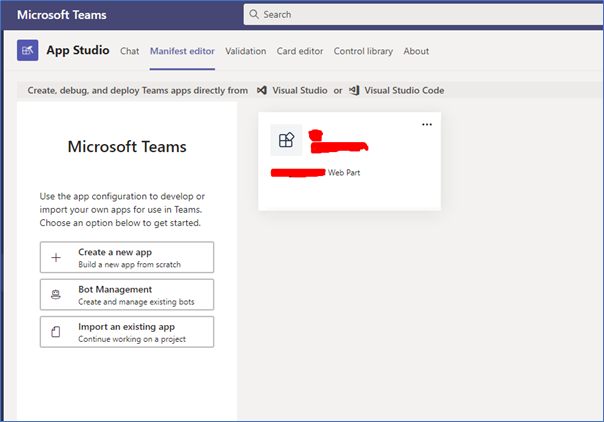
- Click on ‘Create a New App’.
- Provide a short name. (This name will appear when user pins the app in the side bar)
- Provide a full name
- For Identification column, click on generate so that we have place holder for ID and later in the process, we will be changing it
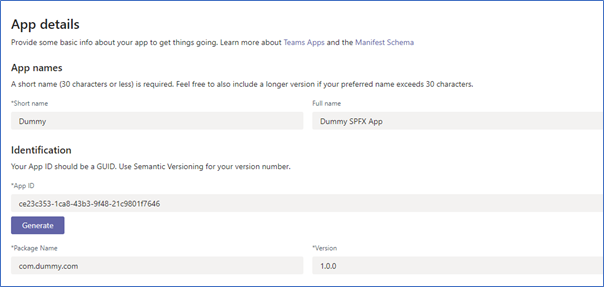
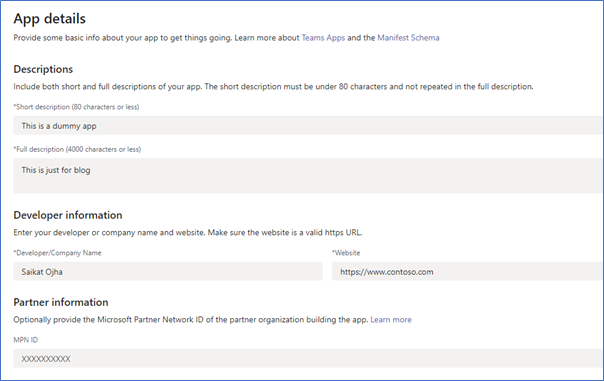
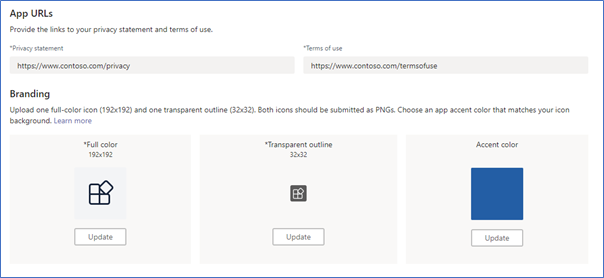
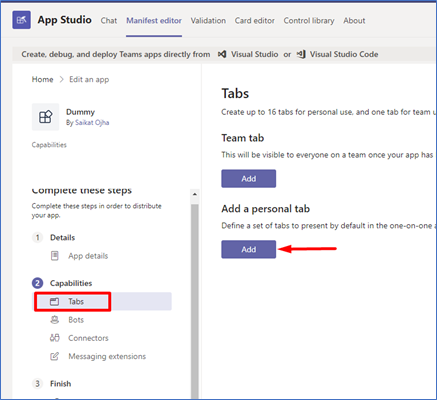
- Now select Tabs from left panel
- Click on add button available under personal tab
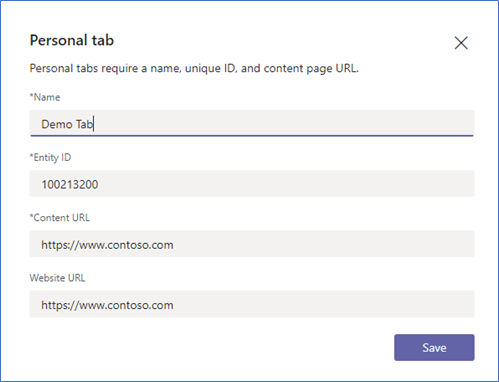
- This will open a popup.
- For time being, fill it with dummy data and later in process, we can change it.
- Save this tab information.
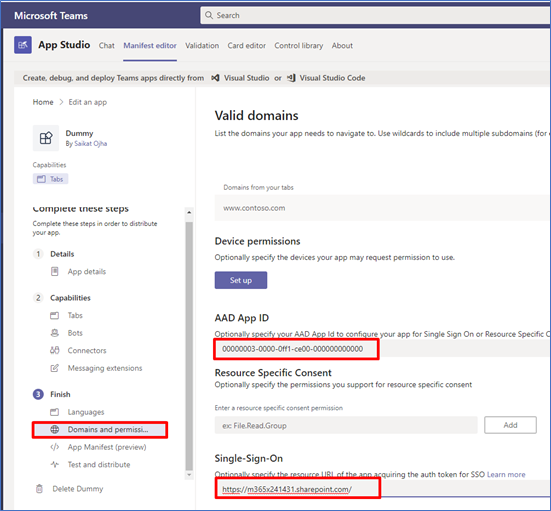
- Click on Domains and Permission tab from left panel (this is very important)
- Under AAD App ID, please provide below ID. The same ID has to be provided in your solution too as described in Microsoft Documentations.
- 00000003-0000-0ff1-ce00-000000000000
- Under single sign provide the SharePoint site URL
- If your app needs any other resource specific consent, you can add them under ‘Resource Specific Consent’. Our app does not need any, so we will keep it blank.
- The above configuration is needed otherwise our app will only work in Microsoft Teams Browser version not in Microsoft Teams App (Desktop and Mobile)
- Click on App Manifest (Preview) link in left panel to view the manifest file, if you want to see it.
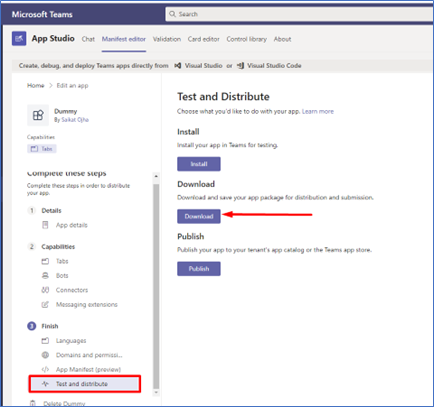
- Click on Test and Distribute link and click on Download button. It will be downloaded as a .zip file to local folder.
- Open the downloaded folder and extract the .zip file.
- Copy the extracted folder to our SPFX solution under teams folder.
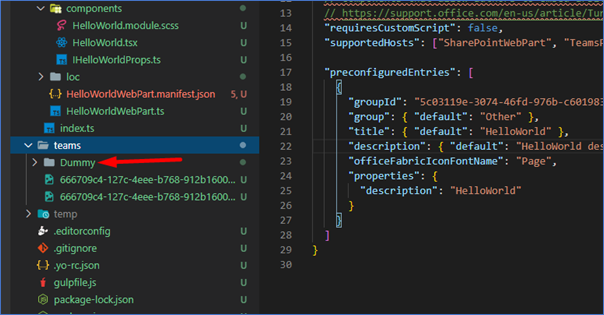
- Expand the folder ad open the manifest.json file.
- We will do some modifications here-
- Under staticTabs, we will change contentUrl and websiteUrl
- For content URL, copy and paste below
- https://{teamSiteDomain}/_layouts/15/TeamsLogon.aspx?SPFX=true&dest=/_layouts/15/teamshostedapp.aspx%3Fteams%26personal%26componentId={{SPFX_COMPONENT_ID}}%26forceLocale={locale}
- Change “{SPFX_COMPONENT_ID}” with our webpart unique ID that we can find under webpart.menifest.json file
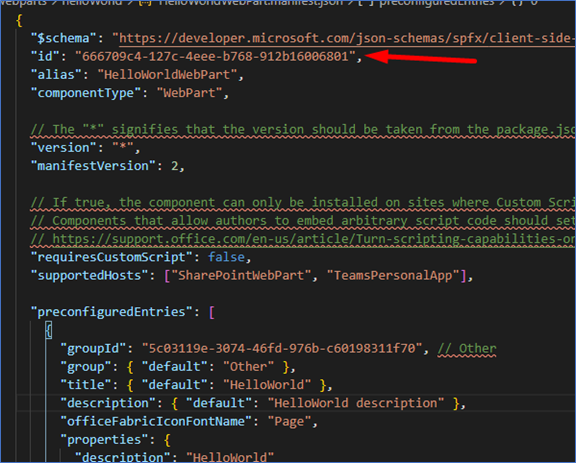
- For “websiteUrl” change it to the SharePoint site URL ,if you want to.

- Under validDomains copy and paste below URL’s.
"*.login.microsoftonline.com",
"*.sharepoint.com",
"spoprod-a.akamaihd.net",
"resourceseng.blob.core.windows.net"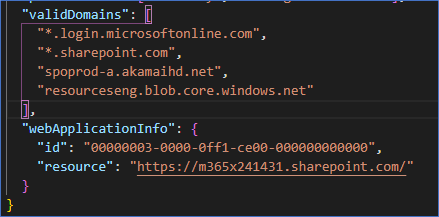
- Now open the Teams manifest folder in explorer view and create a zip file along with two image files and manifest.json file.
- Make sure under zip folder all the above three files are in root level. There is no folder available under zip file.
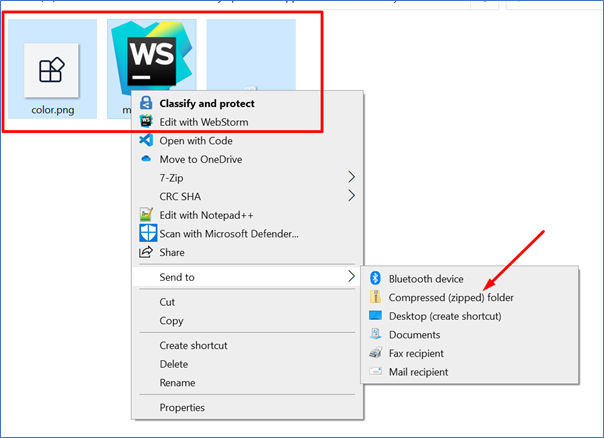
- Rename the .zip file accordingly.
- Go to Microsoft Teams and click on Apps, then click on Upload a custom app
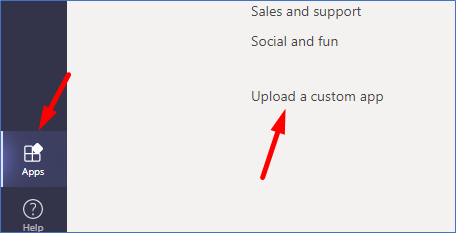
- Select the appropriate upload option according to your requirement. We selected ‘Upload for Tenant’.
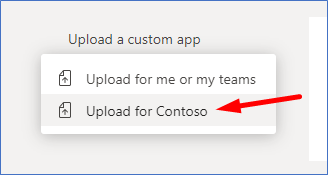
- Now upload the .zip file. Wait for few seconds and the app will be available to Microsoft Teams
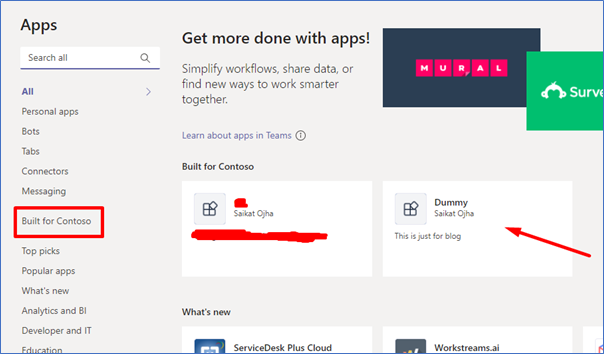
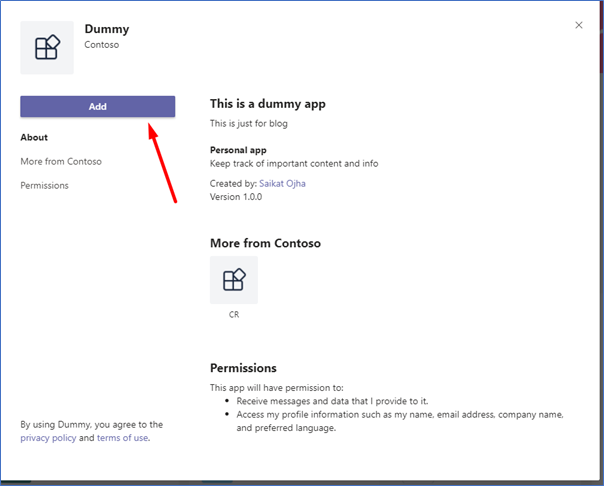
- Click on the app and add it.
Also read: Part I : How to Create Microsoft Teams Personal Tab Using SPFx
Conclusion:
In this blog, we learnt how to manually create Microsoft Teams Personal Tab application using SPFx. In the third and final blog in the series, we will look at how to view the Microsoft Teams Personal Tab manually deployed using SPFx in Microsoft Teams Browser.

