While building Public site in other terms we call Customer Facing site, you will need better Web Content Management capabilities. Generally you will have Authors who are responsible for producing the content while the produced content will go through an approval process before the content becomes visible on the Public Site.
Generally the Public Sites are also Graphics heavy where you also want to better manage the graphics or digital assets.
SharePoint 2013 provides a new feature called Cross Site Publishing capabilities. Utilizing this new feature, you can design more efficient Public Site. In this blog I will discuss about Cross Site Publishing and with an example of the publishing site implementation.
Cross-Site Publishing
Cross-Site Publishing is very simple publishing is a feature driven method that lets you create and maintain content in one or more authoring site collections or web application and publish or display this content in one or more publishing site collections by using content Search Web Parts. Cross-site publishing complements the already existing publishing method, author-in-place, where you use a single site collection to author content and make it available to readers of your site. In a simple manner you write content in one place and have it published somewhere else.
This is the visual presentation by Microsoft:
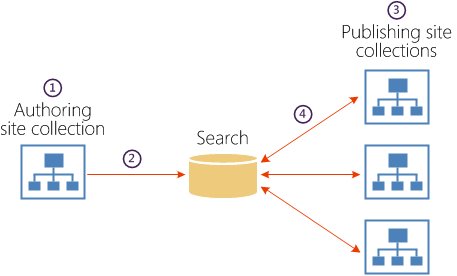
How the cross-site publishing works?
Cross-site publishing uses search technology to retrieve content.
- On a site collection where the Cross-Site Collection Publishing feature is enabled, libraries and lists have to be enabled as catalogs before the content can be reused in other site collections.
- The content of the library or list catalogs must be crawled and added to the search index.
- The content can then be displayed in a publishing site collection by using one or more Search Web Parts.
- When we are changing the content in an authoring site collection, those changes are displayed on all site collections that reuse this content, as we are using continuous crawl.
Why you use the cross-site publishing for your website?
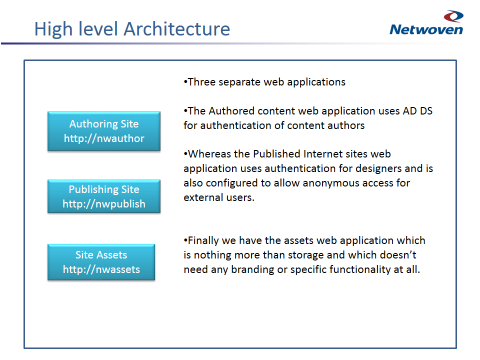
In the scenario, where content authors can add content in a controlled environment, meaning they can add the content in authoring site which is AD authenticated. Let us name it http://NWAuthor.
This content is shared or displayed in Published sites web application which is configured to allow anonymous access for external users. Let us name it http://NWPublish.
At the same time you create another web application where you can store your site assets like images and videos. Now this web application allows read access to anonymous user while it requires authentication for modifying/adding contents. Let us name it http://NWAssets.
Let me share the high level Architecture below:
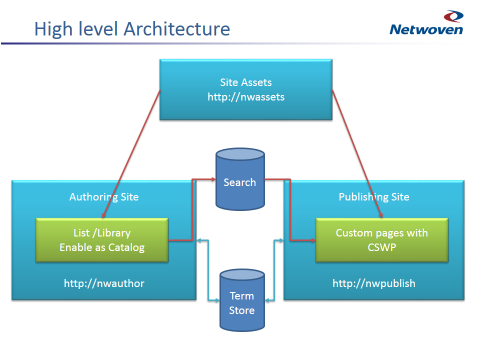
Now we will go through step by step process.
The first thing we have to do is to create three site collections.
Step#1
Create Authoring Site
Firstly, we will create a new web application with windows Authentication
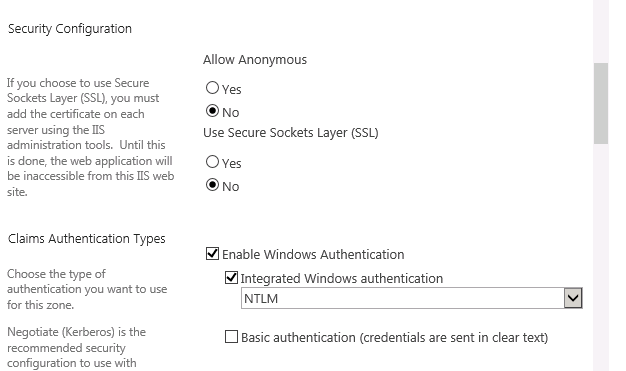
Now we will create an authoring site collection.
To create the Site Collection, we need these details
- A title for the website, which is “NWAuthor”, or any name as you like.
- The website’s URL.
- Select 2013 for the experience version.
- From the Publishing tab, select the Team Site template.
- In the field, Primary Site Collection Site Administrator, enter the site admin’s user name.
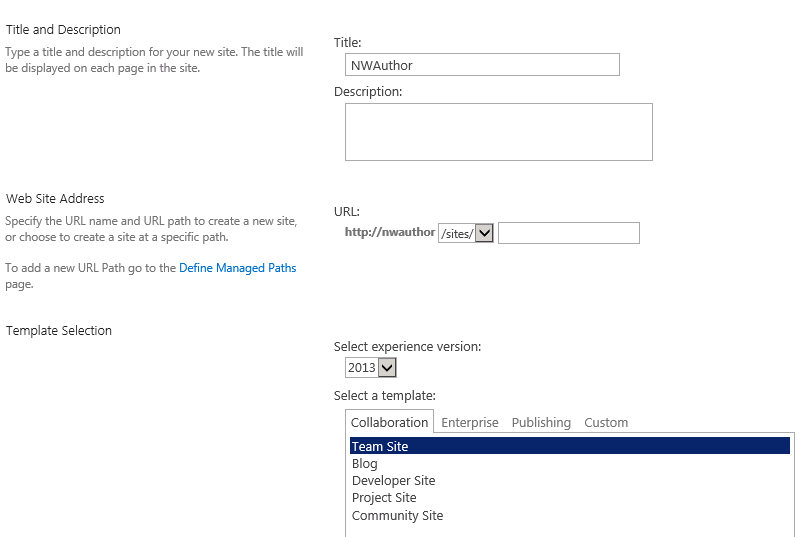
We’ll create a Site Collection based on Team site template.
The ideal Situation is choosing “Product Catalog” template. By choosing “Product Catalog” template, SharePoint will create following artifact for site collection:
- Activate Cross Site Publishing Feature
- Create Product List associated with content type Product with Image
- Create two content types, Product and Product with Image
- Create following Site Columns
Group Number
Item Category [Managed Meta data column linked to Product Hierarchy term set
Item Number
Language Tag
- Create Site Collection Term Set “Product Hierarchy”
As we only require “Cross Site Publishing Feature”, we are choosing “Team Site” template and then we are going to activate this feature.

Step#2
Create the publishing site
Create another web application with “Anonymous access” and name it “NWPublish”
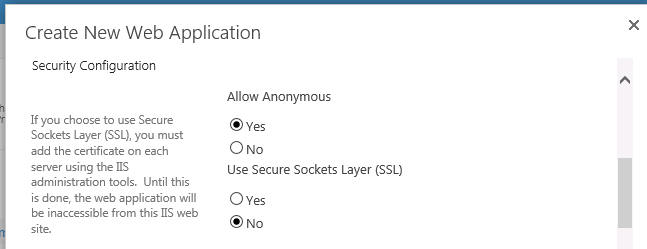
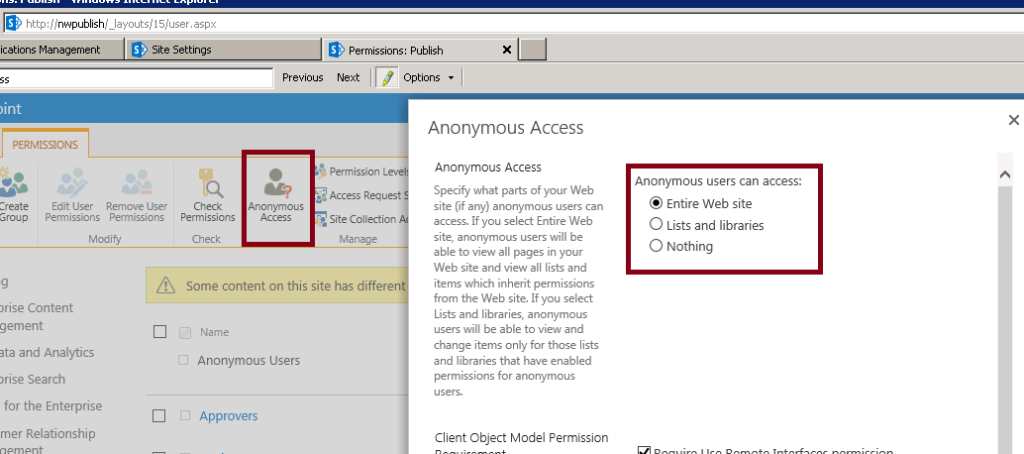
Select the “Entire web site “option from Anonymous access
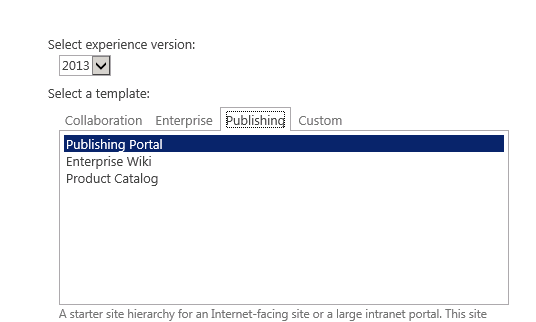
Next we create the root site collection based on “Publishing Portal”
Step#3
Create the Asset library
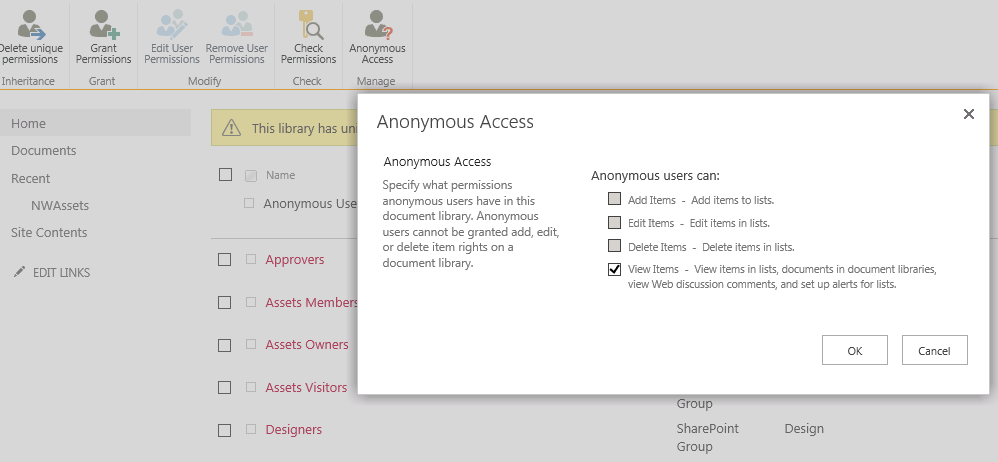
Setup an Asset Library. This can exist anywhere as a container to store site blobs (Pictures, videos, pdfs, etc.) in this case Asset library exists in its own web collection with URL (http://NWAssets). Again this web application has “Anonymous access” for lists and libraries only.
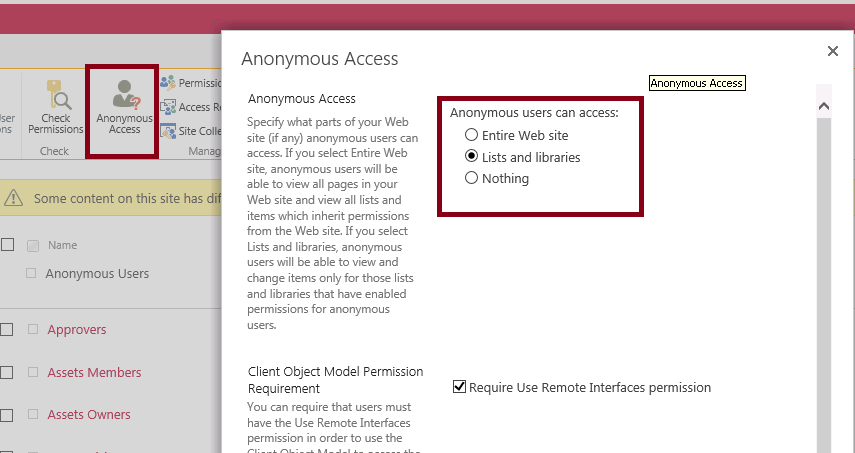
Let’s create a picture library with name “NWassets” and upload the images here. Coming to the specific list we are going to store the blobs, in this case “NWassets”, we’ll check the “View only” option.
So as of now we have created our 3 web application 🙂
Step#4
Create content type & list
Authoring site is ready. Let’s create the list which holds the contents of the site. Create a list with name “websitecontent”.

Now go to the list setting, then catalog setting.
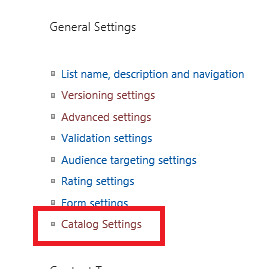
Under catalog setting, check “Enable this library as catalog”.

It will be good to keep the number of list in your author site minimum as this will help you to maintain the site. Otherwise you have to make all the list as catalog then make all the catalog connection from the publishing site.
Now what is Catalogs?
A catalog is a list or library that is shared out to search for consumption on publishing sites. Catalogs enable content to be published across site collections—the cross-site publishing features depend on catalogs.
Any List/Library can be marked as catalog by going to Catalog Settings page and selecting “Share the list as a catalog for other sites and collections”.
After you connect a publishing site to this catalog, the fields that you specified as catalog item URL fields appear as part of the friendly URL, but we do not require this.
Step#5
Adding Images in Asset library
Before adding list items, we will add relevant images in the asset library. Open the asset URL i.e. http://NWAssets and add images there.
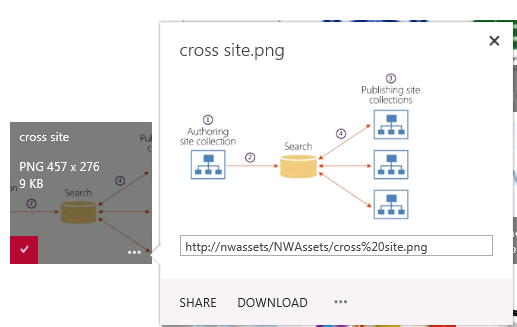
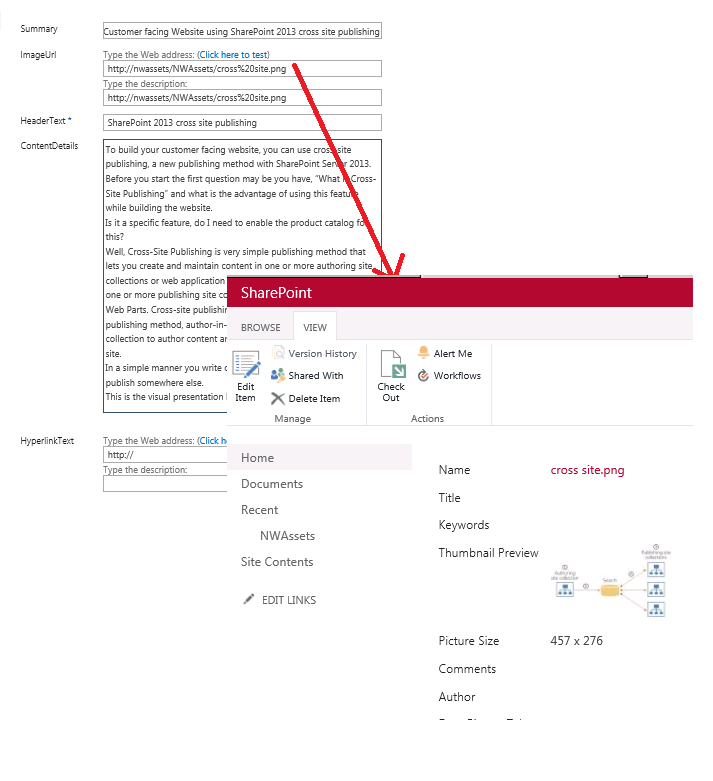
So we see the image first uploaded to asset library, and then that URL refer to the author list.
Next we will go to the Publishing Site, and “Manage the Catalog connection” there.
Step#6
Start adding content
You have already created the list in your author site, now it’s time to add content there.
Step#7
Manage Catalog Connection
Once we enter content in the Author site and make the list as catalog, our next task is to run a full crawl.

After the full crawl is successfully completed, from the site setting of the publishing site, click on Manage Catalog Connection.
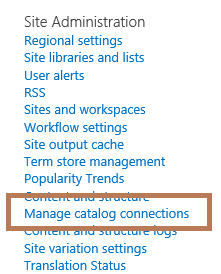
Create the catalog connection. Once you click on “Manage catalog connections”, below screen pops up. Click on the connect link.

While creating the connection choose “Connect, but do not integrate the catalog”.

Step#8
Start creating pages
Once the content is ready for display in pages, start creating pages in the publishing site. Create a custom page in the publishing site and add a content search web part. Now CSWP is ready to use catalogs!
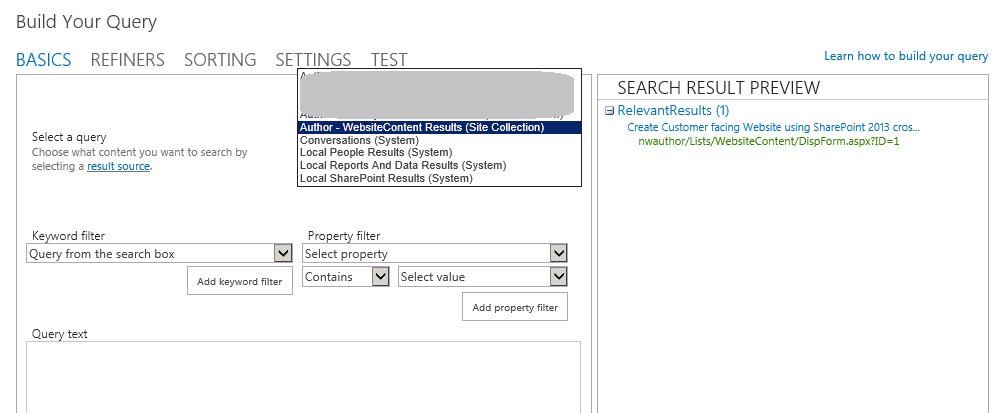
Edit the CSWP and click on “Change Query”. Go to Advance mode and under “select query” option, select the “Author – Website content result”. Close the web part and Check in the page.
Now your page is ready with content and image.
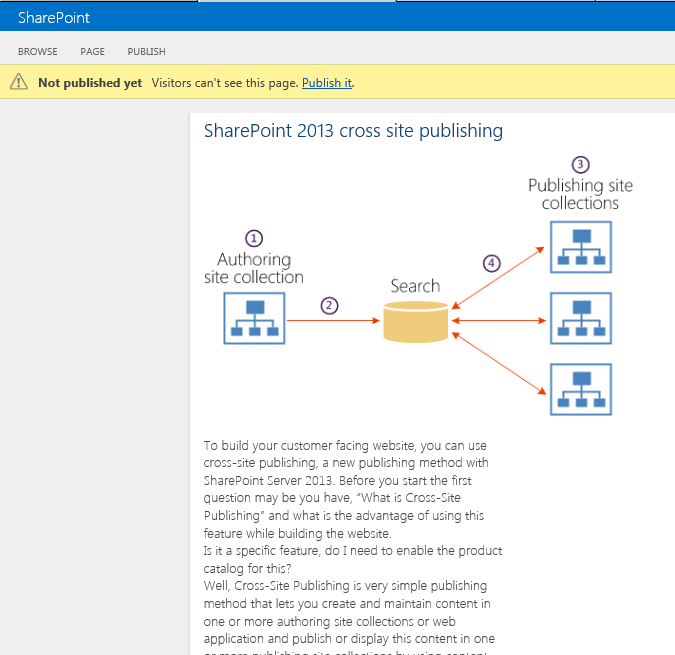
Here I have created a custom display template to show the content & image. You can create a new display template and whatever look & feel you want for your content you can work here.
Conclusion
This is a simple presentation of using cross-site publishing to create public site. Main advantage of cross site publishing is to create content one time and publish in many places and with anonymous access any one can view the publishing site! Another advantage is with the help of display template you can display the same content in different way in different places.
In the next article I will discuss about display template and managed navigation that we can use in cross site.


Hi,
Thanks for this informative post, I have a question. In a e-commerce site that every product has many images. what is the best way to save this images. for example maybe a camera or laptop has three image. do this images saved in a publishing Image list which marked as Catalog on authoring site? Will these images be imported to a publishng images list on the publishing site? how the products get right images? what is the best solution? thanks again.
Hi Kourosh,
I believe you are asking two questions:
Will images be imported: No, the images stay where they are in the authoring site.
How to associate multiple images per product: The catalog concept is really driven by the Content Type. That means you could associate multiple images mechanism with your Content Type. Then to supplement your content type is your Item Page. This is your page to show whatever and however based on the content type and the item in question.
So the best practice or solution is to still architect your ecommerce site with this Catalog function as framework and exploit the customizations available to better fit your catalog presentation to your buyers.
Thanks
Rajesh
Hi Rajesh –
What’s the best way to add a workflow so the content is not published until its approved at the authoring webapplication and then goes to the public webapplication?
Thanks
Mike
Have you finished the next article “display template and managed navigation that we can use in cross site”. Would be fantastic if you can let me know if it is here. Can not find it.
Awesome.. nice explanation thanks a lot 🙂