Power Apps is an extremely handy tool for end-users to create their own apps quickly. Being so very simple it has its own catch points. Imagine that you have a requirement for manipulating a collection of data as one set and bulk update it into a data store as opposed to a one on one form to data store mapping. How to do it is the preamble of this narrative.
This article demonstrates how to take in a set of data from some on-screen entries, keep them in a local store, manipulate it as a collection and finally bulk insert the data into a SharePoint list with help of Power Automate.
The gallery control enables the display of this data set as one within Power Apps.
Let us take a step by step journey to achieve this with the help of a sample use case. Consider a simple scenario of a typical cart application where certain products are to be put in a cart and simultaneously the cart items should be seen as and when the items are being added to it. Finally, the orders are to be placed. Take a look at the following screen.
There is a form to add items with quantity to the cart and a Gallery to display what is in the cart. The form will have a dropdown to select the Product name and an input field for quantity. Evidently, the “Add to Cart” button will add multiple items. In this case, the artifact implemented actually adds the items as a collection into a container in local memory first. That collection is posed as the data source of the gallery. The screen also has a button to place orders. A Power Automate flow will be forked from the “onSelect” event of the “Place Order” button. The flow will receive the collection of items from the power app and will insert all the data in a share point list.
How exactly it can be implemented remains the moot point. Just follow through.
Step 1:
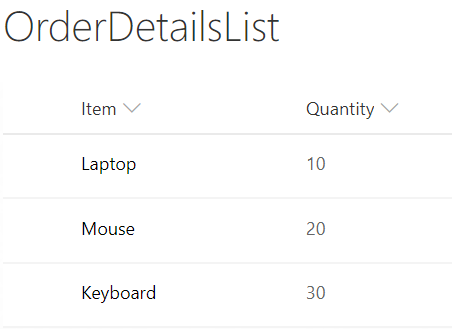
- Create a SharePoint list e.g. OrderDetailsList with two columns:
- Column 1: Product, Type: Single line text.
- Column 2: Quantity, Type: Number.
Step 2:
- Create a Power App with 2 screens: Cart-View Screen and Order-View Screen.
- Write the following to create a collection to store local data of the cart:
- Control: Cart View screen
- Event: on-visible
- Action:
Clear(CartCollection)- Add a Dropdown control to select product and a Text Input control (set its format to Number) to enter quantity and a button to add selected item to cart.
- Add a Gallery control and set the CartCollection as the items of the cart gallery.
- Write the following to insert the selected product and it’s quantity into CartCollection:
- Control: ‘Add to Cart’ button
- Event: on-select
- Action:
Collect(CartCollection,{Product:ProductDropdown.Selected, Quantity: Value(QuantityTextInput.Text)})- Write the following code to run a flow which will receive the cart collection in JSON format as parameter:
- Control: : ‘Place Order’ button
- Event: on-select
- Action:
If(CountRows(CartCollection)>0,PlaceOrderFlow.Run(JSON( CartCollection, JSONFormat.IgnoreBinaryData) );Clear(CartCollection))Step 3:
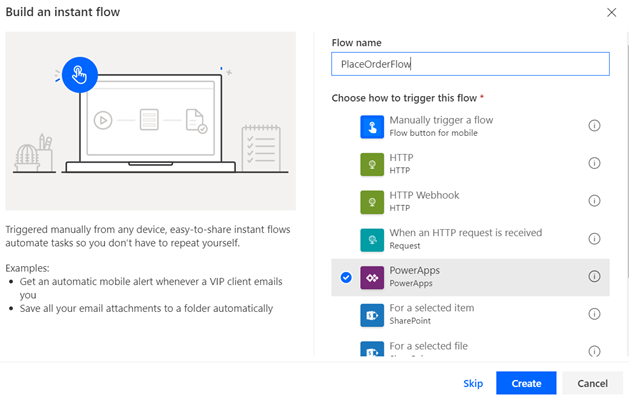
- Create a Flow which gets triggered from the power app application.
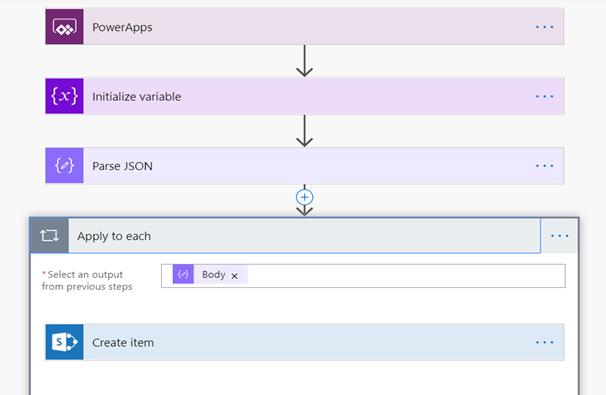
- The complete flow involves 4 steps and looks as follows:
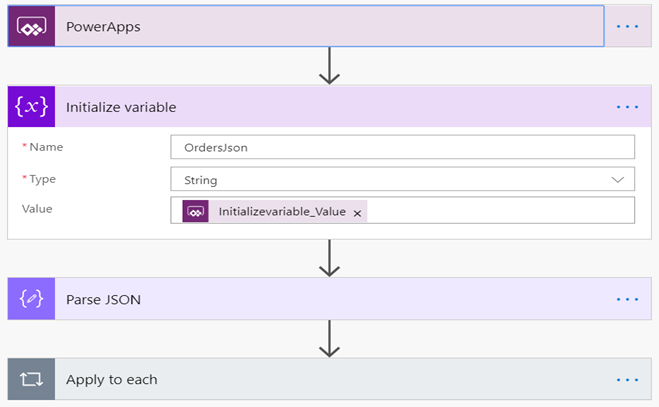
- The flow receives the items to be inserted from power apps in JSON format
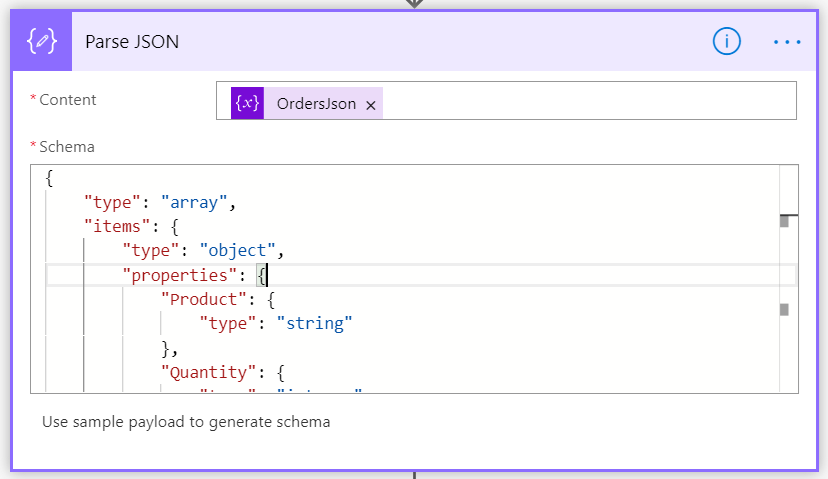
- Received JSON data should be parsed to get each item
- Schema to parse the JSON is as follows:
{
    "type": "array",
    "items": {
       	 "type": "object",
       	 "properties": {
           	 	"Product": {
                		"type": "string"
           	 	},
           	 	"Quantity": {
                	"type": "integer"
            		}
       	 },
        	"required": [
            		"Product",
            		"Quantity"
        	]
    }
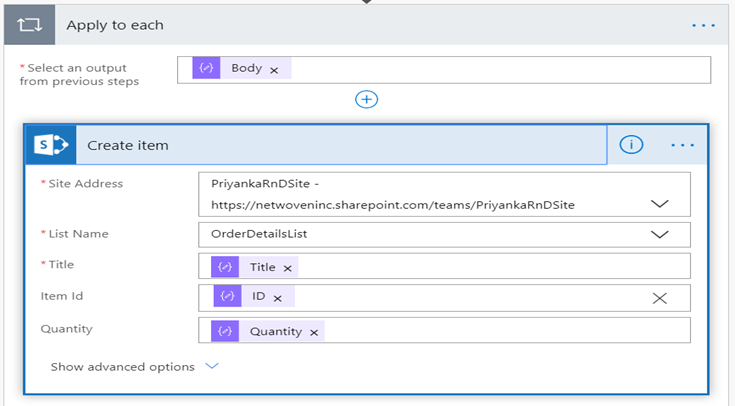
}- Next, insert each item into the share point list OrderDetailsList as follows-
Step 4:
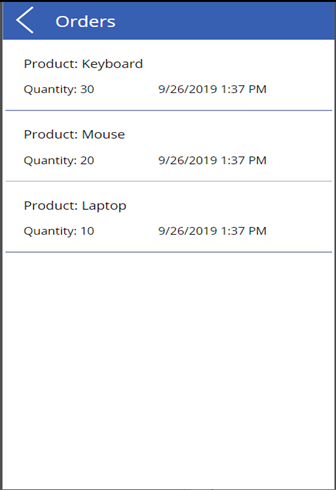
Now back to Power Apps Cart screen. Add a button to navigate to second screen
- Control: : ‘View Orders’
- Event: on-select
- Action:
Navigate(OrdersScreen,ScreenTransition.Fade) Navigate(OrdersScreen,ScreenTransition.Fade)Voila, you are done with.
Power Apps surely allows you to create or modify a single record pretty directly. However, iterating directly onto the permanent data store could prove to be expensive in terms of time and effort. This is a short and sweet way to introduce a little tweak in the middle such that we can create a dataset in local memory, modify it as required and save the dataset in permanent storage together when the dataset is finalized. The inbuilt Microsoft components e.g. Power Apps, Power Automate and SharePoint come together in unison to support an extensible framework. Once the working is understood, you may use this trick to build a more complex real-life application. Go for it if you are Power-hungry!



What If the Flow Failed….How to Notify the User that the Data has not been saved?
Since we have flow Throttling limit…
Good question VUONG.
Inside the Flow we can handle the error and return different response for success and failure.
Inside the Power App, depending on the response received from the Flow, we can take action accordingly.
Hi Priyanka,
A beautiful way to write data to a sharepoint list! Do you know if this is faster then handling it in powerapps with a ForAll(Patch()))?
I am glad that it was helpful to you, Jeroen.
If the collection size is small then time taken by ForAll(Patch()) and Flow may not differ much.
But if the collection size and the number of columns in the SP list is large, then using flow should be preferred for safely insertion of the data.
Using ForAll(Patch()) for large size collection can cause data loss.
This looks very useful, please could you let me know, I’m a Powerapp beginner, but I have an app which is an order form, will this just create one list item in SP but contain all those items which have been ordered? .e.g. an order will have lots of items – I’ve tried the ForAll but that creates a separate list item for each item ordered – Thank you
Very nice. But in real life we need to connect it to a costumer, an order number, etc. The problem is to make an order with an order number, and to connect the orderlines to the same order.