By digitally signing an email message, you apply your unique digital mark to the message. The digital signature includes your certificate and public key, which originate from your digital ID. A digitally signed message proves to the recipient that you, not an impostor, signed the contents of the message, and that the contents haven’t been altered in transit. For additional privacy, you can also secure & encrypt emails in outlook.
A digital ID is issued by an independent certification authority.
Your organization may have policies that require a different procedure. See the network administrator for more information.
You can also look here to find other sources of digital certificates.
Caution:
While obtaining the personal Digital ID, you must ensure that the email address used in the certificate registration matches the email id used by outlook.
Steps:
- Obtain a free email certificate from any certificate authority
- Download the certificate and install in your PC local certificate store
- Confirm installation of the certificate in your machine’s local certificate store:
- Export the certificate from your certificate store into a FPX file
- Import the certificate in outlook
- Activate encryption for mails in Outlook
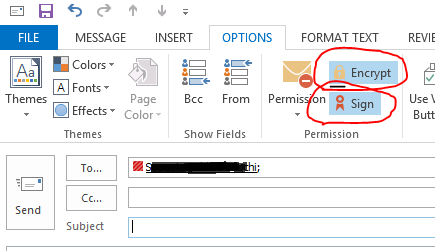
- Send Email from Outlook and choose Encrypt or Put a Digital Signature
1. Obtain a free email certificate from comodo
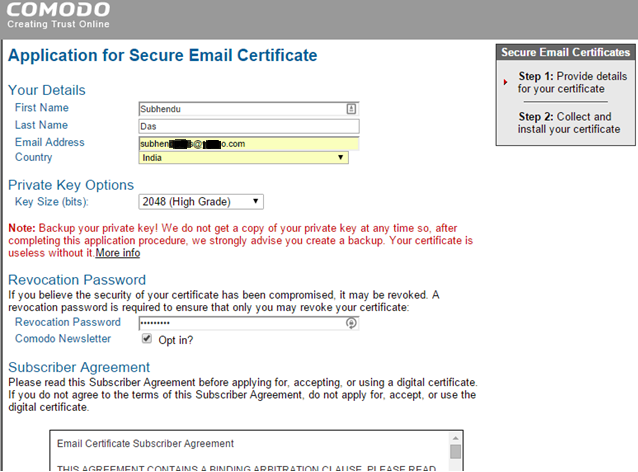
For Demonstration, I have chosen Coomodo for my CA. Visit this page
Fill out your personal details for certificate issuance
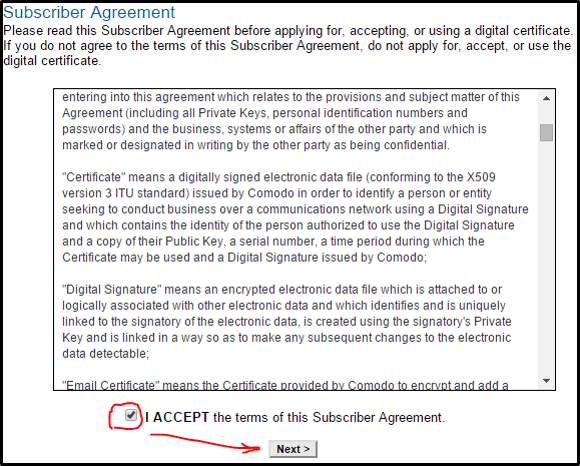
Accept Subscriber Agreement
2. Download the certificate and install in your PC local certificate store
Confirmation about the certificate registration will be send to the email id provided
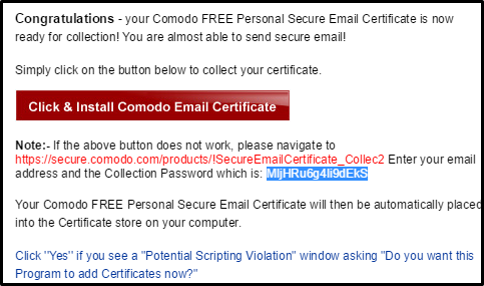
Check for confirmation mail to download the certificate in the mail id provided by you.
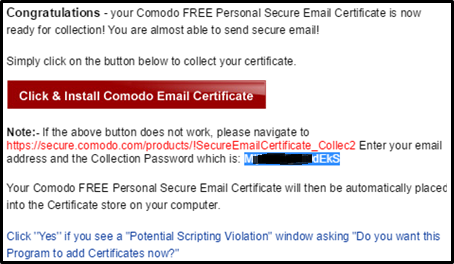
Login to their site and provide the information sent in email
Successful login will automatically install the certificate in your local certificate store
You can view the certificate by clicking on View button.
3. Confirm installation of the certificate in your machine’s local certificate store:
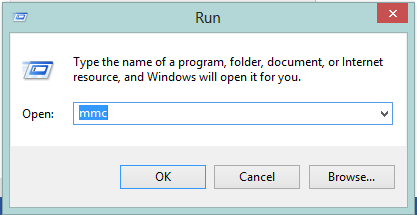
Open MMC by typic MMC in search window of Windows Start Menu
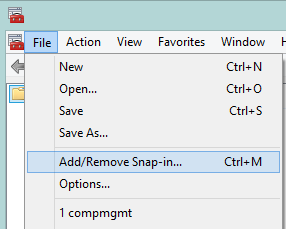
Add certificate snapin from MMC File Menu
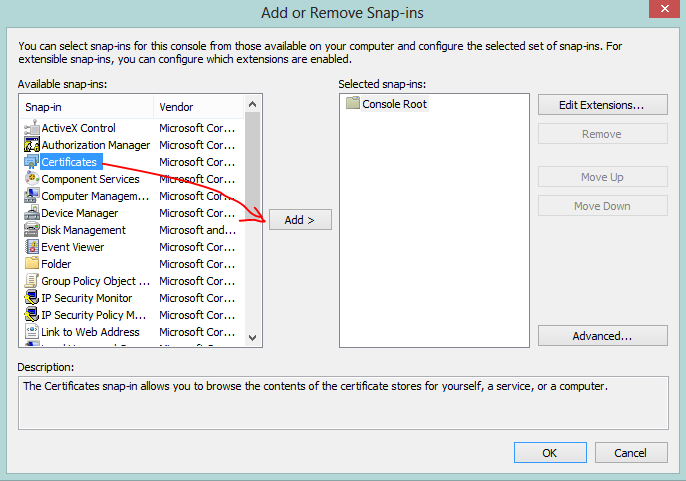
Choose Certificate Snapin from the list and click Add
Select my user account and then confirm by clicking Finish, and then OK.
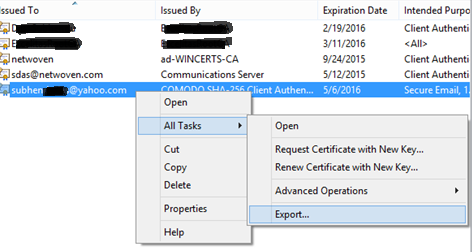
View the certificate from the store reflecting your personal emal ID.
4. Export the certificate from your certificate store into a FPX file
From the above store, select the certificate, right click and choose ALL Task -> Export
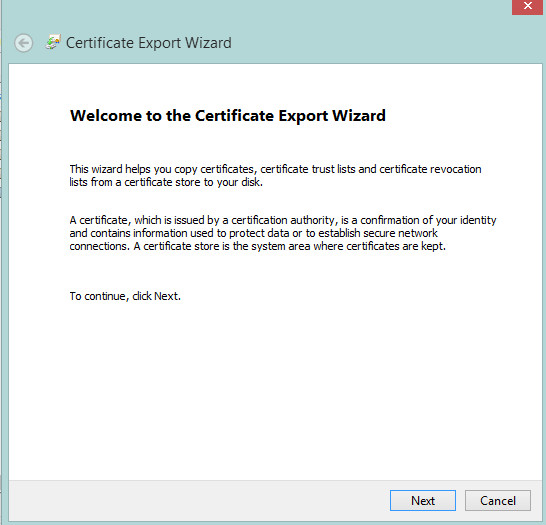
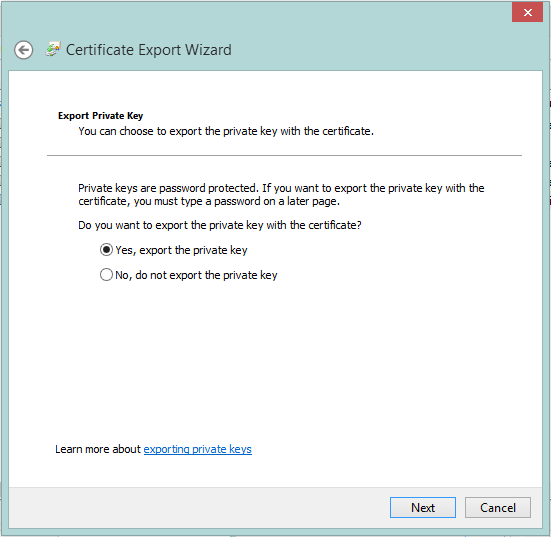
Follow the onscreen Certificate Export Wizard and go to next window
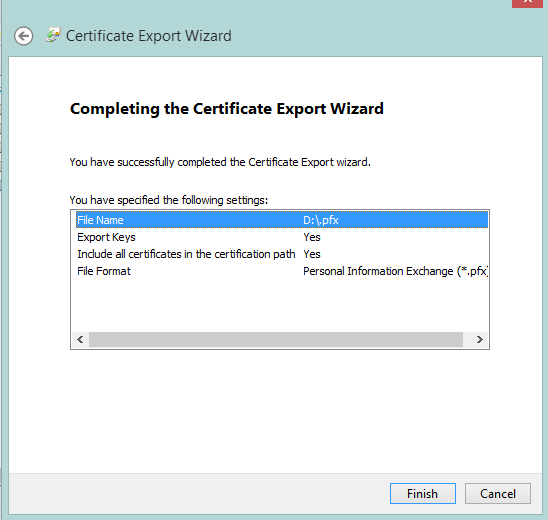
Export Private Key
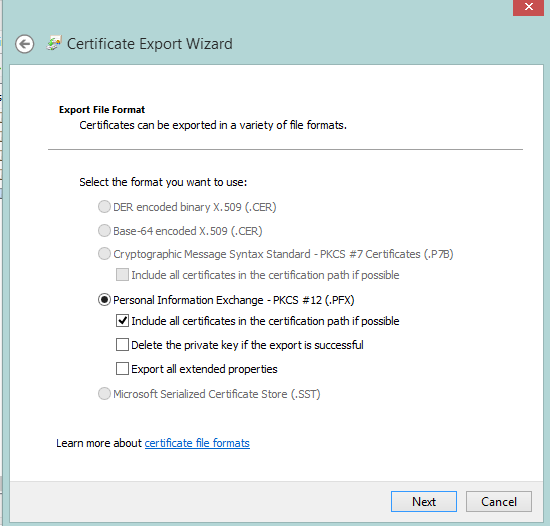
Select the default FPX option
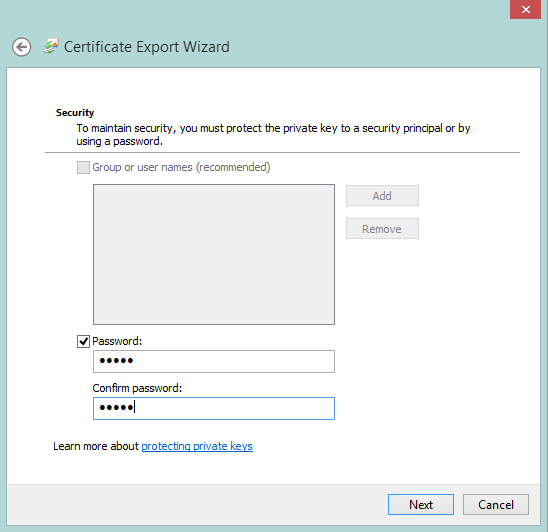
Select a password for your private key
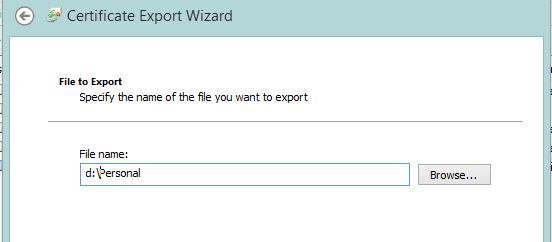
Select a folder location to store your certificate and provide a certificate name
Select Finish from export wizard confirmation window
5. Import the certificate in outlook
Open Outlook
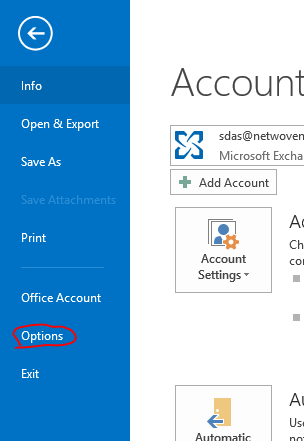
Click the File tab
Click Options
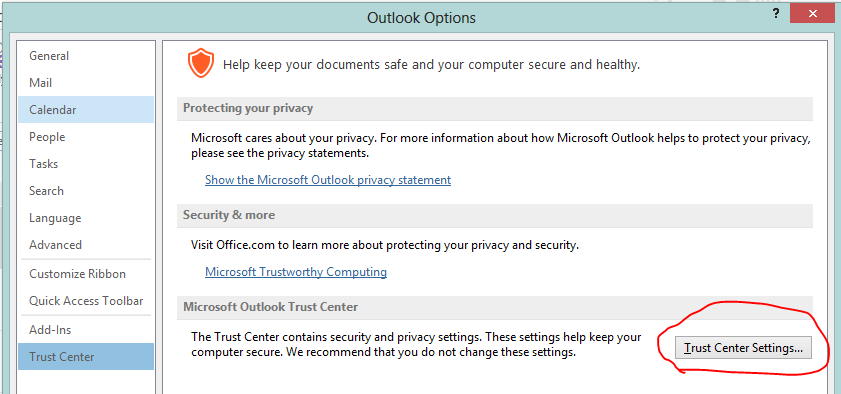
Click Trust Center
Under Microsoft Outlook Trust Center, click Trust Center Settings
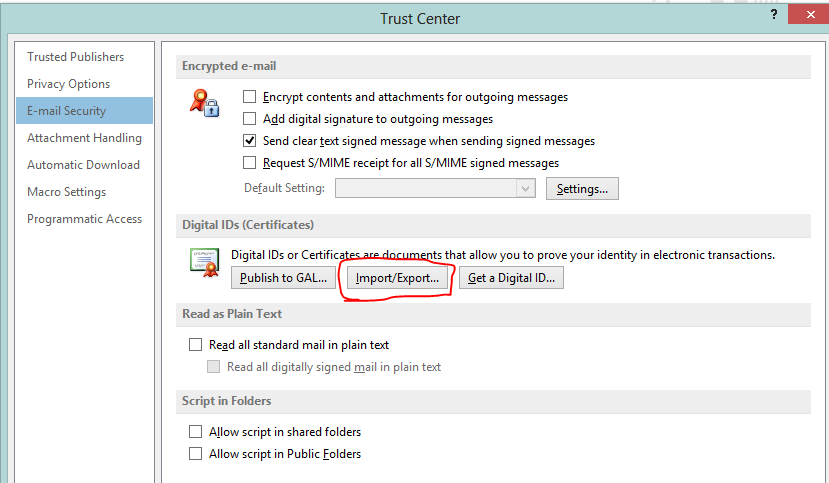
On the E-mail Security tab, under Digital ID, select Import/Export
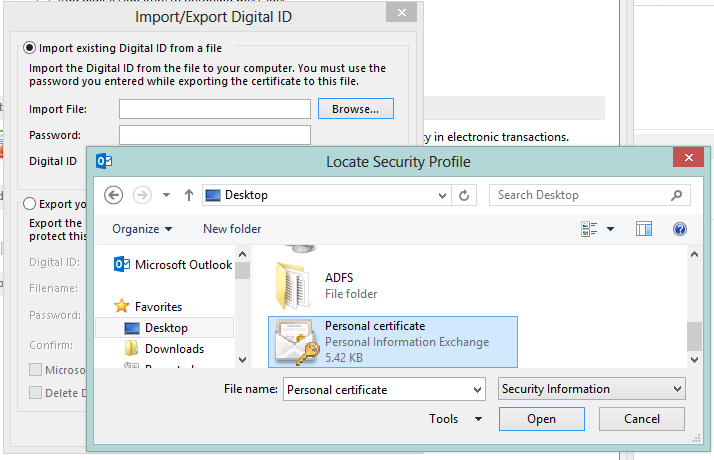
Browse to the location where the certificate was exported and select the PFX file
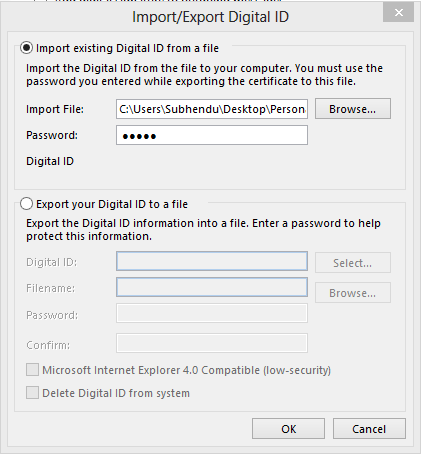
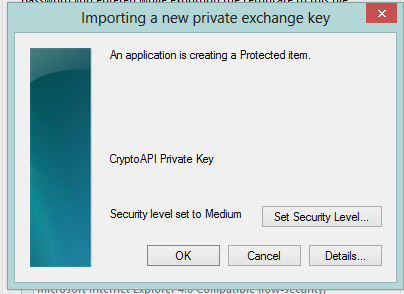
Provide the password for your private key as set earlier and click OK
Click OK
6. Activate encryption for mails in Outlook
Once you are done importing the certificate in outlook, its time to actually activate the additional email security features in Outlook before a mail can be encrypted.
On the E-mail Security tab, under Encrypted Mail, select the Add digital signature to outgoing messages check box
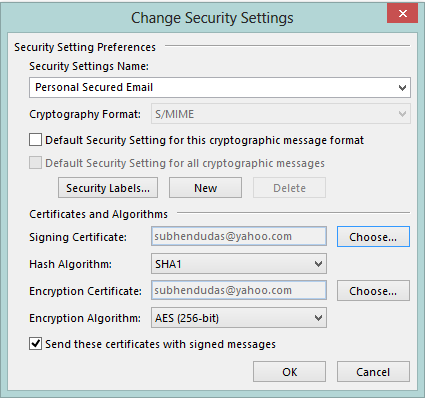
Select Setting for your Encrypted e-mail
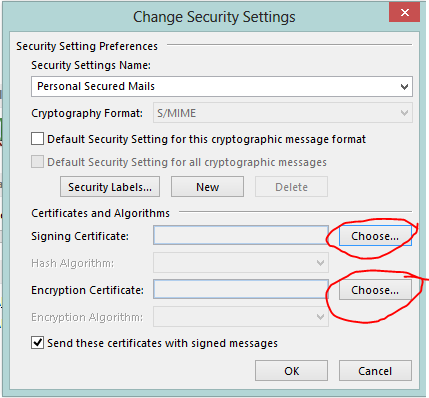
You can choose different certificates for Signing certificate and encryption certificate or same certificate. Click on “Choose” button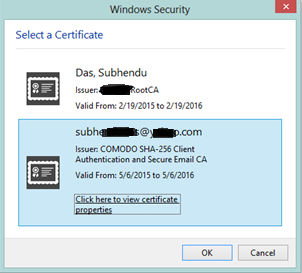
If available, you can select one of the following options:
If you want recipients who don’t have S/MIME security to be able to read the message, select the Send clear text signed message when sending signed messages check box. By default, this check box is selected.
To verify that your digitally signed message was received unaltered by the intended recipients, select the Request S/MIME receipt for all S/MIME signed messages check box. You can request notification telling you who opened the message and when it was opened, When you send a message that uses an S/MIME return receipt request, this verification information is returned as a message sent to your Inbox.
- Provide a name to current Security settings and click OK
- To change additional settings, such as choosing between multiple certificates to use, click Settings.
- Click OK on each open dialog box.
7. Send Email from Outlook and choose Encrypt or Enforce a Digital Signature
Conclusion:
By obtaining and using a personal email certificate to digitally sign your messages you can help to stem the tide of spam and malware being distributed in your name. If your friends and family are conditioned to know that messages from you will contain your digital signature, when they receive an unsigned message with your email address spoofed as the source they will realize that its not really from you and delete it. And its free to obtain a personal certificate that you can always use to make sure your confidential communications reach their intended targets and vice-versa.










Keep on writing, great job!