Overview
Throttling in SharePoint Online is annoying, as it not only delays the process, but also SharePoint Online may completely block the process if there are continued attempts to exceed usage limits.
In my current project there is a requirement of bulk content migration in SharePoint online. When I try to upload the contents (files) and set the file metadata using CSOM and REST API, I encounter the SharePoint throttling issue.
To authenticate and get the SharePoint client context, we are using User only context (User ID and Password)
There have been few guidelines suggested by Microsoft to avoid throttling the tenant from custom code.
In this case, to handle throttling in SharePoint online we used the exponential delay after subsequent requests to avoid throttling like the following:
- Implement retry pattern.
- Handle http web exception code 429
But above solutions slowed down our migration process.
Unlike some cases, if the number of operations per request or the frequency of calls cannot be reduced, an altered approach to tackle the issue is one of the suggested best practices – Decorate the HTTP Traffic.
Identifying undecorated traffic
Traffic is undecorated if there is no App ID / App Title and User Agent string in CSOM or REST API call to SharePoint Online.
Recommendations to decorate traffic
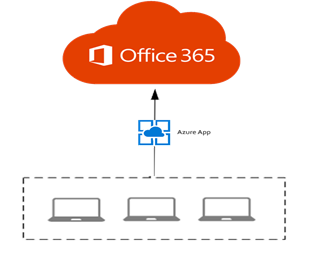
Prioritization of the traffic is directly impacted by how well the traffic is decorated. Create a transport channel that will not blocked by Microsoft, i.e., opening of a managed transport channel which is allowed by Microsoft migration best practice.
Do the following to decorate traffic
- Register and use App ID and App Title – in CSOM or REST API call to SharePoint online.
- Include the User Agent string information [ISV|CompanyName|AppName/Version] to ensure the best overall experience and best path for any future issue resolution.
Implementing App Only Authentication approach
Before any changes can be made to the code to decorate traffic, register the application with the Microsoft Identity Platform page. Follow the process as enumerated below:
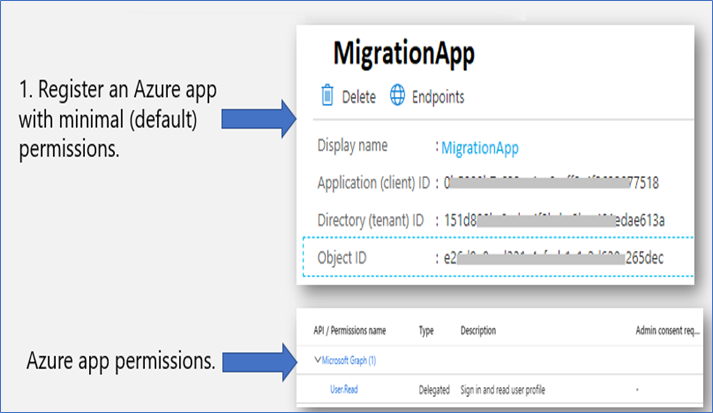
- Register an Azure app with minimal (default) permissions.
- Register and grant permissions to the newly created App in SharePoint Site Collection.
- Decorate the code for implementation of approach.
Register the Azure app
Generic instructions about how to register an Azure app are available here: https://developer.yammer.com/docs/app-registration
Important!
Store the retrieved information (client id and client secret) since you will need this in the next step!
Register and grant permissions to the newly created App in SharePoint Site Collection
Now we are granting permissions to the newly created app. Since we are granting Website scoped permissions, it can be done via the appinv.aspx page on the SharePoint site. You can reach this site via https://contoso.sharepoint.com/demosite/_layouts/15/appinv.aspx.
[ Note: You can also grant tenant scoped permissions via appinv.aspx page on the tenant administration site. You can reach this site via https://contoso-admin.sharepoint.com/_layouts/15/appinv.aspx. ]
To register app, navigate to SharePoint site where you want to register you App,
(E.g., https://.sharepoint.com/demosite/_layouts/15/appinv.aspx)
Once the page is loaded, add your app client id and look up the created principal:
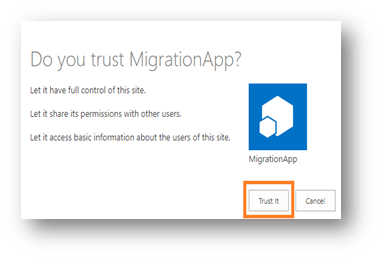
To grant permissions, you will need to provide the permission XML that describes the needed permissions.
| Sample Permission Request XML |
| <AppPermissionRequestsAllowAppOnlyPolicy=”true”><AppPermissionRequestScope=”http://sharepoint/sitecollection/web” Right=”FullControl”/></<AppPermissionRequests> |
Ref : https://docs.microsoft.com/en-us/sharepoint/dev/sp-add-ins/add-in-permissions-in-sharepoint
When you click on “Create” button a permission consent dialog box will appear. Choose “Trust It” to grant the permissions.

Implementation of App Only Authentication and decoration of code with App info and User agent
With the preparation work done let us continue to the next step showing how can we use the created app principal via its client id and secret combination.
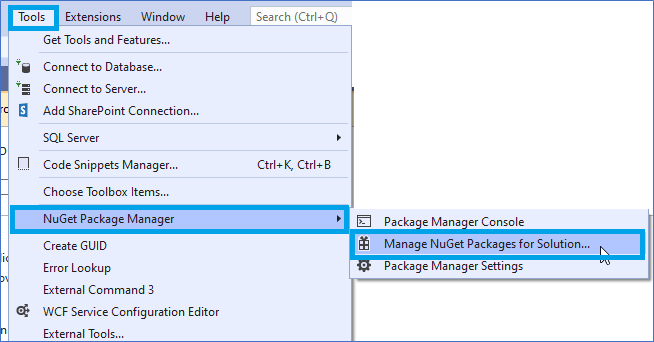
Add the SharePoint PnP Sites Core library NuGet package in your .Net code solution.
- Go to Tools Menu ↠ NuGet Package Manager ↠ Manage NuGet Packages for Solution…

- Install the “SharePointPnPCoreOnline” into your solution
- Once package is added and app is registered you can use below code with app client Id and client secret to get the client context.

Advantages of the method
- Authenticate with App Only Policy instead of real user credentials
- Connect to SharePoint without any user dependency
- Outstanding performance of content migration
- No impact with Office 365 throttling
- Addresses common challenges with large-scale data transfers, including long transfer times

