
Introduction:
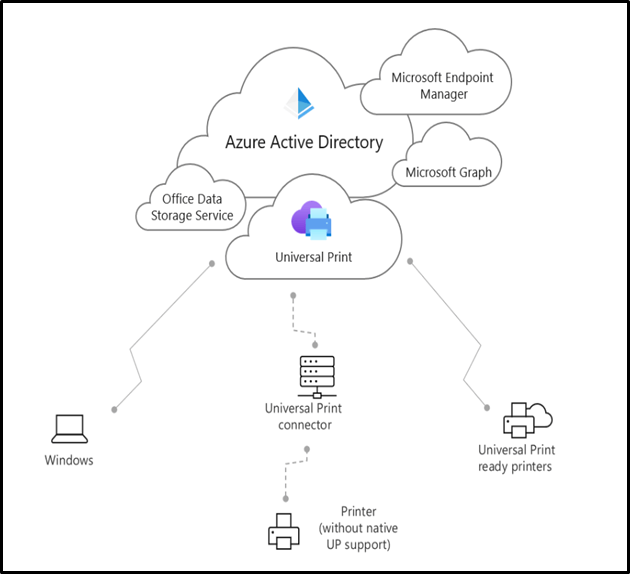
Universal Print is a modern print solution that organizations can use to manage their print infrastructure through cloud services from Microsoft. Universal Print runs entirely on Microsoft Azure. When it is deployed with Universal Print–compatible printers, it does not require any on-premises infrastructure.
How to deploy Azure Universal Print?
Universal Print is a Microsoft 365 subscription-based service that organizations use to centralize print management through the Universal Print portal. It is fully integrated with Azure Active Directory and supports single sign-on scenarios.
Universal Print can be deployed with non-compatible printers by using Universal Print connector software.
1. Architecture
2. Prerequisites
Cloud Requirements:
- An Active Azure AD (Active Directory) tenant (subscription not required)
- Universal Print license
- One Global Admin or Printer Administrator account with a Universal Print license
W10 Clients Requirements:
- Build version 1903 or later required.
- An Internet Connection.
- The device can be AAD (Azure Active Directory) Joined, Hybrid AD Joined, or AAD Registered.
User Requirements:
- Universal Print License assigned to each user and to the Printer Administrator.
Connector Requirement:
- Windows 10 64-bit (Pro or Enterprise), version 1809 or later.
- Windows Server 2016 64-bit or later (Windows Server 2019 64-bit or later is recommended)
- NET Framework 4.7.2 or later.
- A continuous connection to the internet.
3. Steps to configure Universal Print
STEP 1 – Assign Universal Print License to users
Universal Print license is by default included with business and educational Microsoft 365 and Windows 10 subscriptions, but it can also be purchased as a standalone license. We need to assign this license to the client as well as the account which will be used to login into the ‘Universal Print Connector’ application.
STEP 2 – Install the UP Connector
Download the Universal Print connector from https://aka.ms/upconnector.
Install the connector on the ‘Printer Server’ (A Physical system or Virtual Machine with Windows 10 64-bit (Pro or Enterprise) or Windows Server 2016 64-bit or Windows Server 2019 64-bit or later.
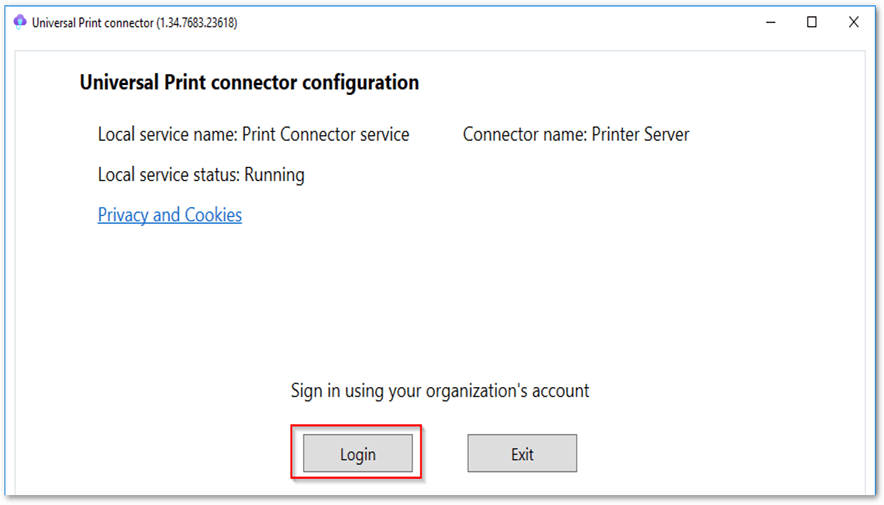
After the installation, we need to register the UP connector on Azure, and to do so we need a ‘Global Admin’ or a ‘Printer Administrator’ account. Login with the credentials.
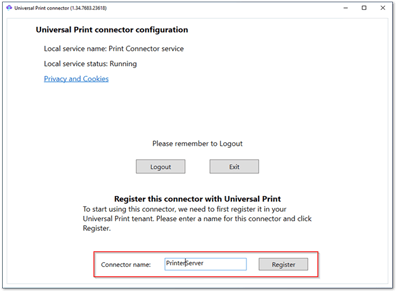
Insert a name for the connector and register it on Azure Tenant. This name will be shown in Azure tenant under ‘Printer Connectors.’
Now if we go to the Azure portal and search for ‘Universal print’ in global search, under the resource menu we can find the connectors menu and here we can see the connector name that we have just registered.

STEP 3 – Register the Printers
Open the ‘Universal Printer Connector’ application in the printer server, now we need to register the printers on the cloud by selecting it from the connector interface. All the printers that are locally installed in the printer server will be visible under the ‘Available Printers’ section. Select all the printers that you want to register for and click on the ‘Register’ button. After this step, all the selected printers will be listed under the ‘Registered Printers’ section.
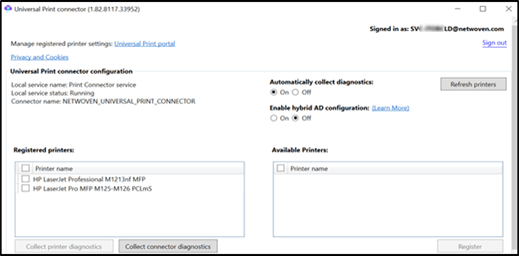
After successfully completing the printer registration you need to remember to ‘Sign Out’ from the connector.
As the user account used to log in to the connector does not represent a service account used by the connector, the service is visible in the Windows services but will only be used to register the printers from the connector interface to the Azure tenant and manage it.
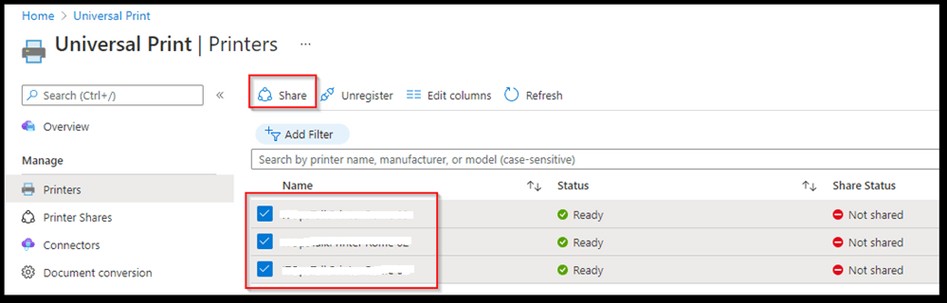
STEP 4 – Share the Printers
Once the printers are successfully registered in the ‘Universal Print Connector’ application, the same will be visible in Azure Portal under printers.
Now there are two ways to share the printers:
Process 1- Select multiple Printers and click on ‘Share’ to immediately share the printers with the same name of each printer. Select users or groups that will have access to the printers.
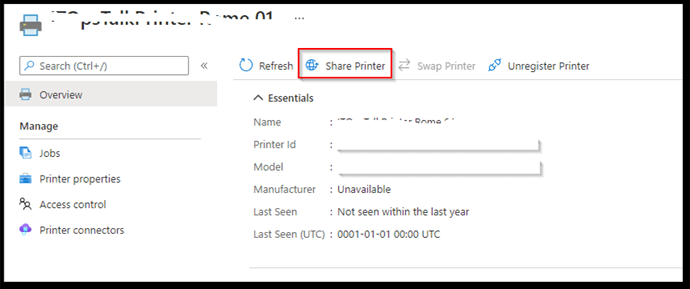
Process 2- Click on a printer name and in the next pop-up window click ‘Share Printer’
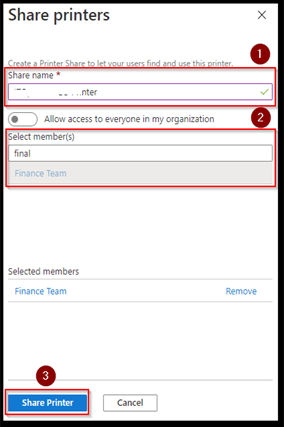
Type the desired share name (1) and select user or groups (2) then click on Share Printer (3)
4. Add Printers on Win10 / Win 11 Clients
Note: You cannot have more than one Work or School account configured to the profile. If you do, then the cloud printer will not be discovered, or you will not see the option to search for work printers.
Ref: – https://docs.microsoft.com/en-us/universal-print/fundamentals/universal-print-troubleshooting-support-howto#discover-and-install-printer-on-client (Read ‘Discover and Install printer on Client’ section)
Once the above steps are completed, follow the below steps to add cloud printers in client devices.
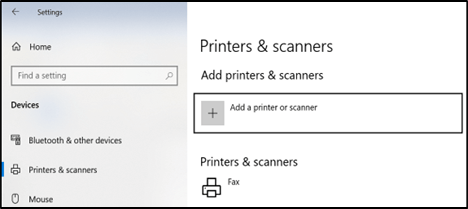
- Open “Add a Printer or Scanner” wizard from Start Menu
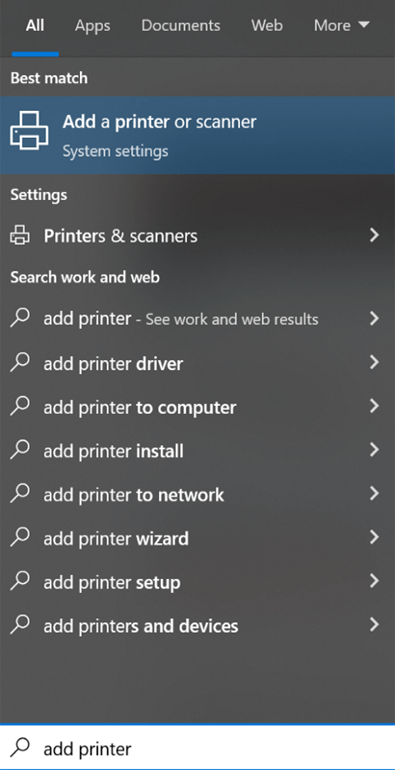
- Select “Add a printers or Scanner”
- If the cloud printer is shared with you then it should be auto discovered in the list as below. Click on add device…
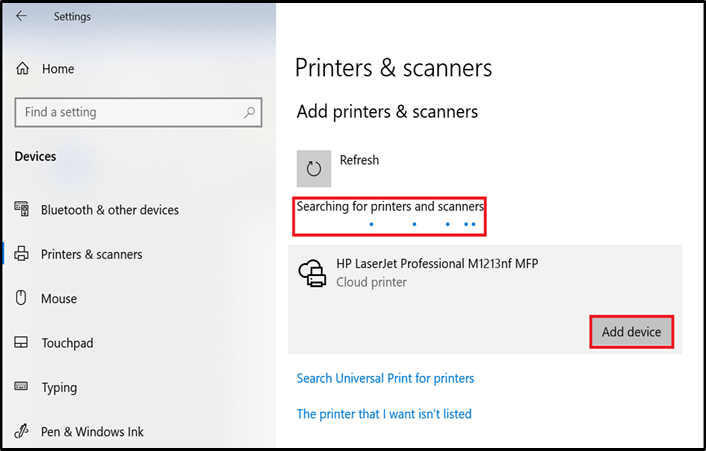
- Once the device is installed successfully it should show as “READY” and the printer should also be listed under “Printers & Scanners” list as below

Print a test page to verify the installation of the printer you have just added.
We hope you found this blog useful. We can put our decades of Microsoft 365 and Azure Active Directory experience work for your organization’s digital transformation. Please reach out to know more.