
This blog is part of the following series:
- Installing and configuring the Lotus Domino Server – Part 1
- Search Lotus Notes Documents from SharePoint 2013 – Part 2
- Search Lotus Notes Documents from SharePoint 2013 – Part 3

In this series of blogs I will be discussing how to crawl a Lotus Notes database
from SharePoint 2013 environment. In the Part 1 series I have covered how to Install Lotus Notes Domino Server, in the Part 2 I have covered how to install the Lotus Notes client and connector on the SharePoint 2013 Server.
With the above two blogs we had already installed Domino Server and then Lotus notes Client with Designer & Administrator in SharePoint App server.
In this blog we will register and configure Lotus Notes Connector and crawl from SharePoint 2013 search.
Task 1: Register Lotus Notes with the Service
We have already created the Mappings database named “NWMappng” with Domino designer and entered the UserID through which we want to make the connection between Lotus note & SharePoint.
Now we will register the service.
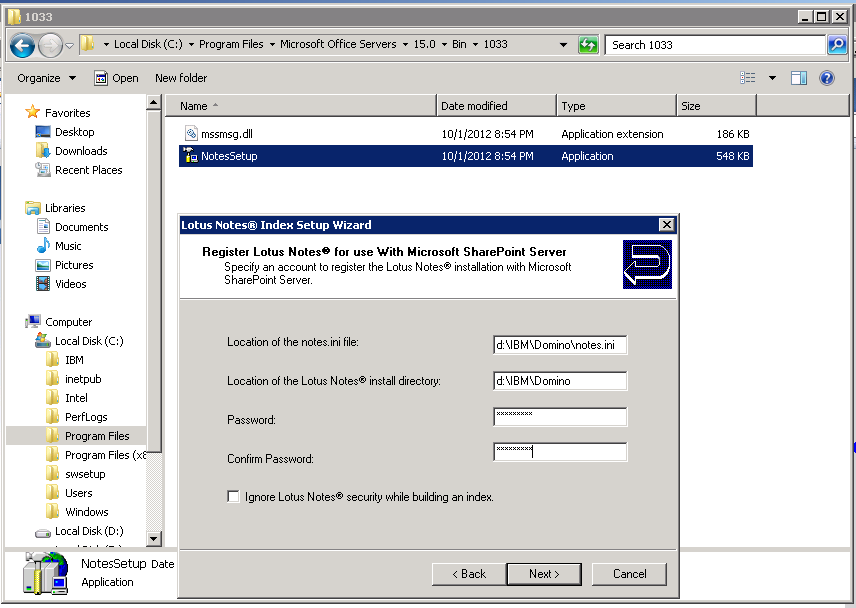
Step 1:
- Run the NotesSetup.exe.
- Open the C:Program FilesMicrosoft Office Servers15.0Bin1033 folder.
- Double-click on the NotesSetup file. The Index Setup Wizard screen appears. Click Next to continue.

Step 2: Registration
- The Register Lotus Notes screen appears.
- Enter the Location of the ini file and the password for the Notes ID to run the Lotus Notes client software.
- Leave the checkbox un checked.
In my installation:
| Location of notes.ini file | D:IBMDominonotes.ini |
| Location of Lotus Notes install directory | D:IBMDomino |
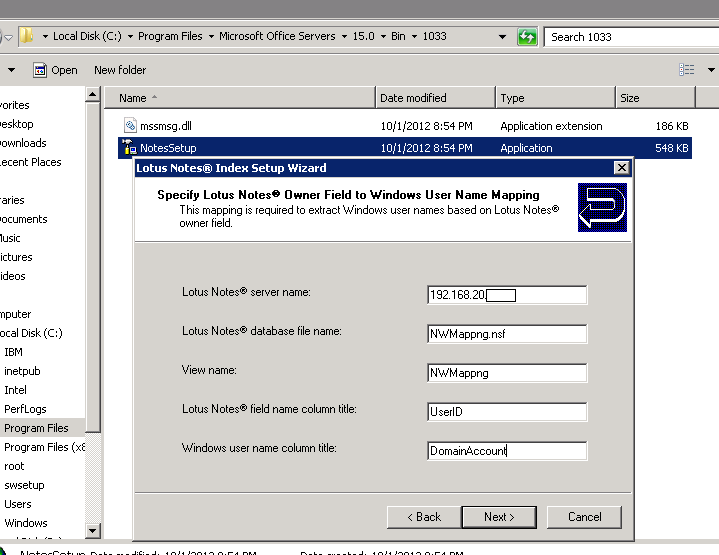
Step 3: Enter Mapping details
The Specify Lotus Notes Owner Field screen appears. Enter details and click Next to continue.
| Lotus Notes server name | 192.168.20.xxx |
| Lotus Notes database file name | NWMappng.nsf |
| View name | NWMappng |
| Lotus Notes field name column title | UserID |
| Windows user name column title | DomainAccount |
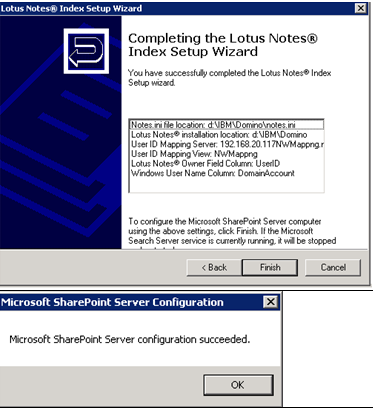
Step 4:
Complete he Lotus Notes Index Setup.
Click Finish to continue.
Task 2: Start the Lotus Notes Connector service
Congratulations! Lotus notes is now registered. Next we will start the connector service from SharePoint 2013
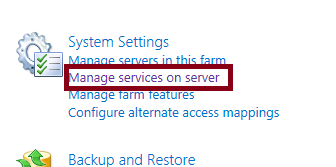
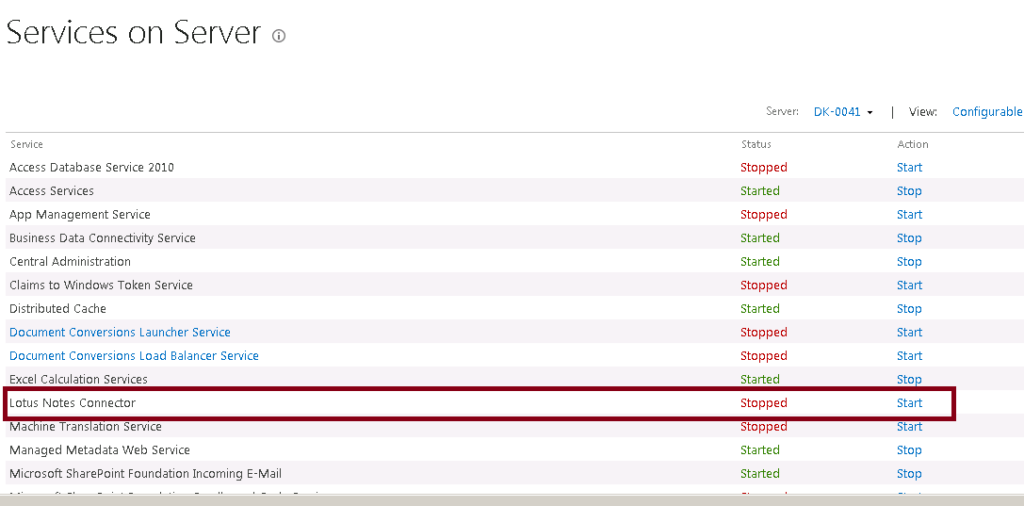
Step 1: Open Central Admin , click on Manage services
Step 2: Start the Lotus Notes Connector Service
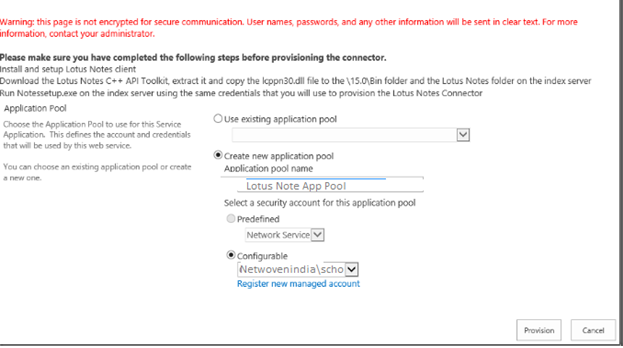
Step 3:
- Start the connector
- Create a new App pool
- Select the account
- Click Provision
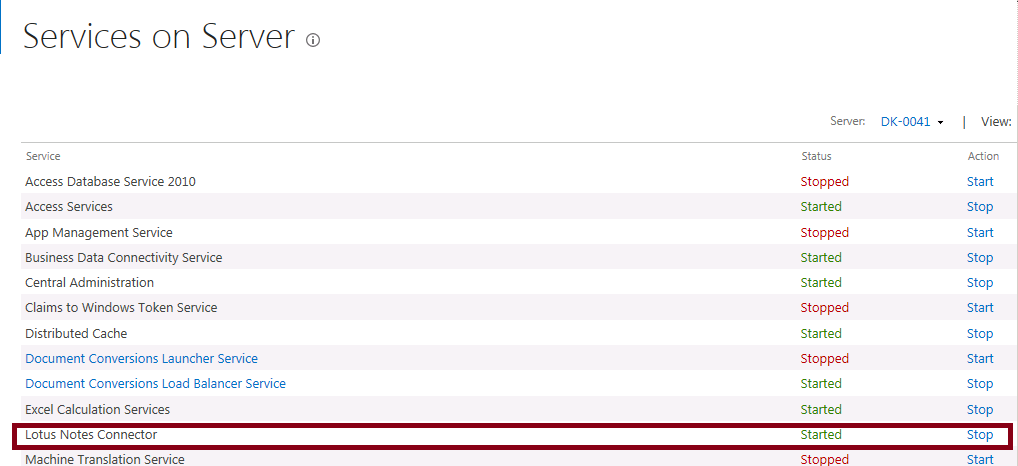
Service started.
Task 3: Setup & Start the Crawler
Lotus Note connector service started, now we will crawl our Lotus Notes Database from SharePoint.
Step 1: Open Central Admin , click on Manage services applications

Step 2: Click on the search service Application
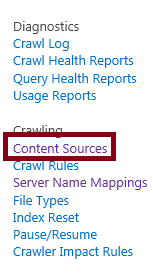
Step 3: Click on the “Content Source” from the left Navigation
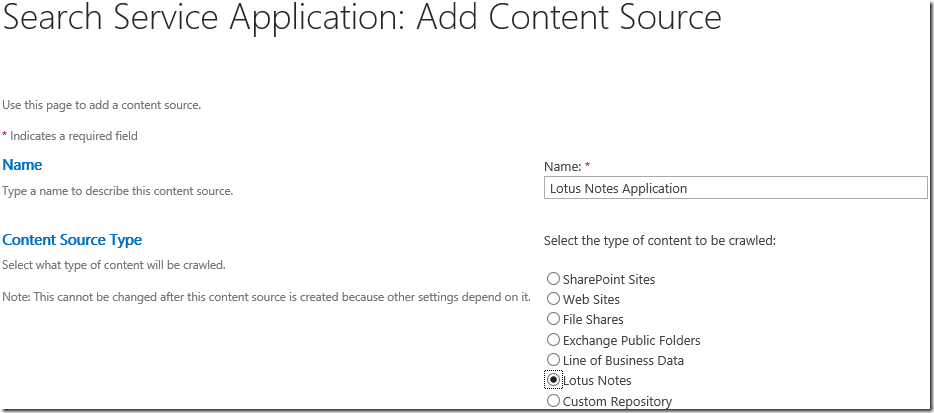
Step 4: Create New Content source

Step 5:
- Enter the name “Lotus Notes Application”
- Select the Lotus Notes radio button
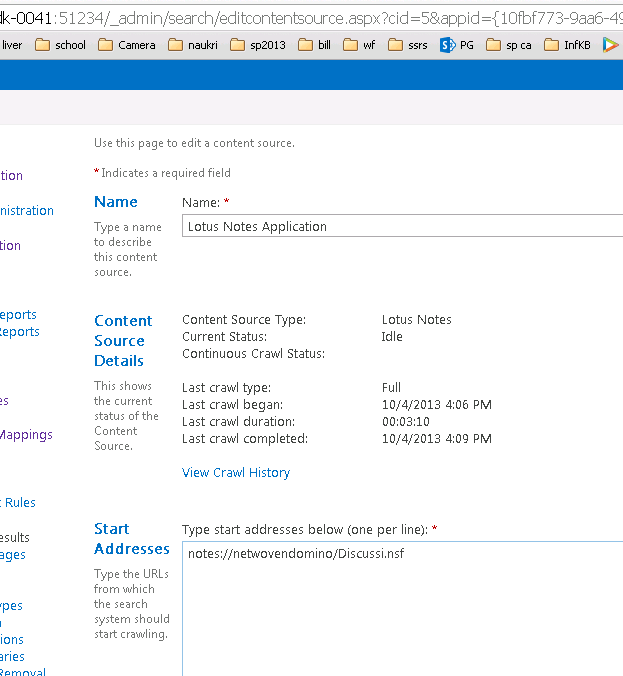
Step 6:
- Set the Start Addresses to point to the Notes database that we created earlier
- Also set the craw setting, schedule…
- Click OK to accept the settings and continue.
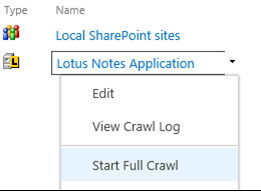
The new content source appears in the Manage Content Sources screen.

Start Full Crawl
Task 4: Setup, Start and configure the metadata service
Check the metadata service, if not started then create & start.
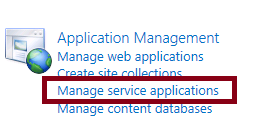
Step 1: Goto Central Administration and click on Manage service applications.
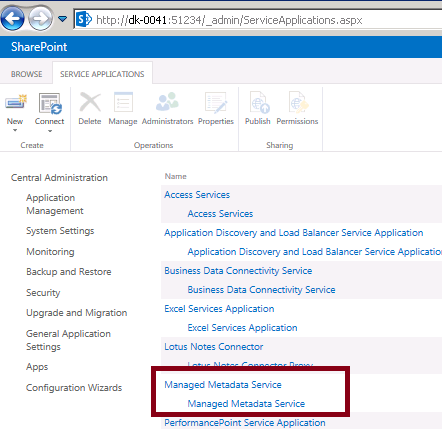
Step 2: In my server Metadata service is already started.
If not then
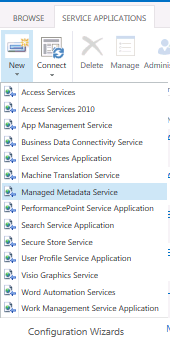
Click on “New” from the left icon of the ribbon>Create new>Managed Metadata Service
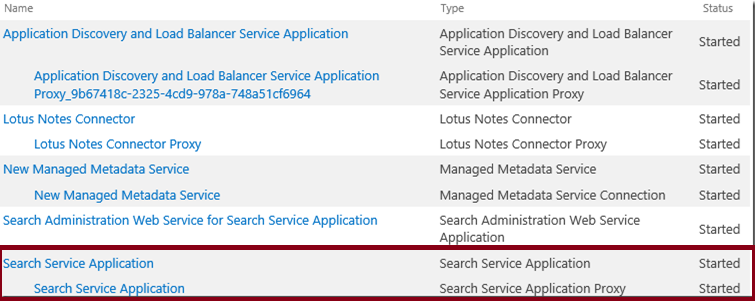
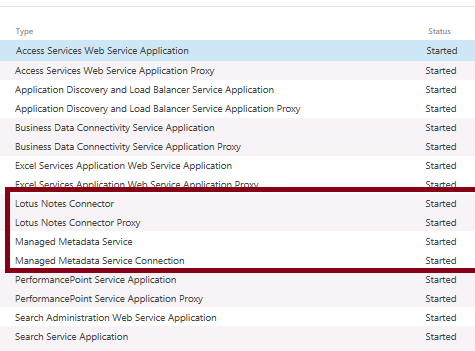
Check the services
Task 5: Create a Search Center Site
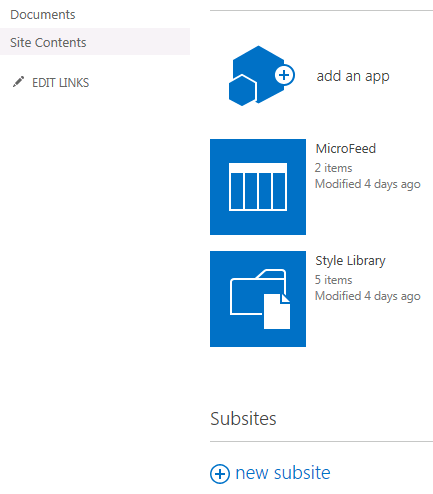
Create a new sub site or site collection with “Enterprise search” template. Here I am creating a new sub site.
Step 1: Go to Site content , click on “new subsite”
Search for “lotus”
Expected Result!
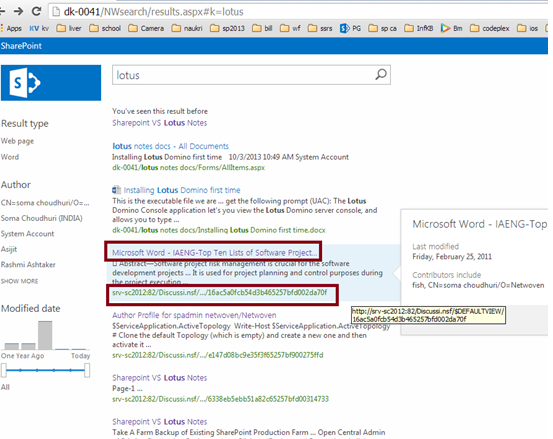
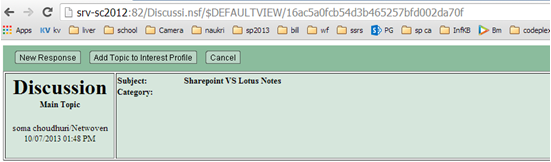
Click on the Link
Conclusion
This concludes the series and wow you should be able to search your Domino contents from SP2013. I hope this blog series was helpful.


