In this blog, I will show how to display one or many SharePoint lists in SharePoint web page using REST services and out of the box features. The source lists can be anywhere in a site collection. At minimum the user is required to have read permission for all those lists you intent to display.
I will use knockout.js and jQuery to implement this. There will be no server side code and hence with the deployment is just very simple. You can utilize this method both in On-Prem and office 365 environments.
Background
With SharePoint 2003, 2007 and 2010 we have been using Server Site Object model to develop our SharePoint web parts. Start with SharePoint 2010, Client Side Object Model was introduced. Based on the fit for purpose we have utilized CSCOM to develop our Web parts. With the simplicity of CSCOM and combined with the new REST Services you can write an effective web part.
Microsoft continuous to invest heavily on “Client side object model”. Starting from SharePoint 2010 several REST services were developed corresponding to server side “SharePoint object model” or web Services. Microsoft continued this approach in SharePoint 2013. There is now REST service available for most function available through server side object model. There are over 2000 REST based services available in SharePoint 2013 out of the box. I will show in this blog how easy it is to use REST services in SharePoint 2013 along with HTML5 Knockout.js templates.
Implementation
Site Structure Preparations
- Create a sub site in the root site collection. I gave it a name “NWSush”
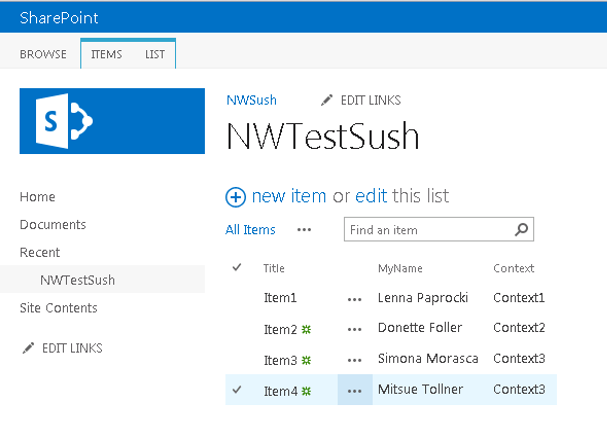
- Create a list in the site “NWSush”. I created the custom list by name “NWTestSush”. The list has 3 fields 1) Title, 2) MyName, 3) context. I added four items in that list. Our code will show these four list items in the root site

Deployment Preparation
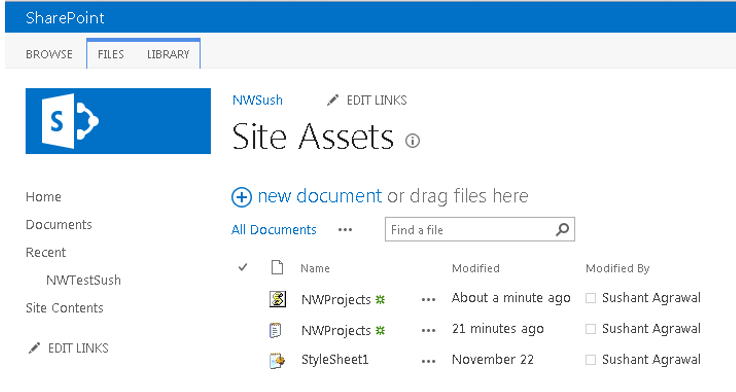
- I will keep all HTML, JavaScript files and style sheets (CSS) in site collection’s “Site Assets” library. This library is provided out of the box in SharePoint site / site collection
- HTML code will refer to style sheets and JavaScript files in the same folder (folder of the library)

Code Development
1. Provide the CSS and .js files in “Site Assets” library
2. Do following changes in HTML file
- Change the file extension from .htm to .txt
- Get the url’s of css and .js file stored in the “Site Assets” library and provide these url’s in the html file
3. Upload the text file created (in step 2 above) to “Site Assets” library
4. Drag /drop content editor web part in SharePoint root site in a “web part zone” wherein we want to display the SharePoint list items. “Content Editor Web Part” is available in “Media and Content” category of Web Part selection
5. Edit “Content Editor Web part” and in “Content Link” provide the url of uploaded text file. In my case it was “/NWSush/SiteAssets/NWProjects.txt”. NWProjects.htm was my original html file
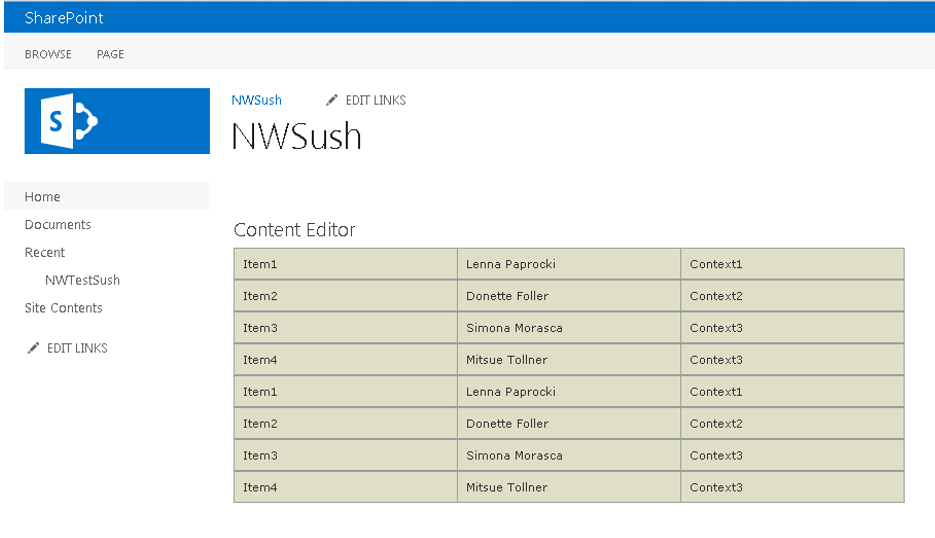
6. If everything is done correctly the contents of SharePoint list will appear correctly in the web page
Code
1. HTML: NWProjects.htm
- Here is my html code. See how I used “Knockout.js” from aspnetcdn site. If you are using “https://” then remember to replace “http://” with https:// in the url for download of knockout-2.2.1.js and jQuery-1.7.1.js. Please note that jQuery version 2.2 didn’t work with SharePoint 2013
- I have provided Knockout template with the <script> tag within the HTML itself
<!DOCTYPE html>

<html xmlns=”http://www.w3.org/1999/xhtml”>

<head>

<title>Netwoven Project Pages</title>

</head>

<body>

<link rel=”stylesheet” href=”/NWSush/SiteAssets/StyleSheet1.css” type=”text/css” />

<script type=”text/javascript” src=”http://ajax.aspnetcdn.com/ajax/jQuery/jQuery-1.7.1.js”></script>

<script src=”http://ajax.aspnetcdn.com/ajax/knockout/knockout-2.2.1.js”></script>

<script src=”/NWSush/SiteAssets/NWProjects.js”></script>

<!–<input id=”Button1″ type=”button” value=”button” onclick=”LoadNWData(0)” />–>

<div id=”KO1″>

<div data-bind=”template:{name:’KOListTemplate’, foreach:results, as:’listRow’}”></div>

<script type=”text/html” id=”KOListTemplate”>

<table class=”imagetable”>

<tr>

<td data-bind=”text:Title”></td>

<td data-bind=”text:MyName”></td>

<td data-bind=”text:Context”></td>

</tr>

</table>

</script>

</div>

</body>

</html>
2. JavaScript: NWSush.js
- Here is the javascript file. Check How I used recursion. I have provided the values “NWSush” twice in the var subsites. This is to mimic multiple lists. See how the SharePoint REST call to provide all list items is called in $.ajax.
<

var results = [];var rootSite = “http://srv-symmat-113/”;

var subSites = [“NWSush”, “NWSush”];

var length = subSites.length;

function LoadNWData(index) {

$.ajax(

{

url: rootSite + subSites[index] + “/_api/web/lists/GetByTitle(‘NWTestSush’)/items”,

success: function (data) {

results.push.apply(results, data.d.results);

if (index == (length – 1)) {

ko.applyBindings(results);

return;

}

else {

index++;

LoadNWData(index);

}

},

error: function (fn, status, error) {

alert(‘There was error:’ + error);

},

method: “GET”,

headers: {

“ACCEPT”: “application/json;odata=verbose”

}

}

);

}

$(function () { LoadNWData(0); })
3. Stylesheets:stylesheet1.css
I have used following very simple stylesheet to display html table. You can create your own stylesheet or download one from the internet
table.imagetable {

font-family: verdana,arial,sans-serif;

font-size:11px;

color:#333333;

border-width: 1px;

border-color: #999999;

border-collapse: collapse;

}

table.imagetable th {

background:#b5cfd2 url(‘cell-blue.jpg’);

border-width: 1px;

padding: 8px;

border-style: solid;

border-color: #999999;

}

table.imagetable td {

background:#dcddc0 url(‘cell-grey.jpg’);

border-width: 1px;

padding: 8px;

border-style: solid;

border-color: #999999;

width:200px;

}

button.buttonClass {

padding:8px;

}
4. Here is the display of list contents in the Content Editor web part.


