Introduction:
In most migration-related activities, you might face situations where you have to import JSON file to any relational Database. Sometimes, the JSON files data structure varies from file to file. As the size of JSON files is large, it may not be possible to import them manually, and using any customs application may take a long time to import data to the relational database. Also, the execution time of customs applications may affect the project timeline.
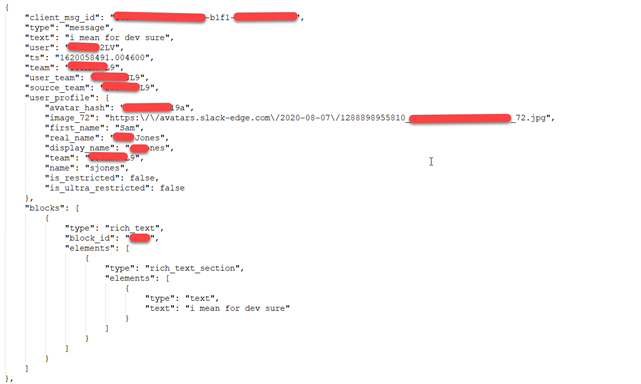
Screenshot 1:
Screenshot 2:
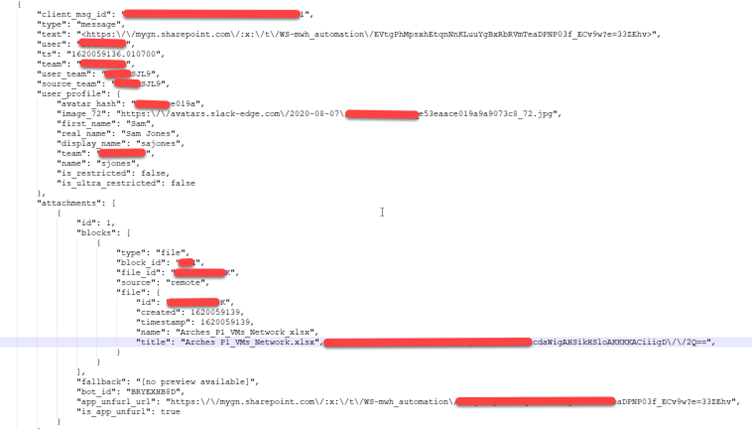
If we observe the above two screenshots closely, we can notice that the two JSON files are not in the same format, but we have to store the files into a single relational table.
Microsoft Azure provides an effective solution to overcome this challenge. In this blog, you will learn how to handle such a situation.
Pre-requisites
- Azure subscription
- Azure Data Lake storge account (Data Lake Gen 1 or Gen2).
- Azure Data Lake Analytics account
- Azure Data Factory account
- Row JSON data file
Steps to be performed
- Upload row JSON Data into Data Lake storage
- Create U-SQL procedure in Data Analytics
- Test the procedure
- Create and assign permissions to service principal (one time setup)
- Create Azure Data factory pipeline to process the row JSON and convert to relational structure (in this case, CSV file).
- Create another Data Factory pipeline to import the converted CSV formatted data to any relational Database (In this case, MySQL)
Step 1: Upload row Json Data into Data Lake storge:
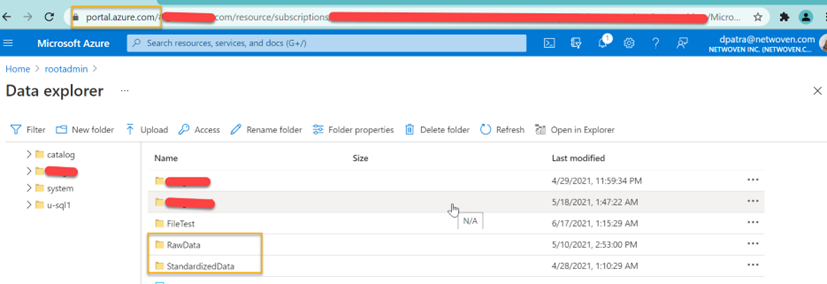
To perform any operation on the row JSON, you must first upload it on the storage account. You can use Azure Data Lake Gen 1 or Gen 2 to store the row JSON.
To upload the row JSON file, you can use Azure Storage Explorer and register with Azure subscription details or you can use other processes to upload it.
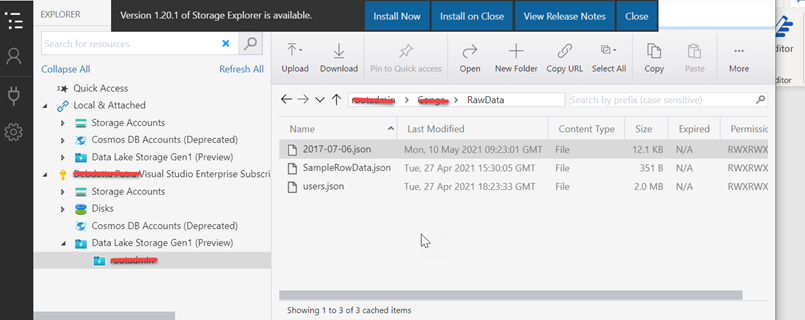
Once the row JSON files are uploaded in your desired location, you can check the data within the Azure Data Lake account.
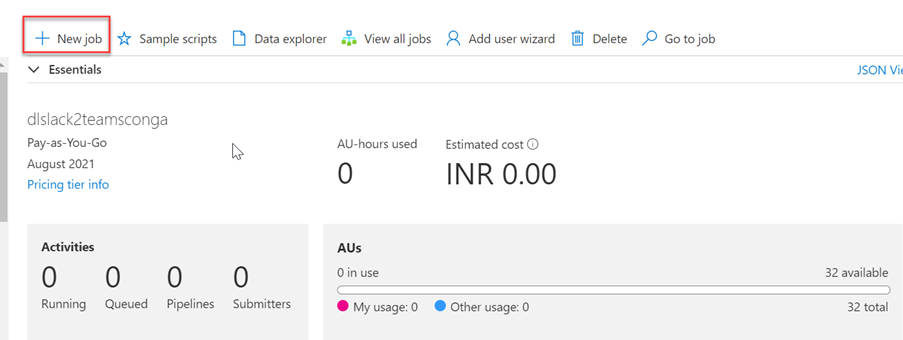
Step 2: Create U-SQL procedure in Data Analytics:
Now we must create U-SQL store procedure that will help us convert multi-structure JSON file to relation structure. In this step, we will be able to convert the JSON data to CSV format with PIPE (|) separation. To do that, we have to create a Database in Azure Data Lake Analytics using ‘New Job’ option like below-
Then run the U-SQL script to create Database-
DROP DATABASE IF EXISTS <YourDatabaseName;
CREATE DATABASE <YourDatabaseName>;
Now register 2 DLL in the newly created Database Newtonsoft.Json and Microsoft.Analytics.Samples.Formats. Download the DLL form from the link. Now register both DLL into the storage and register it into the Database.
CREATE ASSEMBLY IF NOT EXISTS [Newtonsoft.Json] FROM <YourStoragePath>
CREATE ASSEMBLY IF NOT EXISTS [Microsoft.Analytics.Samples.Formats] FROM <YourStoragePath>
Now we have to run the U-SQL script below, that creates the procedure. You can modify the script as per your requirement- input, output file path.
CREATE PROCEDURE [SlackToTeams].dbo.uspCreateDirectMessageCsv(@ThreadID string)
AS
BEGIN
REFERENCE ASSEMBLY [CongaSlackToTeams].[Newtonsoft.Json];
REFERENCE ASSEMBLY [CongaSlackToTeams].[Microsoft.Analytics.Samples.Formats];
USING Microsoft.Analytics.Samples.Formats.Json;
//These external parameters will be populated by ADF based on the time slice being executed.
DECLARE EXTERNAL @ThreadID string ="D5123EFLH5";
DECLARE @InputPath string = @"/Approved_Direct_Message/"+@ThreadID+"/{*}.json";
DECLARE @OutputFile string = @"/DirectMessageFile/Messages/"+@ThreadID+".csv";
@RawData =
EXTRACT
 [type] string
,[subtype] string
,[ts] string
,[user] string
,[MessageTS] string
,[text] string
,attachments string
,[files] string
,[bot_id] string
,[username] string
,thread_ts string
,reply_count string
,reply_users_count string
,latest_reply string
,[reply_users] string
,[replies] string
FROM @InputPath
USING new JsonExtractor();
@CreateJSONTuple = SELECT
[type]
,[subtype]
,[ts]
,[user]
,[MessageTS]
,[text]
,attachments
,[files]
,[bot_id]
,[username]
,thread_ts
,reply_count
,reply_users_count
,latest_reply
,[reply_users]
,[replies]
,JsonFunctions.JsonTuple([files])?? NULL AS FileData
FROM @RawData;
@DataSet =
SELECT
 @ThreadID AS ThreadID
,[type] ?? "" AS MessageType
,[subtype] ?? "" AS MessageSubType
,[ts] ?? "" AS MessageTS
,[user] ?? "" AS user
,[text]  ?? "" AS MessageText
,attachments  ?? "" AS attachments
,FileData["id"] ?? "" AS FileID
,[files]  ?? "" AS filesTxt
,[bot_id]  ?? "" AS BotID
,[username]  ?? "" AS Username
,thread_ts  ?? "" AS ThreadTS
,reply_count  ?? "" AS ReplyCount
,reply_users_count  ?? "" AS ReplyUsersCount
,latest_reply ?? "" AS LatestReply
,reply_users ?? "" AS ReplyUsers
,[replies] ?? "" AS Replies
FROM @CreateJSONTuple;
OUTPUT @DataSet
TO @OutputFile
USING Outputters.Text(outputHeader:true,delimiter:'|');
END;
Step 3: Test the ADLA Procedure
Before placing the new procedure into the Data factory, we must test it to see if it is working or not. Open a new Job and call the procedure, provide the parameter in it as mentioned below-
[SlackToTeams].dbo.uspCreateDirectMessageCsv("ABCDE123");Then we will be able to see the output CSV file in the output folder.
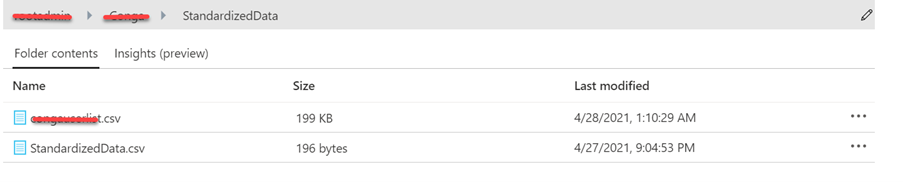
Open the CSV file and check if it has created all the columns we defined in the procedure with PIPE (|) separation.
In part 2 of the series, we will learn how to create and assign permissions to service principal and import CSV file to MySql database(or any relational DB)