
When you are migrating your database in SQL Azure, the first thing you face that how will you schedule your SQL jobs? Microsoft Azure Automation provides a way for scheduling SQL jobs by creating and scheduling runbooks. You can automate processes using runbooks. This article provides brief overview of Azure Automation and answers some common questions.
Step 1: Create an Automation account in Azure
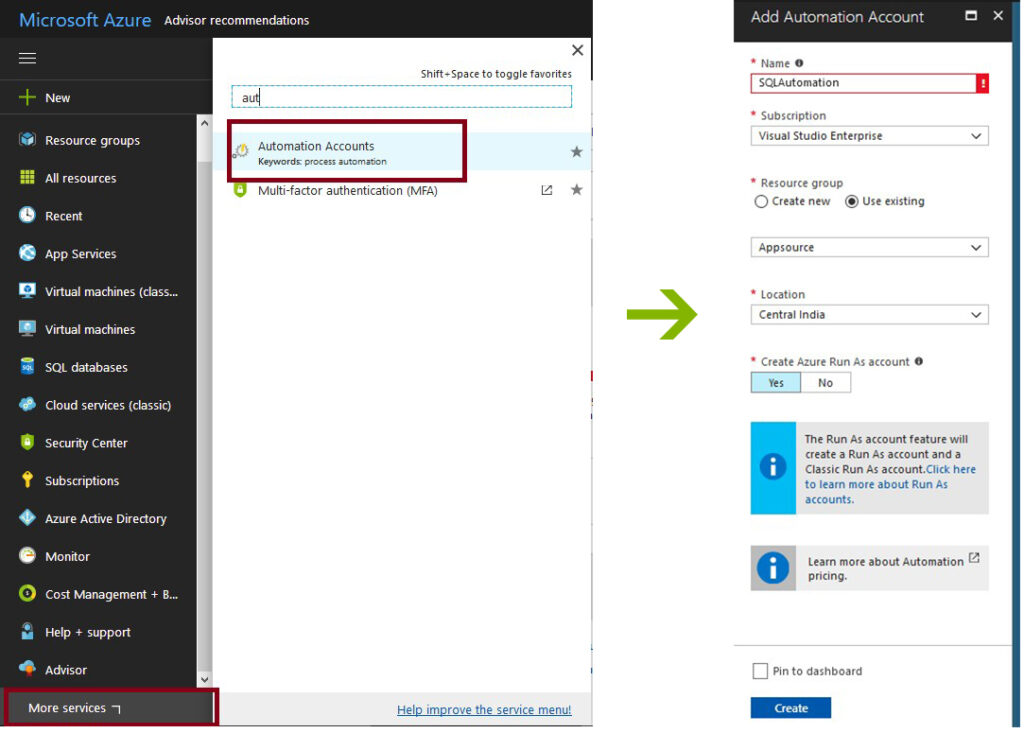
Go to your Azure Portal. Click on more service and filter with “automation”.
Select Automation accounts.
I named the automation account as SQLAutomation, now choose the resource group & location as per your choice.
Step 2: Create new Credential
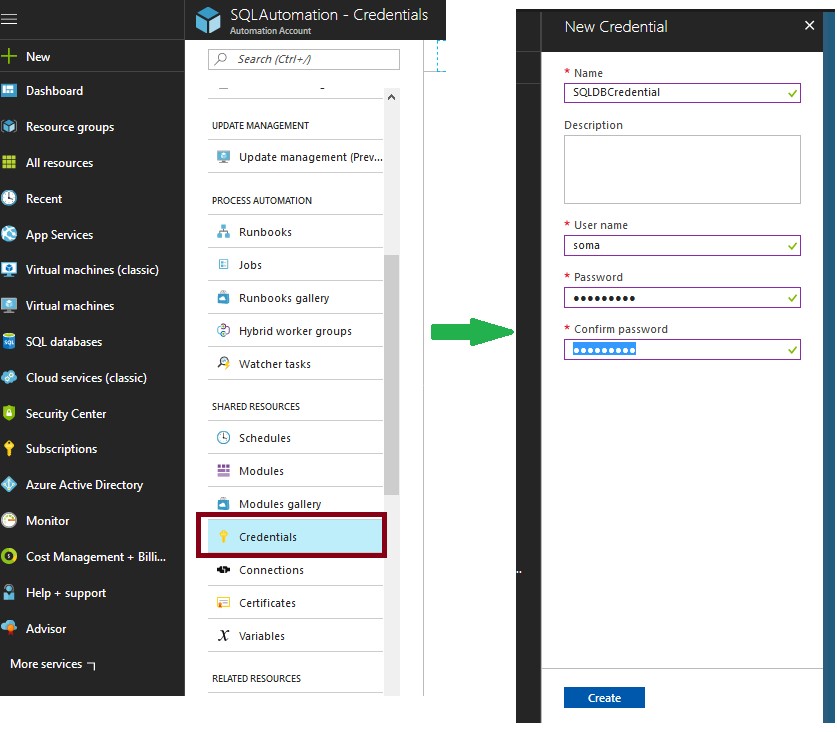
Go to the automation account, and create a new credential for your DB. This is required to connect your SQL DB . Enter the name SQLDBCredential and enter user id & password. This user should have the access in your DB and credential to run the store procedure.
Step 3: Store procedure
Here I am going to create a table and a store procedure.
CREATE TABLE [dbo].[Record_AzureScheduler](
	[ID] [int] IDENTITY(1,1) NOT NULL,
	[AzureUser] [nvarchar](max) NULL,
	[AzureSchedulerTime] [nvarchar](max) NULL,
	[Inserdatetime] [datetime] NOT NULL CONSTRAINT [DF_Record_AzureScheduler_Inserdatetime]  DEFAULT (getdate()),
 CONSTRAINT [PK_Record_AzureScheduler] PRIMARY KEY CLUSTERED
(
	[ID] ASC
)

CREATE PROCEDURE [dbo].[stp_Insert_Record_AzureScheduler]
(
@AzureAdmin nvarchar(max) = 'Scheduler',
@AzureSchedulerTime nvarchar(max) = null)
as
Begin

	INSERT INTO  [dbo].Record_AzureScheduler
	SELECT @AzureAdmin,@AzureSchedulerTime

END
You can use your own store procedure.
You may also like: Build a Superior Enterprise Cloud with Microsoft
Step 4: Create new Runbook
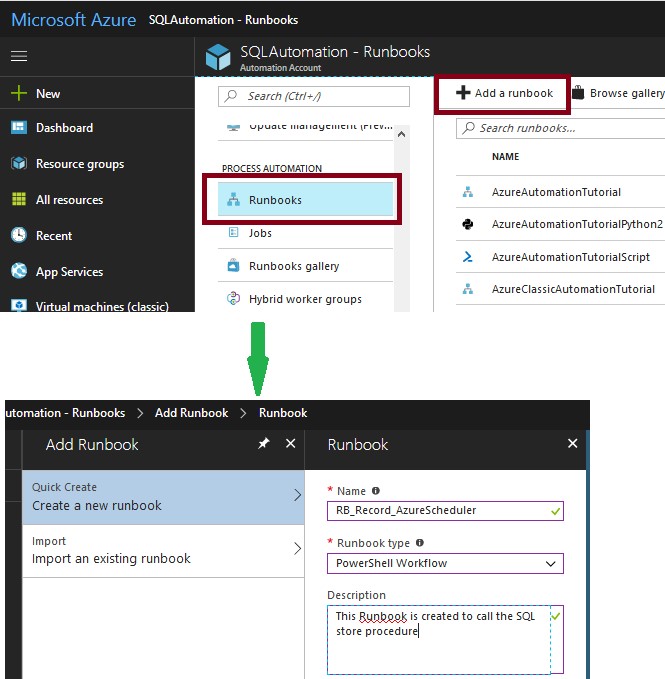
Under the SQLAutomation automation account ,create a new RunBook with name “RB_Record_AzureScheduler”.
Choose the type “PowerShell Workflow”.
Create another runbook with name “RB_Record_AzureScheduler_JobAgent” with same type, this we will schedule later.
Step 4.1: Runbook – RB_Record_AzureScheduler
workflow RB_Record_AzureScheduler
{
    [OutputType([string])]
     param
     (
       [Parameter(Mandatory=$true)] [string] $SqlServer,
        [Parameter(Mandatory=$false)] [int] $SqlServerPort = 1433,
        [Parameter(Mandatory=$true)] [string] $Database,
        [Parameter(Mandatory=$true)] [string] $SprocName,
        [Parameter(Mandatory=$false)] [string] $Parameters,
        [Parameter(Mandatory=$false)] [string] $SqlCredentialName

     )

    #Get Credential Assets
    #Get the username and password from the SQL Credential
    $SqlCredential = Get-AutomationPSCredential -Name $SqlCredentialName
    $SqlUsername = $SqlCredential.UserName
    $SqlPass = $SqlCredential.GetNetworkCredential().Password
    #Get email assets if required


     #Run SQL Query
     inlinescript
     {
         $haveError = 0
         # Define the connection to the SQL Database
         $DatabaseConnection = New-Object System.Data.SqlClient.SqlConnection("Server=tcp:$using:SqlServer,$using:SqlServerPort; Database=$using:Database; User ID=$using:SqlUsername;Password=$using:SqlPass; Trusted_Connection=False; Encrypt=True; Connect Timeout=7200;")


         $outputDataTable = New-Object System.Data.DataTable
            [string[]] $ColumnNames
             try
             {
                # Open Connection
                $DatabaseConnection.Open()
                $Cmd=new-object system.Data.SqlClient.SqlCommand
                $Cmd.Connection = $DatabaseConnection
                $Cmd.CommandText = 'EXEC ' + $using:SprocName + ' ' + $using:Parameters + '; SELECT @@ROWCOUNT;'
                $Cmd.CommandTimeout = 7200
                # create data adapter from the SQL command
                $sqlDataAdapter = New-Object System.Data.SqlClient.SqlDataAdapter $Cmd
                # declare dataset to hold data
                $dataSet = New-Object System.Data.DataSet
                # print sql command
                Write-Output($Cmd.CommandText)
                # fill the adapter
                $sqlDataAdapter.Fill($dataSet) | out-null
                # records returned?
                if ($dataSet.Tables[0].Rows.Count -gt 0)
                {
                    $outputDataTable = $dataSet.Tables[0]
                }
                else
                {
                    $outputDataTable = "SQL Stroc Proc Executed”
                }
             }
            catch
            {
                 #write your own error handling code here.
                 #if required send error message in email.
            }
             finally
            {
                 if ($Cmd -ne $null)
                 {
                    $Cmd.Dispose
                 }
                 # Close the SQL connection
                 $DatabaseConnection.Close()
                 $DatabaseConnection.Dispose()
            }

        }
    }
Step 4.2: Runbook – RB_Record_AzureScheduler
This is the second runbook. Open the runbook and write the code below, replacing your server parameters.
workflow RB_Record_AzureScheduler_JobAgent
{
$dataTable = RB_Record_AzureScheduler -sqlServer '<span style="background:#ffff00">xxxxxxxxxxxx.database.windows.net</span>'-Database 'AppSourceDB'-SprocName 'stp_Insert_Record_AzureScheduler' -Parameters '@AzureAdmin = ''Azure Scheduler'' ,@AzureSchedulerTime =''08 Dec 2017''' -SqlCredentialName 'SQLDBCredential'
Write-Output($dataTable)

}
Step 5: Schedule the Runbook
Now our RunBooks are ready, we will schedule the 2nd Runbook (RB_Record_AzureScheduler_JobAgent). Save the RB_Record_AzureScheduler_JobAgent RunBook and publish it. Once the RunBook is published you can see the “Schedule” menu in top bar.

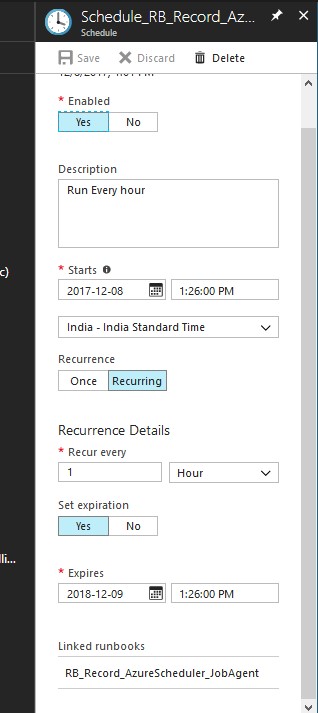
Click on the schedule and create a new scheduler. Name it “Schedule_RB_Record_AzureScheduler_JobAgent” and schedule it every hour
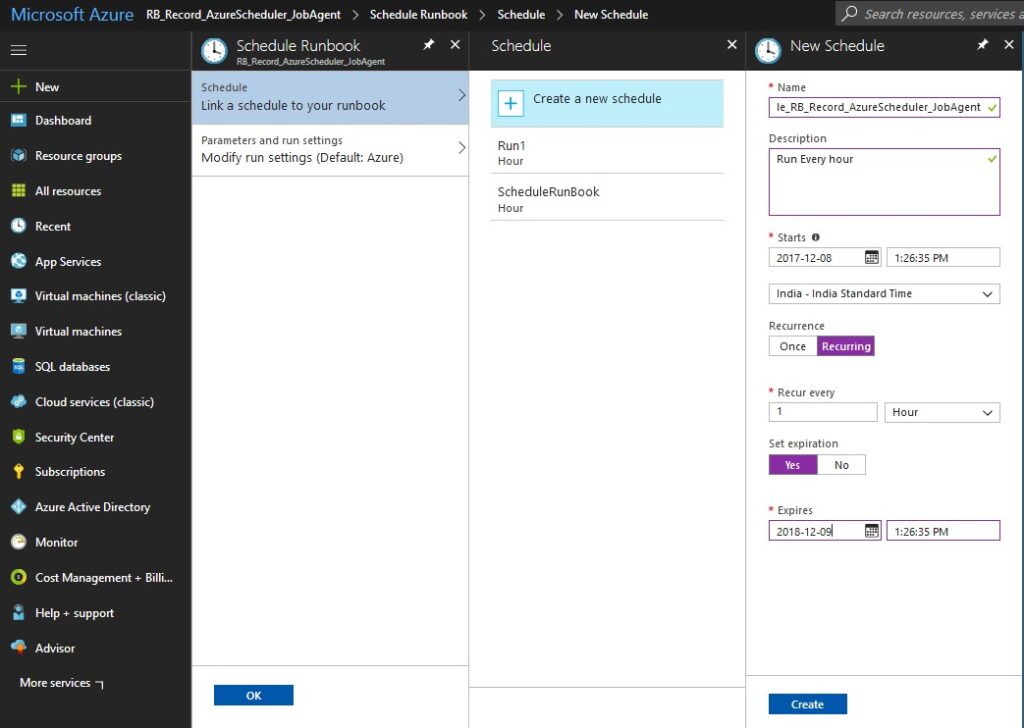
Ok, great your scheduler is ready. Next Link it with the RunBook. Click on the “Link a schedule to your Runbook” and choose the newly created scheduler. Save it.
That’s it! See the below image , the run book is scheduled to run every hour.


How to set it for every minute
Sorry, step 3 is not clear, where do we save the stored procedure? is it inserted in the runbook script or called? I have my sql, is there some part of step 3 that I need to keep or replace it all?
Thanks
… and step 2 “This user should have the access in your DB and credential to run the store procedure.” does this mean they get permissions automatically, or does it mean there is an extra step where we give them access that is not in the instructions?
Thanks again
not working