In a virtualized environment you have a LINUX based Virtual Machine and the root drive has run out of space in an existing partition inside a single VM hard disc. However, the space that can be added to the VM Hard Disc will not necessarily increase space of the Linux root drive because when a Virtual Machine Hard disc is expanded, space is only added to the end of the logical partitions. This requires a simple tweak inside the Linux Operating System to add the extra space to the partition that needs it.
In this article, I would like to discuss how to incorporate the extra space into the existing Linux partition.
Technical Overview
In a virtualized environment when a LINUX OS created the VM contained one VHD.
There are min three partitions created 1. ROOT 2. HOME & 3. SWAP.

And if you think that expanding the HDD from hypervisor will solve this, then you are wrong. This is because when VM HDD is expanded from the hypervisor, the additional space in only added to the end of the last logical partition (i.e. after the SWAP drive in our example).

So, we need to mount the expanded partition and merge it with the partition that requires expansion.
Let’s start step by step.
Steps
1. Shut down the VM from Hypervisor

2. Expand the disk capacity from settings with your desired value. Here we choose to expand the VHD with additional 60 GB space.
3. Start the VM from the hypervisor.
4. Login to virtual machine console as root.
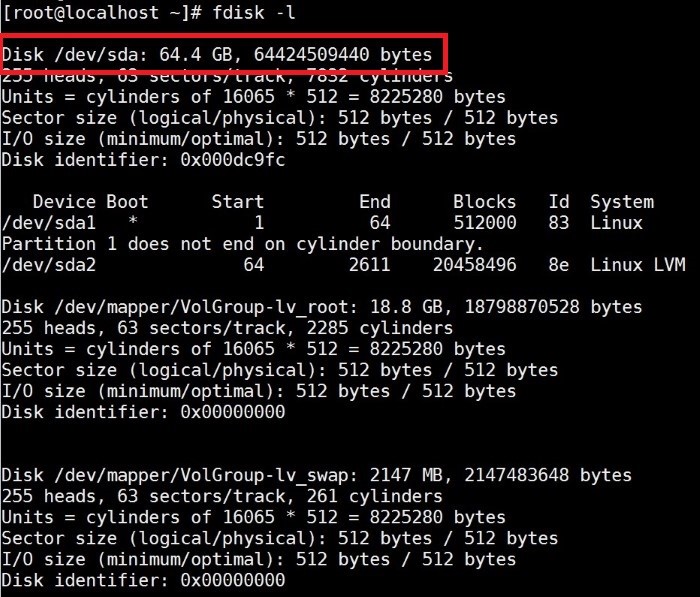
5. Execute below command to check the disk space.
fdisk -l
6. Now execute this below command to initialize the expanded space and mount it.
fdisk /dev/sda
root@localhost ~]# fdisk /dev/sda

WARNING: DOS-compatible mode is deprecated. It's strongly recommended to
switch off the mode (command 'c') and change display units to
sectors (command 'u').
7. After this enter ‘n’ in the next line for creating new partition.
Command action
e extended
p primary partition (1-4)
p
8. Then assign the partition number you wish based on your existing partition numbering.
Partition number (1-4): 3
Partition number (1-4): 3
Hex code (type L to list codes): 8e
Changed system type of partition 3 to 8e (Linux LVM)
9. In the next line choose code ‘8e’ for select the LINUX OS
Hex code (type L to list codes): 8e
Hex code (type L to list codes): 8e
Changed system type of partition 3 to 8e (Linux LVM)
10. Next enter ‘w’ to proceed further.
Command (m for help): w
Command (m for help): w
The partition table has been altered!

Calling ioctl() to re-read partition table.

WARNING: Re-reading the partition table failed with error 16: Device or resource busy.
The kernel still uses the old table. The new table will be used at
the next reboot or after you run partprobe(8) or kpartx(8)
11. Reboot the system.
12. Now we need to create physical & logical volumes execute below command to create physical volume.
pvcreate /dev/sda3

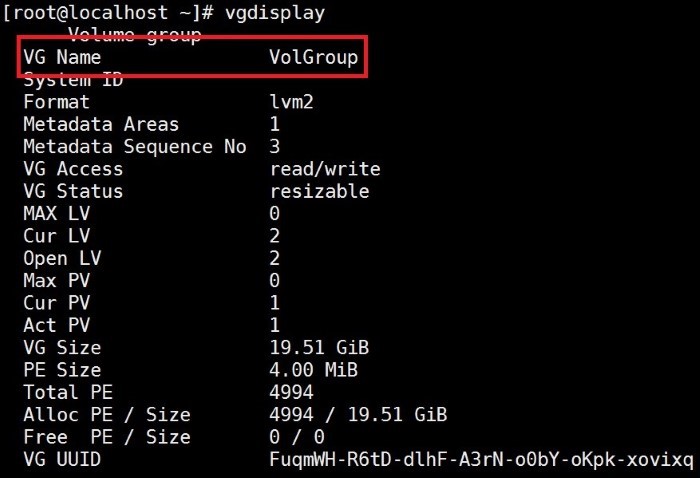
13. Execute below command to get the name of current Volume Group
vgdisplay
14. Execute below command to extend the Volume Group with /dev/sda3
vgextend VolGroup /dev/sda3

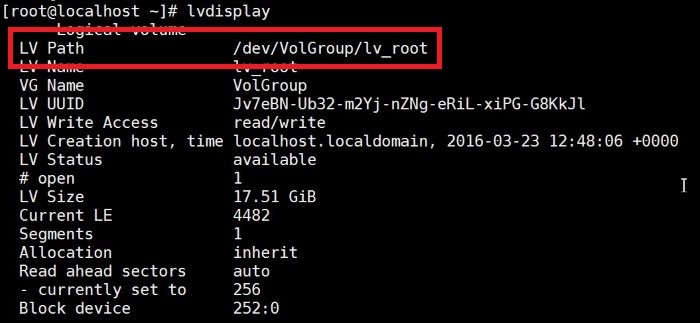
15. Execute below command to get Logical Volume path.
lvdisplay
16. Execute below command to extend the Logical Volume with /dev/sda3
lvextend /dev/VolGroup/lv_root /dev/sda3

17. Execute below command to update the Logical Volume
Xfs_growfs /dev/VolGroup/lv_root

18. Check for the new disk space.
>df -h
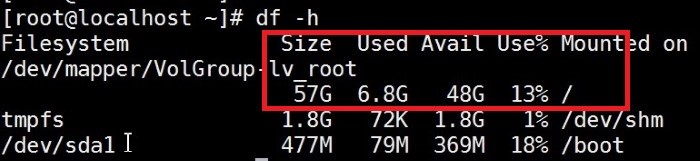
19. Your Disk space is now successfully increased with 60 GB.
You may also like: Planning & Management of Modern Data Center
Conclusion
It is a common occurrence that in a virtualized environment, we encounter such issue quite often and this is a handy way to add that breathing space to the virtualized OS.


Hi Priyam, I am stuck at number 13 as vgdisplay is not showing any volume group.
Distri : Linux Mint 18
please advise.
Regards
Error in part 17 -> Xfs_growfs /dev/VolGroup/lv_root
I think it should be “resize2fs /dev/VolGroup/lv_root”
I tried change Xfs_growfs to resize2fs and it works.
Everything is correct except
17. Execute below command to update the Logical Volume
Xfs_growfs /dev/VolGroup/lv_root
it should be
xfs_growfs /dev/VolGroup/lv_root
Not captial X, small x
I have vmware ESXi4.0 . It has 3 physical drive (500GB main + 500GB extended + 500GB extended. Now 500GB main Drive has been damage.
So it is possibele to recover all 2 extended drive data ? how ?
Excellent article thank you