
Case Study:
As part of migration activities some users may require transferring very large sets of data from a Remote Oracle DB server to another Microsoft SQL Server Database.
To make it a bit more challenging, my task involved a bit more complexity to move millions of records from large number of tables without any discrepancy and within an acceptable timeline.
Technical Options:
There are numerous approaches to bulk copy records from Oracle to SQL Server. Following are a few options which may be considered.
- Microsoft SQL Server Migration Assistant for Oracle
- Import Using Oracle Client and SQL Server Management Studio
- Linked Server on SQL Server pointing to the Oracle database
- Export to CSV file and import to SQL Server via bulk copy
There may be driving factors to choose one option over the other.
Of the above listed options, we preferred executing with Option #2.
In following few sections I will demonstrate the basic requirements, system setup and configurations required to transfer the data.
Pre-requisites:
- Connectivity to the Oracle Database Server
- Connectivity to the SQL Server
- If not already installed, download and install SQL Server Management Studio.
- Download and install Oracle Database Instant Client Basic Package (Follow Instructions in next section)
- The Instant Client V19 Basic package also needs Microsoft Visual Studio 2017 Redistributable.
Important Note: During our evaluation, we faced some compatibility issues between Oracle Database Instant Client 64 bit and SQL Server Management Studio during connectivity, so we switched back to 32 bits of Oracle Instant Client. So, it’s suggested to use the 32 bit version.
You may also like: Learn how to proactively identify and protect your sensitive information
Instructions for installing Oracle Instant Client on Windows:
- Create a directory for the Oracle client components e.g., “c:\oml4rclient_install_dir”
- Go to the Oracle Database Instant Client download page.
- In the “Instant Client for Microsoft Windows” section choose Instant Client for Microsoft Windows (32-bit).
- From the next page download the “Basic Package” and Save the file in directory created in Step 1
- Unzip the file. The files are extracted into a subdirectory called instantclient_version, where version is your version of Oracle client. e.g., c:\oml4rclient_install_dir\instantclient_19_9
- Return to the Instant Client Downloads for Microsoft Windows (x64) page.
- Accept the license agreement and select Instant Client Package – SDK for your version of Oracle Database.
- Save the file in the installation directory that you created in Step 1.
- Unzip the file. The files are extracted into the instantclient_version subdirectory.
- Add the full path of the Instant Client to the environment variables OCI_LIB64 and PATH. The following steps set the variables to the path used in this example, c:\ oml4rclient_install_dir\instantclient_19_9:
- a. In Windows Control Panel, choose System, then click Advanced system settings.
- b. On the Advanced tab, click Environment Variables.
- c. Under System variables, create OCI_LIB64 if it does not already exist. Set the value
- of OCI_LIB64 to c:\ oml4rclient_install_dir \instantclient_19_9.
- d. Under System variables, edit PATH to include c:\ oml4rclient_install_dir\instantclient_19_9.
Steps to Import data:
After all the system setup is done, follow the below steps to import the data.
- Open the SQL Server management studio and connect to the SQL Server.
- Create a new database with a suitable name.
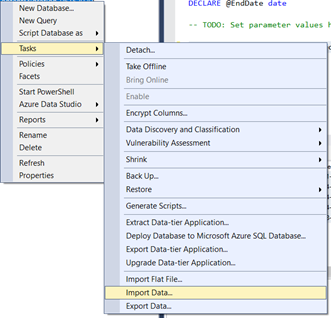
- Right Click on the newly created database and select Task-> Import Data
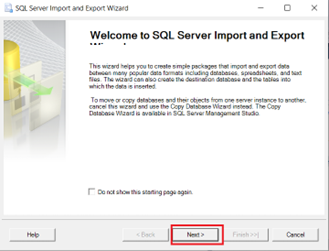
- Click Next
- Select “.Net Framework Data Provider for Oracle” from list of options available from Data source dropdown.
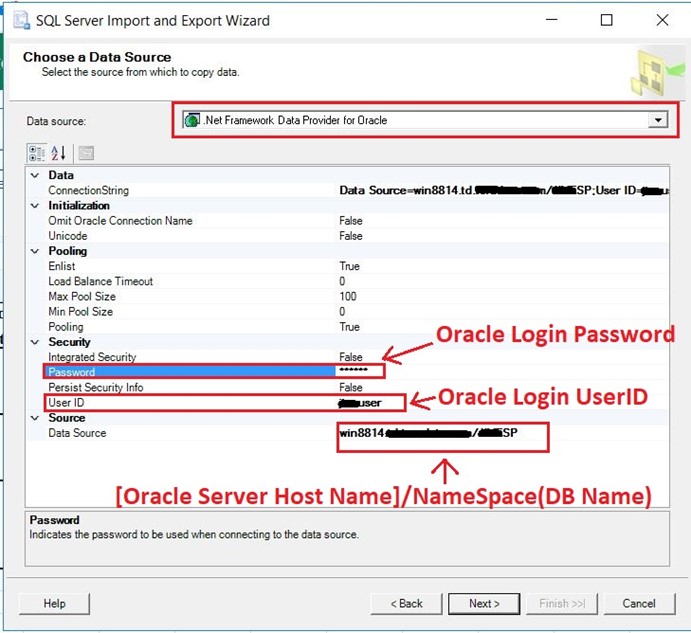
- Under Security section provide oracle username and password.
- Under Source section enter the Data Source in following format:
- [Oracle Server URL:Port(if not running on default port) / NameSpace]
- Click on next. On successful connection with the oracle server, it will proceed to the next screen
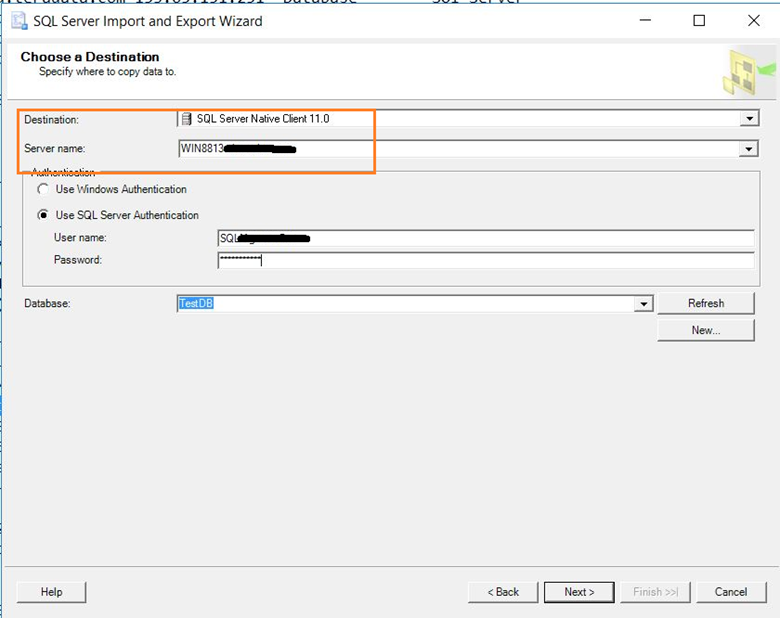
- Select Destination as SQL Server Native Client, Server Name, SQL Server Credential and Database. Click Next.
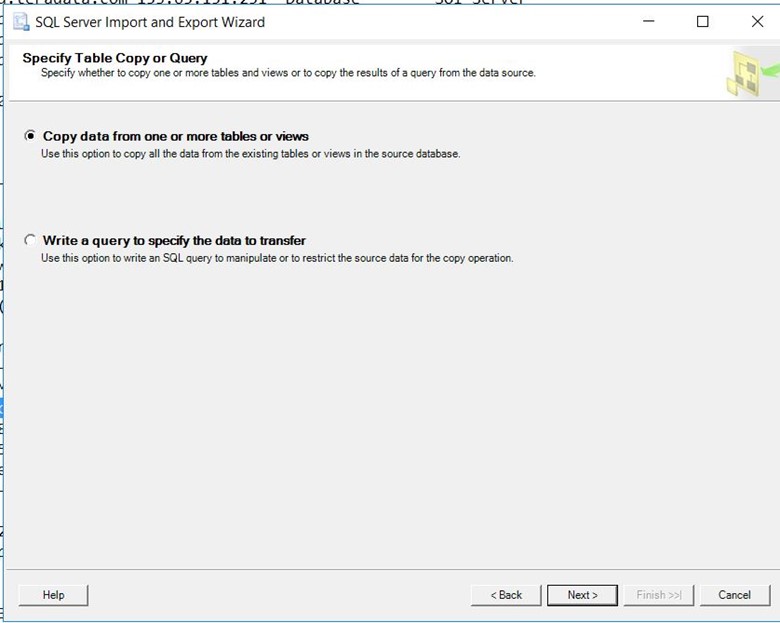
- From the next screen select “Copy data from one or more tables or views” and click on Next.
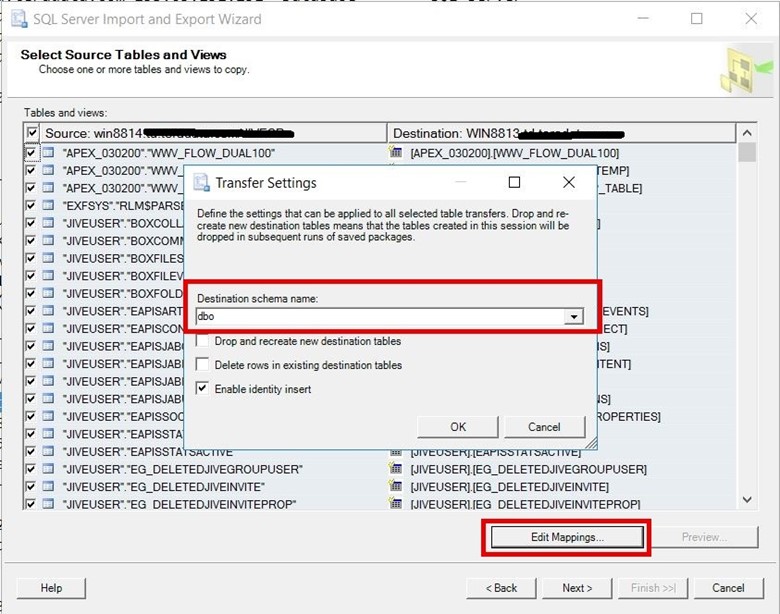
- From the next screen select all the tables or only the tables which are required.
- Click on Edit Mappings Button and from the popup window select destination schema name. In our case selected the SQL Server default ‘dbo’ schema.
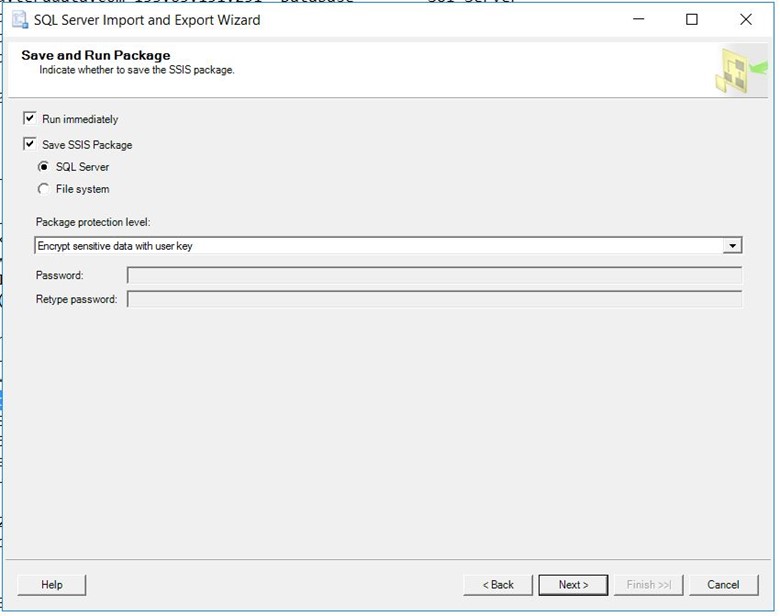
- Check Run Immediately checkbox and click on the Next button.
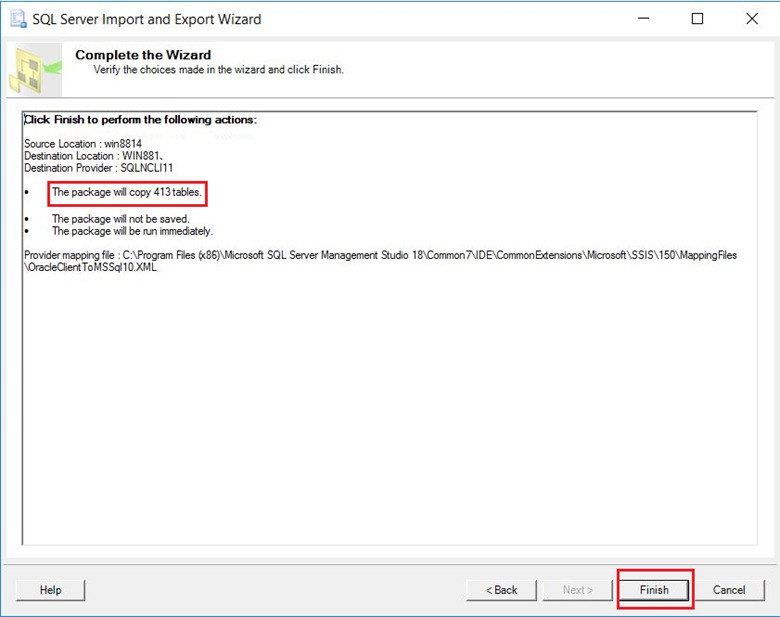
- On the final screen Click on the Finish button to start coping of data.
- Once done Explore the SQL Server Database and verify the data with Oracle DB.
Summary:
Our choice of copy option was driven by the following factors:
- Very less setup of activities
- Coping of data from multiple tables is fully automated, hence there is little chance of data discrepancy
Download the Datasheet to learn more about Netwoven’s Information Protection and Compliance service.
Download the Solution Brief to learn how Netwoven’s solution proactively identifies and protects your sensitive data.


This worked for me so I could copy 2 tables from Oracle to SQL Server.