Six basic steps are required to set up a hybrid search. In order to enable hybrid search, you’ll need an on-premises SharePoint farm running supported SharePoint versions. You’ll also need an Office 365 subscription with licenses for the users who need to be able to perform hybrid search.
Step 1: Establish Active Directory Synchronization
Step 2: Create a Search Service Account
Step 3: Create a Cloud-Based Search Service Application
Step 4: Enable Server-to-Server Authentication
Step 5: Define Content Sources
Step 6: Start the full Crawl
Step 1: Establish Active Directory Synchronization
Although establishing Active Directory synchronization was once a daunting task, Microsoft has made the process much easier. The key to success is to use the correct synchronization tool. There are a number of different directory synchronization tools available for download. In this scenario it is already in-place, so we are not doing this.
Step 2: Create a Search Service Account
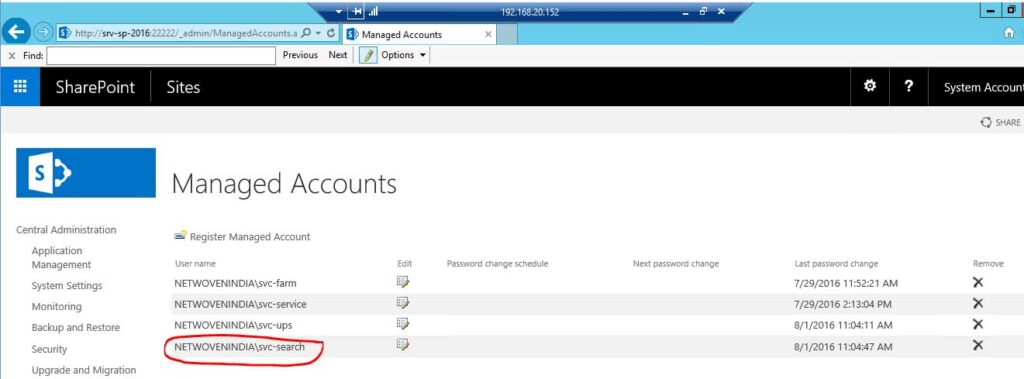
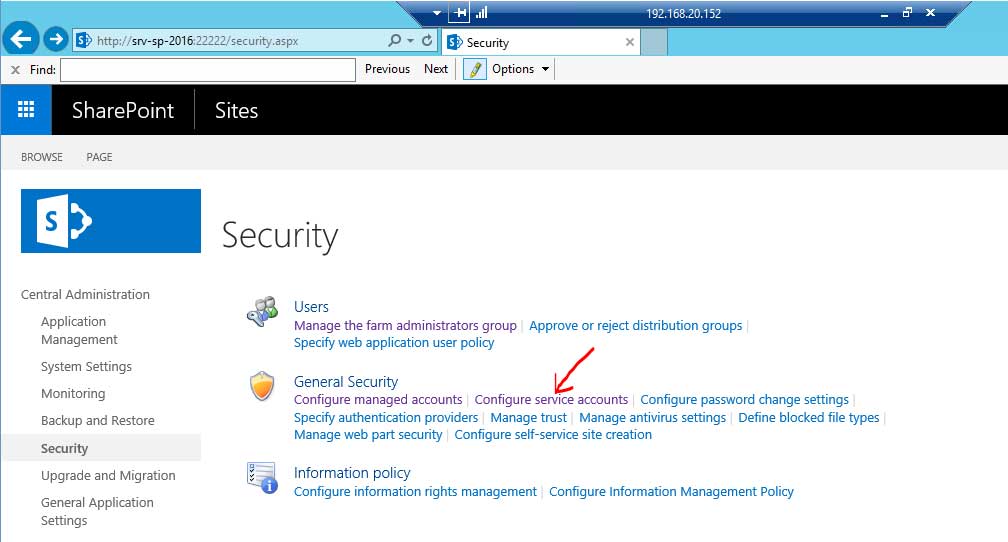
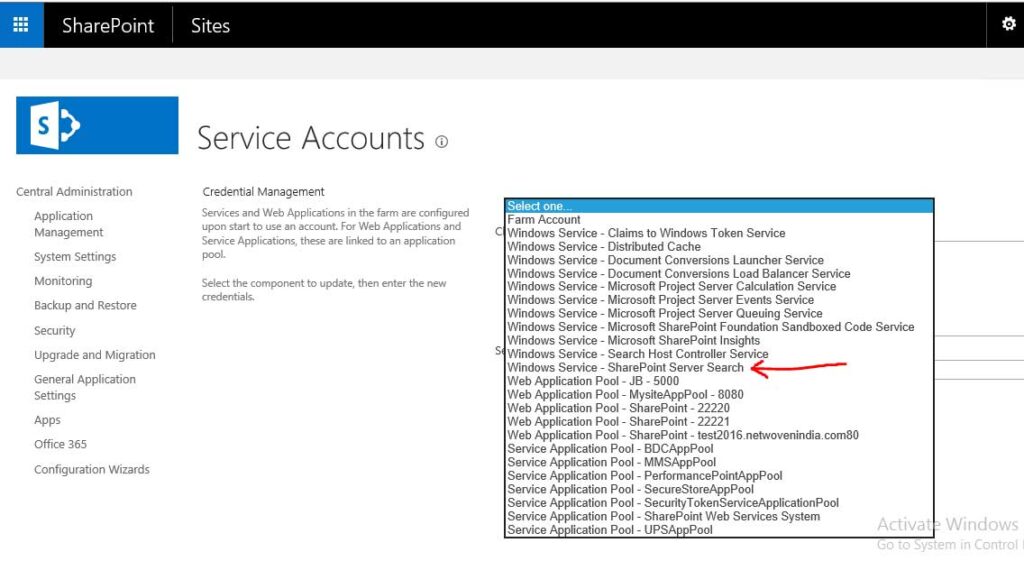
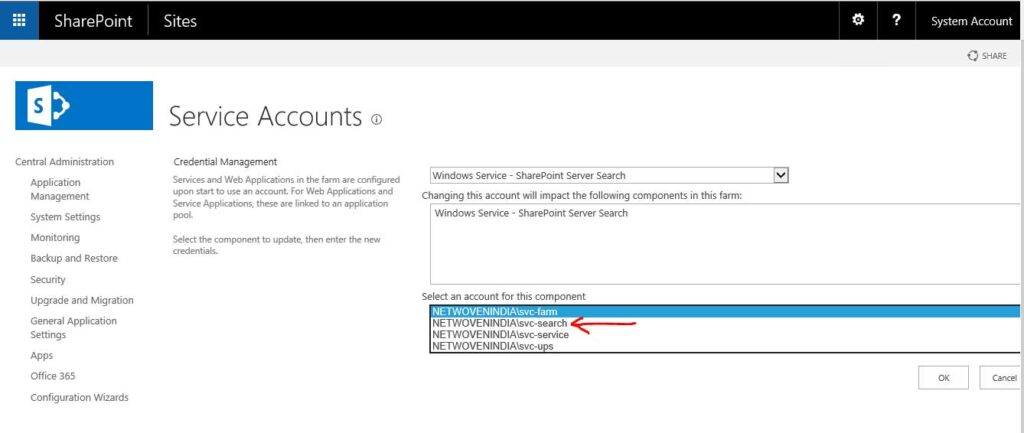
The second step in the process is simply to create a search service account for your local SharePoint farm. You can accomplish this by opening the SharePoint Central Administration tool, clicking on the Configure Service Accounts link (found in the Security section on the main screen) and then choosing the Windows Service – SharePoint Server Search option from the list of services. In many cases, it will be necessary to register a new managed account by using the Register New Managed Account link.
First we have registered the search service account-
Now we are moving to assign this account for SharePoint server search
Step 3: Create a Cloud-Based Search Service Application
The third step in the process is to create a cloud Search service application. This application will need to be created within your local SharePoint farm. Microsoft provides a Windows PowerShell script that can be used to automate the creation of this application. You can download this script from connect.microsoft.com. The file is included in a .ZIP file named CloudHybridSearchPreview.zip. The name of the script you’ll be using is CreateCloudSSA.ps1.
The script should be run on a local SharePoint Server. When you run the script, you’ll need to provide the name of the SharePoint Search Server within your local farm, your Search Service account name (in domain\name format), the name you want to assign to the new Search Service application and the name of your database application
Download link is – https://www.microsoft.com/en-us/download/details.aspx?id=51490


![]() Copy this to .ps1 to SharePoint app server from where cloud search service will run.
Copy this to .ps1 to SharePoint app server from where cloud search service will run.
Now open windows power shell as an administrator and execute the above PS file.

Now it will ask you all the parameters one by one, you need to supply all the values.

After that it will first start check whether service account is already registered or not, then it will create an application pool and search service application. All the components for search service will be configured.

After that it will activate search topology for this search service application and it will create search service proxy.

Now you validate it part by part.
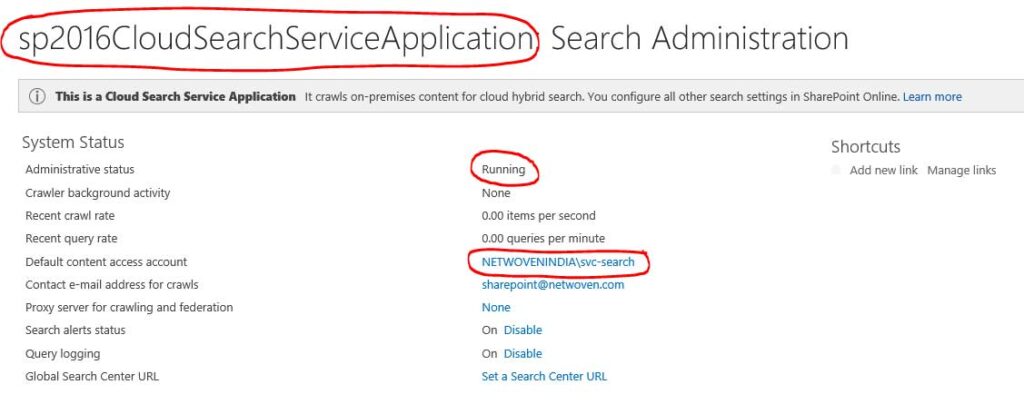
First you validate the status of this newly created cloud search service, verify the account.
…17/01/hybrid.jpg(opens in a new tab)
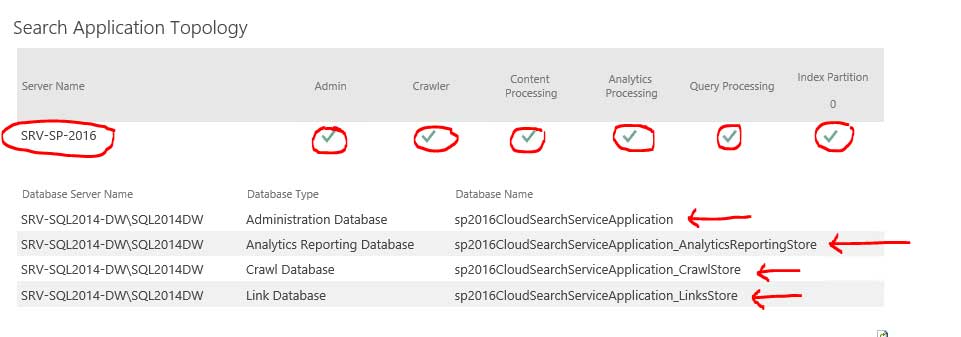
Now validate the search topology with index component, verify all the databases.
Install hybrid onboarding prerequisites
In order for you to successfully execute the on-boarding script, the following prerequisites must be installed on the SharePoint Server where the script is executed.
Download the two prerequisites and save in the same folder where the Install-HybridSearchConfigPrerequisites.ps1 . The two prerequisites can be downloaded from:
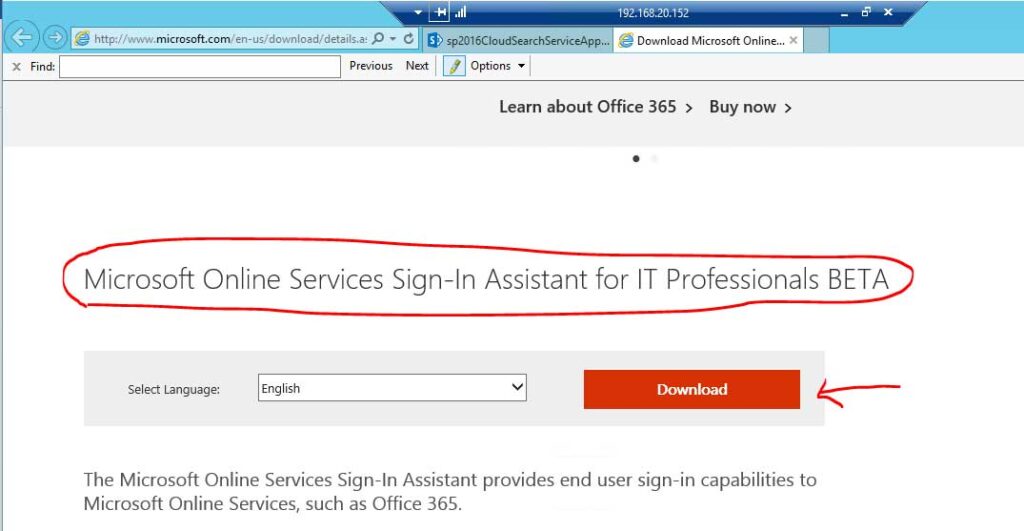
Microsoft online sign in assistant – http://www.microsoft.com/en-us/download/details.aspx?id=39267
Microsoft Azure AD PowerShell – http://go.microsoft.com/fwlink/p/?linkid=236297
Execute the Install-HybridSearchConfigPrerequisites.ps1 to install prerequisites. Successful execution of the pre requisite installer shows the following output

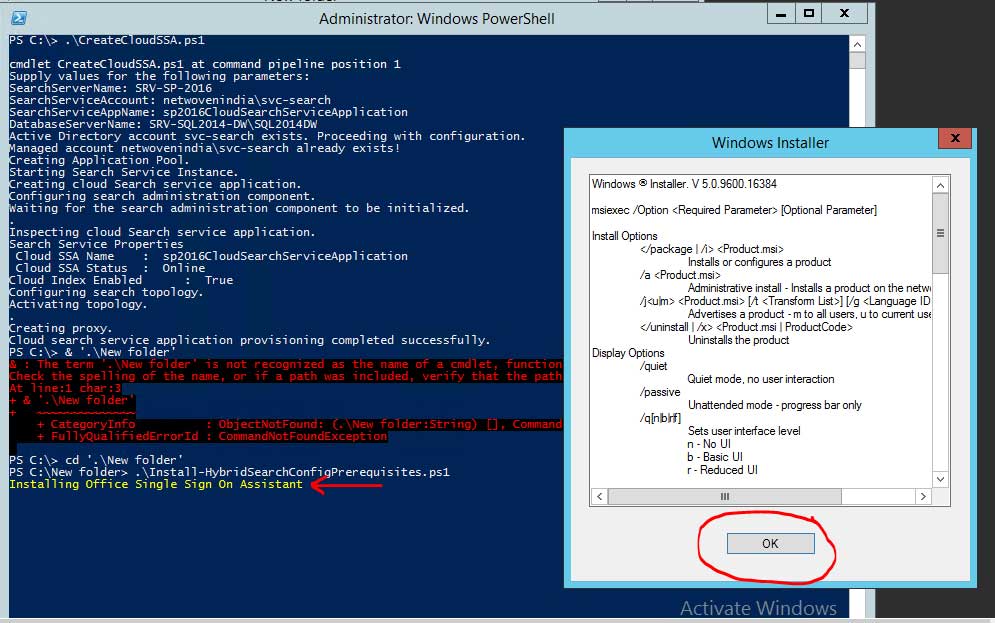

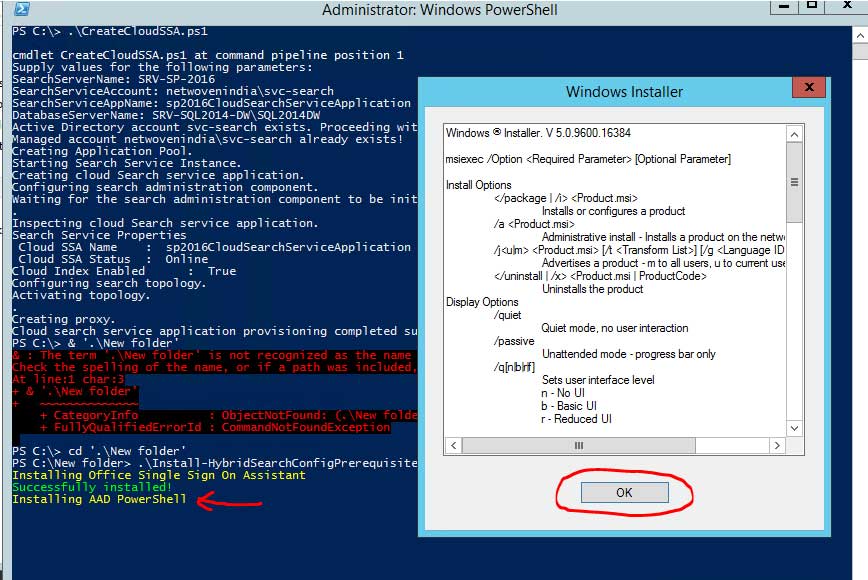

The script has installed both components in silent mode. To validate that the components were successfully installed you can execute the following PowerShell; to confirm the Microsoft Online Single Sign On Assistant is successfully installed (get-service msoidsvc).Status
A response of Running is a report of success

To confirm the Windows Azure AAD PowerShell is successfully installed import the msonline modules
import-module msonline
import-module msonlineextended
A successful import results in no error message

Step 4: Enable Server-to-Server Authentication
The next step in the process is to enable server-to-server authentication. By doing so, the local SharePoint farm and the cloud-based SharePoint Servers will be able to request and access resources on one another’s behalf. Once again, Microsoft has provided a script that automates the configuration process.
The aforementioned CreateCloudSSA.ps1 script included within a .ZIP file is called CloudHybridSearchPreview.zip. The documentation for setting up Hybrid Search also contains the Windows PowerShell script (OnBoard-HybridSearch.ps1) required for enabling server-to-server authentication.

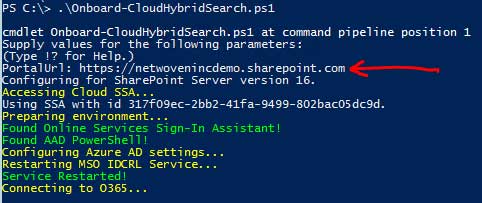

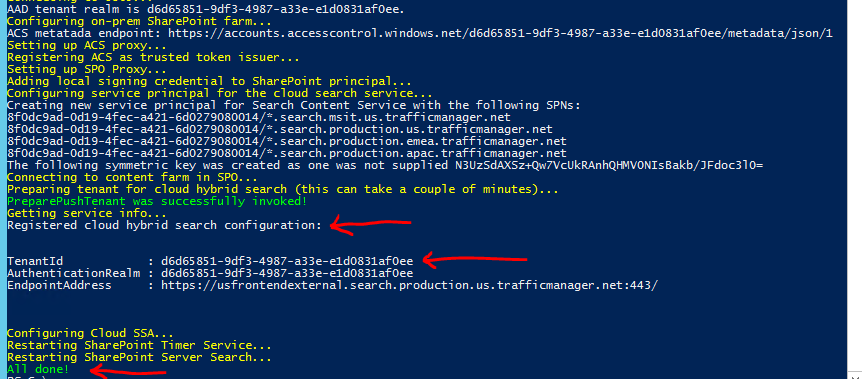
If connection is successful, the script will proceed and you should be presented with an output matching the following print screen
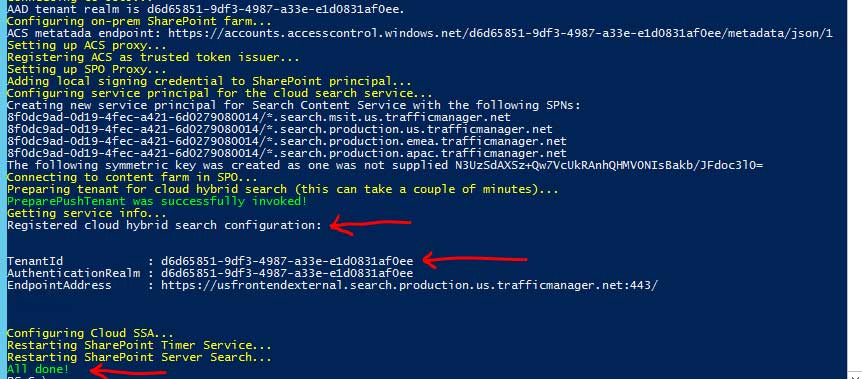
In this print screen you can see the Tenant ID, Authentication Realm and the connected endpoint address.
At this point on-boarding is completed.
Step 5: Define Content Sources
The second-to-last step in the configuration process is to define a content source. The content stored within your specified content source will be indexed for searching. Given the complexity of hybrid search, Microsoft recommends you initially start by defining a small content source. You can use this content source for testing purposes until you’re sure hybrid search is working correctly.
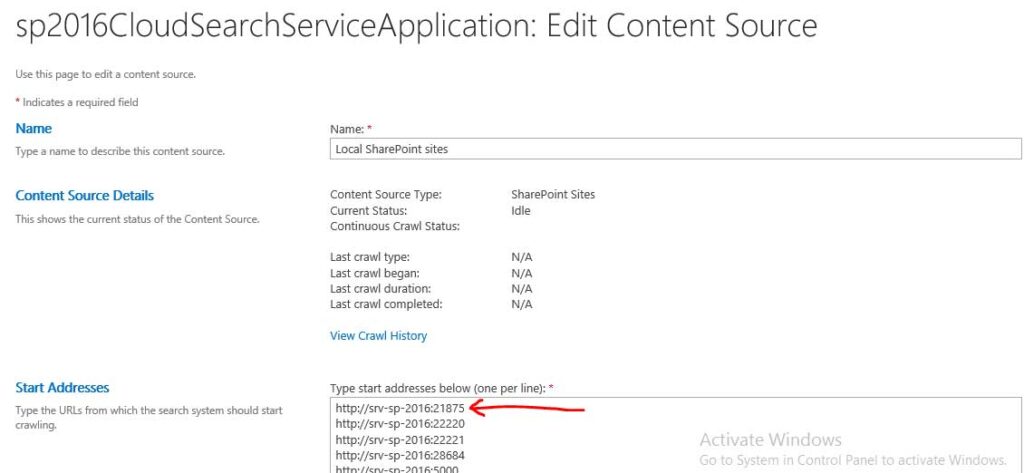
In order to add a content source, you’ll need to log into the SharePoint Central Administration tool using an account that’s an authorized administrator of the Cloud Search Service application. Now, click on the Manage Service Applications link, found in the Management section. Now, click on your Cloud Search Service application, followed by the Content Sources link found in the Crawling section
Central Admin – Application Management – Manage Service Applications – Click on “CloudSBSSA” search service application – Content Source – Click on “Local SharePoint sites” content source – Enter locat sharepoint site url in “Type start addresses below”
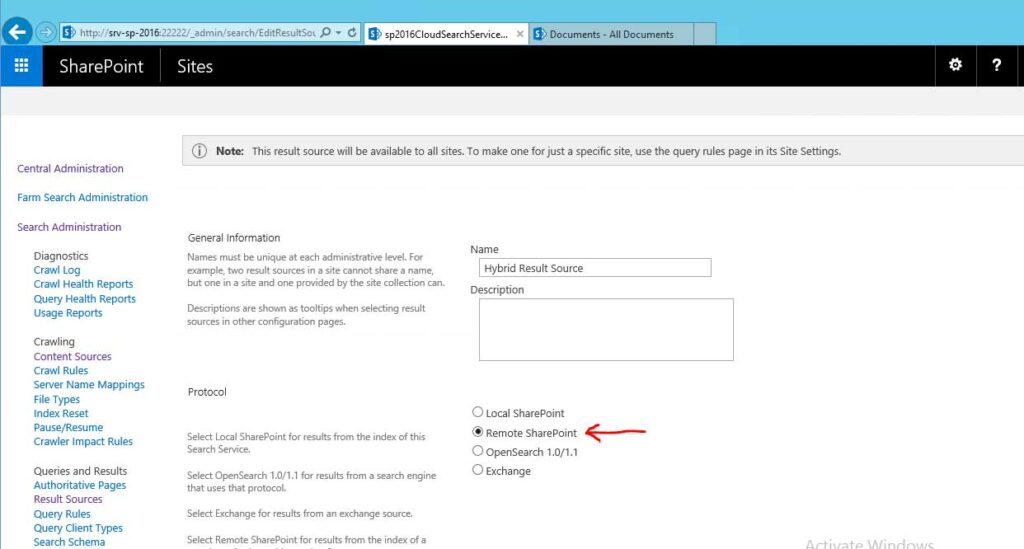
Create a Search Result Source
Central Admin->Application Management -> Manage Service Applications -> Click on “CloudSBSSA” search service application -> Result Sources ->Click on “New Result Source” ->Enter name (Hybrid Result Source) -> Select Protocol – “Remote SharePoint” -> Enter “Remote Service URL“ as online SharePoint site URL https://netwovenincdemo.sharepoint.com

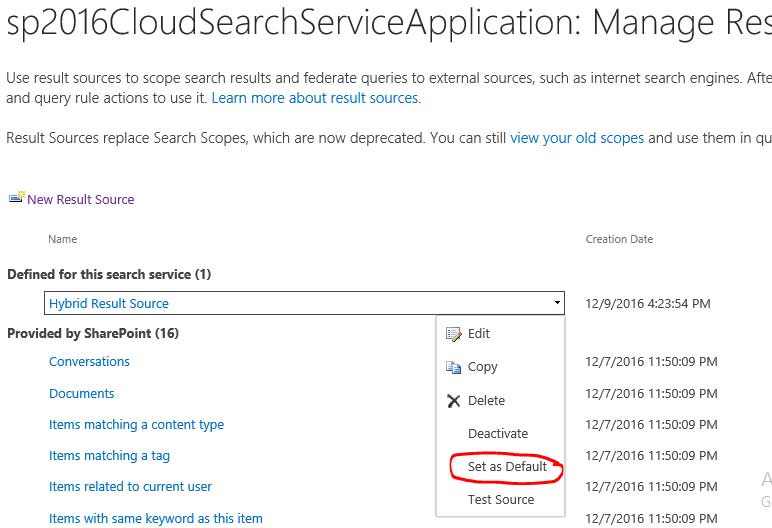
Select the newly created result source and “Set as Default”
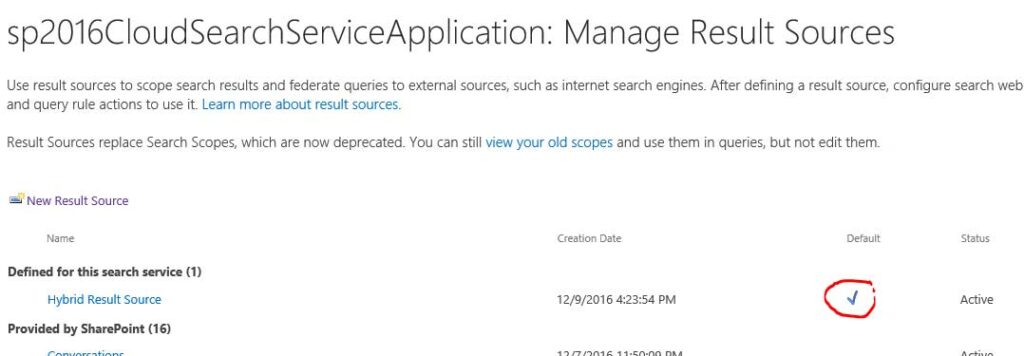
Step 6: Start the full Crawl on Cloud search service application Content Source
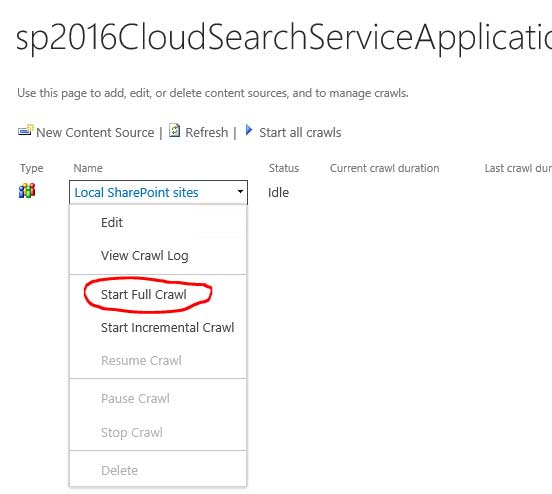
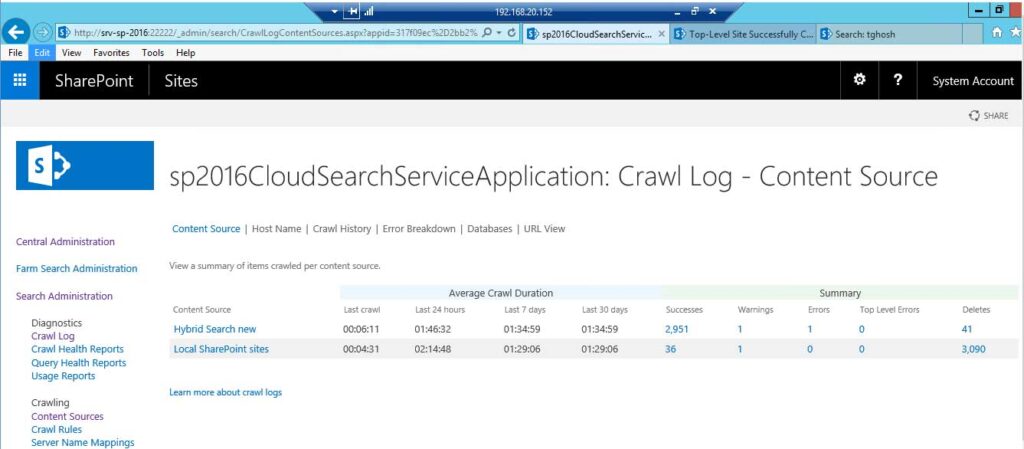
Crawl completed successfully.
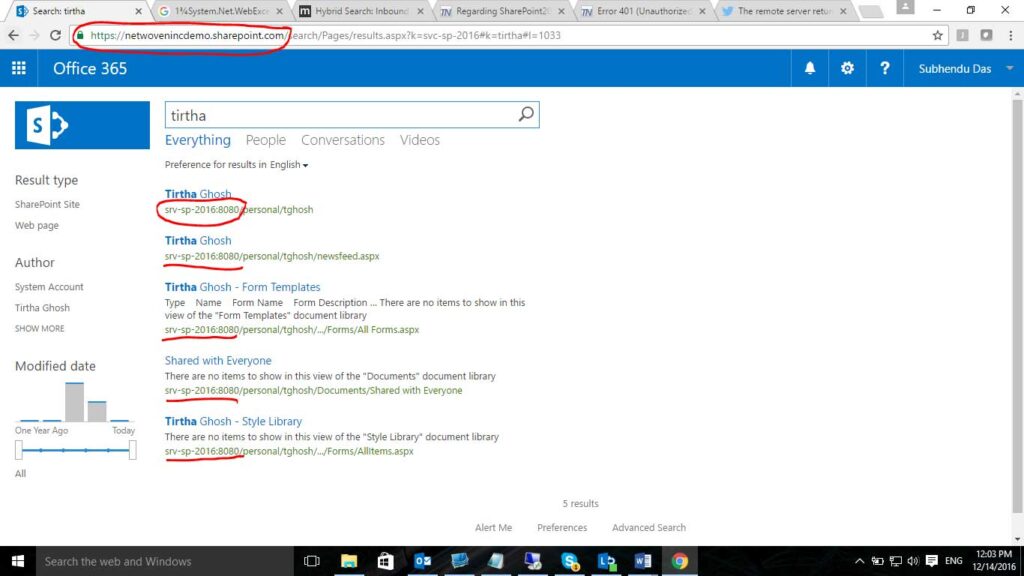
Now On-premises result are showing on O365
If you may run into issue with running full crawl, please refer to my article on how to resolve this.



Thank you for preparing a step by step guideline Tirtha !!. Great work.