What is Deep Linking in Power Apps?
When user opens a Power Apps application, normally it shows the landing screen. But if it is desired to navigate users to some specific screen (e.g., Product details screen for a particular product) nested in the app, how do you do that?
Here comes Deep Linking into action. It enables you to navigate your users directly to a specific record/screen nested in your app with parameters. That means, with the help of a specific URL, you can navigate your users from email or any other app to a specific screen in your app.
Demonstration
Using a very simple app as an example, that uses SharePoint to hold required background data, this article demonstrates the process.
The app in this example has only three screens, namely,
- Home Screen: Available UI options to end users to go to respective screens linked to each of the given option
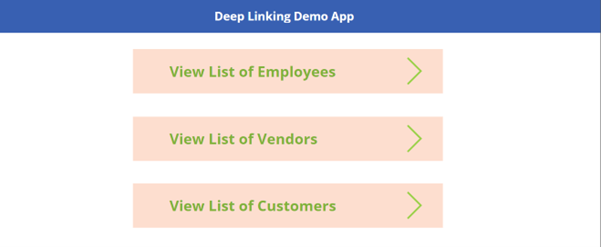
- Employee List Screen: For simplicity, of all the UI options on the home or landing screen, the app in this example is created to be functioned to list only all the employees linked to View List of Employees option
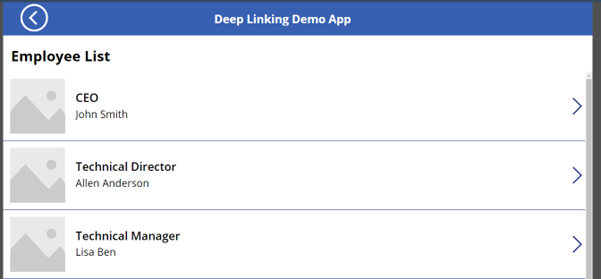
- Employee Details Screen: Displays the details of the selected employee

The SharePoint list that holds employee data is created with the name EmployeeList and is created with a simple structure as shown below:

Goal
Using Deep Linking, the aim is to enable users to navigate directly (without going to the Home screen and selecting a particular employee) to the Employees Details screen of a particular employee.
For this, follow the below steps:
Step 1:
In this step, in the Employee List screen, set a variable “varEmployee”, with the selected item of the gallery and navigate to the Details screen.
Set(varEmployee,ThisItem);
Navigate(DetailsScreen);

Step 2:
In the Details Screen, take a view form to show employee details. Set “Item” of this form as “varEmployee” variable, which was used in the earlier step to store the employee object.

Step 3:
Write below code in the App’s OnStart event:
Set(varEmpID,Param(“EmpID”));
If(!IsBlank(varEmpID),Set(varEmployee,LookUp(EmployeeList,ID = Value(varEmpID))); Navigate(DetailsScreen););
Use the “EmpID” as the query string parameter to be passed through the details screen URL. In the first line, set the variable with the value of the query string value of “EmpID”. Then set “varEmployee” variable with the employee object for that particular “EmpID” value.

Now, construct the URL for a particular employee. To get the app URL, go to the details page of the app and for this given example, the URL of use is highlighted in the screenshot below.
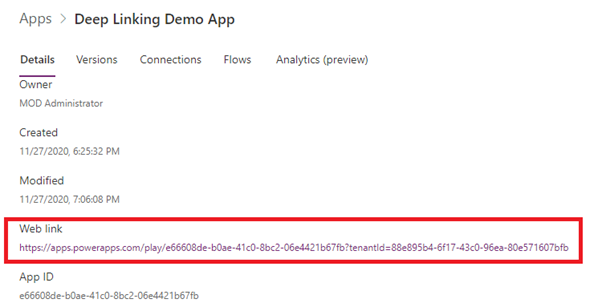
Append the URL with the EmpID query string to construct the final URL for the given example: https://apps.powerapps.com/play/e66608de-b0ae-41c0-8bc2-06e4421b67fb?tenantId=88e895b4-6f17-43c0-96ea-80e571607bfb&EmpID=1
This URL is now ready to be used to navigate directly to the Employee Details screen, if shared with any other user or within any app.
The same approach can be followed for Vendors and Customers list options.
VendorID or CustomerID can be passed through the query string to show vendor’s details or customer’s details, respectively.
Summary
Using the constructed URL, click on this shared URL will redirect directly to the relevant screen, instead of having to start from the Home or landing screen.




Good post
Navigate is not allowed in the App.OnStart event.
Use the StartScreen instead.
Yet, Global variables are not allowed in the StartScreen
So you’ll need to use the Param(“EmpID”) instead of varEmpID
This post got me where I was going!
Thanks so much!