OneDrive, formerly SkyDrive gives us the ability to sync any SharePoint document library into local computer. For whatever reasons, if you have thousands of documents already synced into your local computer and realise that you have run out of space in your present synced drive, what would you do? Create a new folder and re-sync? Possibly you would not like to waste hours behind re-syncing and downloading all documents. Here is a smart way to move OneDrive folder to a different location without having all files re-synced.
Solution :
Move SkyDrive folder to a different location without having all files re-synced.
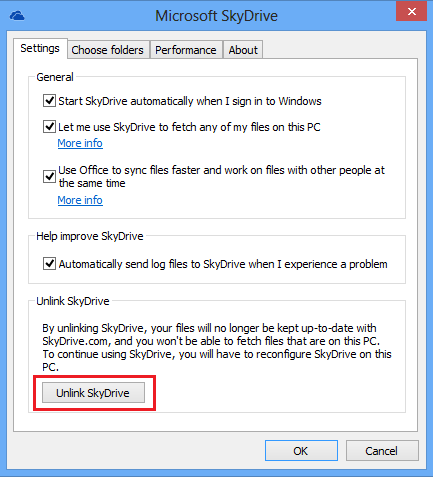
Right click SkyDrive icon on the task bar, click settings
In the settings tab, click Unlink SkyDrive button
Move your SkyDrive folder to new sync folder location.
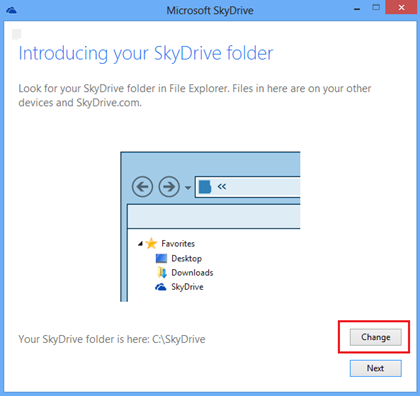
Launch SkyDrive again, on the first run, click Change button to choose the folder set in step
SkyDrive will now use the new folder you choose, all existing files will be merged without getting resynced from cloud.
Another workaround can also be followed here if you do not find the option of unlink:
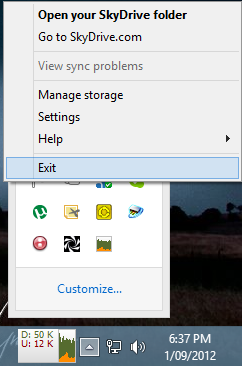
Exit the SkyDrive/OneDrive application by right click on your system tray.
Move the existing SkyDrive folder (under your user profile by default) to the new desired location. I moved mine to “D:MAXSkydrive”.
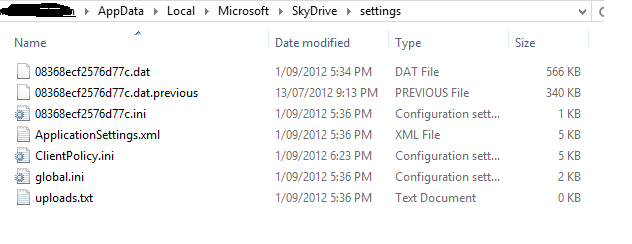
Use Windows Explorer to navigate to the folder“c:users[username]AppDataLocalMicrosoftSkyDrivesettings” where [username] is your user profile. If APP Data is not visible, need to make it visible from Control Panel by selecting “Folder Options” > “View” > “Show hidden files”
Look for the .ini file with the random letters & numbers (in the above image, it is 08368ecf2576d77c.ini). Edit this with your favorite text editor.
Search for the line which starts with “library = “. This line shows the folder where your SkyDrive data was originally synchronized after “personal“. Change this to the proposed new file location. Make sure you get this exactly right. Once you are done, Save and Close.
Launch SkyDrive from your Start Menu. You may get an error pop up, but the application will do a quick scan of the folder and confirm all is in order.


