Introduction
In the realm of modern workplaces, swift access to information is the cornerstone of productivity and a key driver of employee efficiency. Microsoft Search offers a robust search functionality that can be further optimized by configuring data sources both inside and outside of the Microsoft 365 environment. By connecting and integrating various data repositories, organizations can harness the power of Microsoft Search to deliver more accurate, comprehensive, and relevant results to users, all from a singular search experience.
Understanding Data Sources
Data sources (previously called Result Sources in SharePoint) in Microsoft Search represent the diverse repositories where information is stored within an organization. These sources can range from SharePoint sites, OneDrive accounts, Microsoft Exchange, external databases, line-of-business applications, and other third-party enterprise applications (ServiceNow, Workday, etc). Configuring these sources enables Microsoft Search to crawl and index content, making it accessible and searchable across the organization, and is also a requirement for configuring custom search verticals.
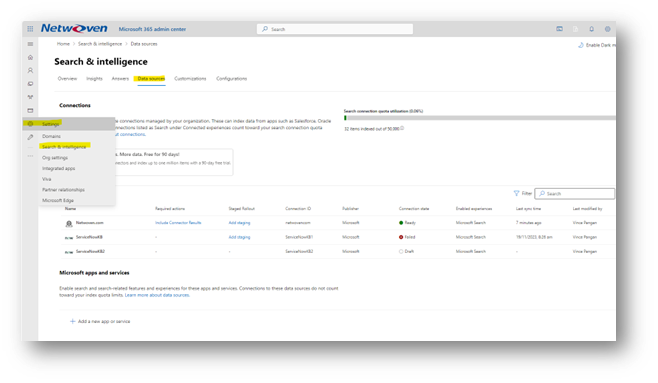
Data Sources are configured in the Microsoft Admin panel, within the Search and Intelligence section.
Configuring the Data Source
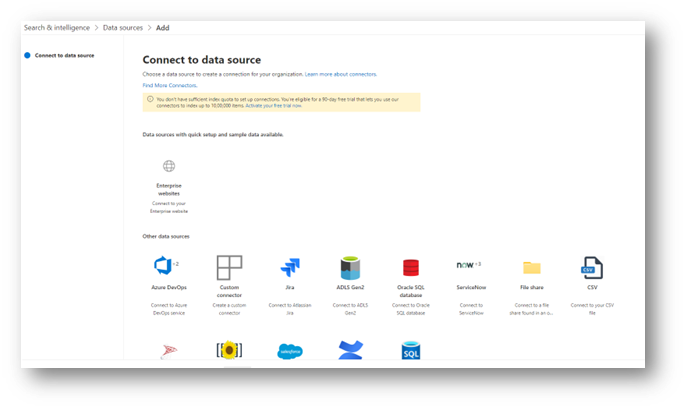
Each data source configuration will be a little bit different, but they all have the same basic setup to start with. The main element for a data source is the Microsoft Graph Connector, which indexes data in the source system to make it consumable by Microsoft Search. You can read more about these here Microsoft Graph connectors overview for Microsoft Search | Microsoft Learn. There are a lot of existing connectors available for use right away, while other connectors have been developed by third parties and may require a fee to purchase and use. If you have a development team on hand and a custom data source (e.g. internal databases), you can even develop your own custom connectors. Some useful connectors that are readily available are File Share (connect to an on-premise shared drive) and CSV File (useful for indexing large amounts of data in a csv file). For this example, we will look at the ServiceNow connector, which will allow Microsoft Search to index and leverage results from your ServiceNow Knowledge Bases.
Start by clicking the + Add Data Source link, then choosing ServiceNow from the list of available connectors.
At the time of this writing, there are 3 available connectors: Tickets, Knowledge, and Catalogs. Click on Knowledge, then Next.
Give your connector a descriptive name (e.g. ServiceNow IT Knowledge Base) and optionally add a description. Check the box for the Notice that states Microsoft’s information about indexing and what happens to your data, then click Save and Proceed.
On the next screen, you will enter the URL for your ServiceNow instance and set up the authentication method. While each connector will have different settings, they will all require some form of authentication. It is highly recommended to have a dedicated service account with read-only permissions for each application, and to ensure that the account has permission to access all data, otherwise your search results will be restricted to only the contents which the account has access to.
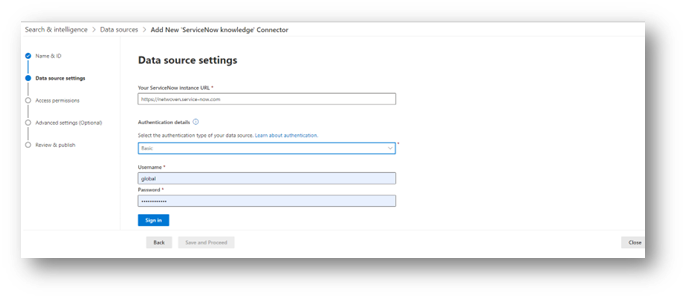
Connectors, such as those for ServiceNow, will usually be able to map the logged-in user’s credentials to their access within the source application to make sure that they are not able to see contents which they shouldn’t have permission to. Be sure to test this thoroughly before deploying any data source to the entire company.
From here you will be getting to the Advanced Settings, which may or may not be optional depending on the connector. For this instance, the first option is to select which properties we want the connector to index.
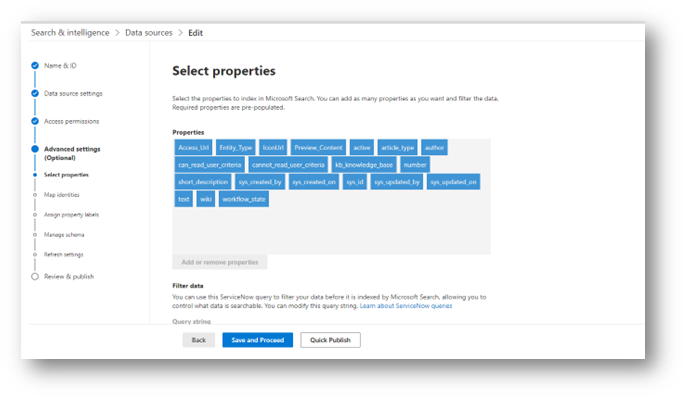
The properties that are indexed can later be mapped to a schema which is used to determine how and where that property is displayed within a search result. Choosing properties to index is optional, and often times not something you will need to mess with.
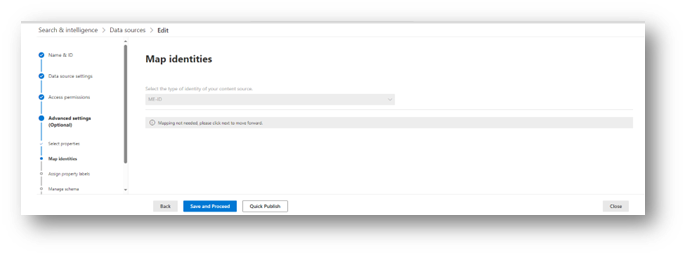
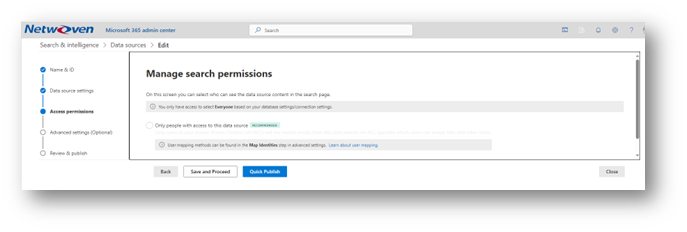
Mapping identities allows the system to map the current user’s login to their account in the source system, thereby ensuring that they will only see results that they should have access to, even if the service account has permission to see everything. This step is vital to maintaining data security and will be different for each application. Make sure to check the documentation for that connector in order to ensure that your mapping is configured properly, and as always, test first!
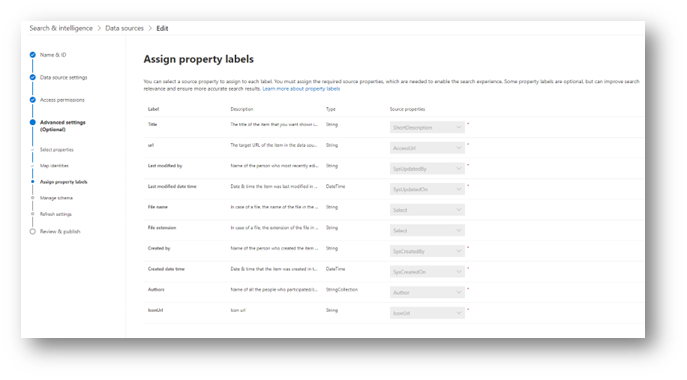
When the data comes back from the source system, it often has cryptic names that are used internally within that system. In order to use those values, we will need to map them to property labels. These labels are required and are often mapped by default to their respective properties from the source system, but you can change them if you want to.

The search schema is critical to ensuring that your users can properly retrieve results based on their queries and also refine the results based on a specific property. Each property from the source can be set to Query, Search, Retrieve, and Refine.

Microsoft 365 Modern Intranet & Employee Experience Look Book
In this look book, you’ll see examples of how Netwoven has created layouts and solutions for clients to enhance employee experiences with a modern intranet on Microsoft 365. Download now!
Get the Look BookQuery
Enabling Query on a property allows that property to be specifically search by a query. For example, if Query is enabled on the Title field, then a query of “Title: Deep Dive” would specifically search only the Title field for the text “Deep Dive”.
Search
Enabling Search on a property makes all of the text of that property included in results where a search term in the query matches a word in that property. So, if Search is enabled for Title, then a search for “Dive” would show this document, which has the word “Dive” in the title.
Retrieve
Enabling Retrieve makes that property visible in search results. Make sure that this box is enabled for all fields that you intend to display within a search result.
Refine
Enabling Refine allows that property to be used as a filter (refiner) within the search results page. For example, if you had a Category property in your source that you wanted people to be able to filter the results page by, you would check the Refine box for that property.
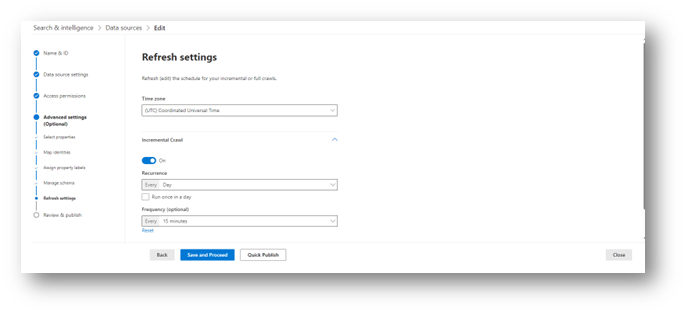
The Refresh settings options allow you to choose how often the content in that source is crawled. A full crawl will happen when the data source is initially configured, and from then, incremental crawls are used to update the indexes with changes to the source data. Choose how often you want this crawl to occur (the default is every 15 minutes).
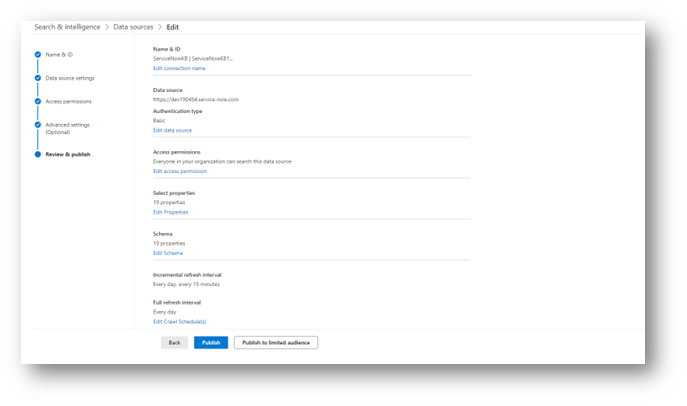
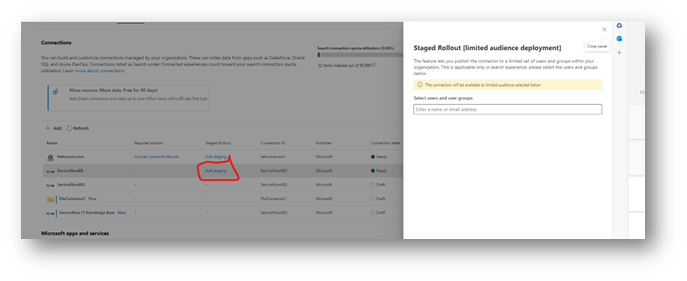
Lastly, you will review all of your settings and publish the data source. It is highly recommended to initially publish to a limited audience so you can test the results using multiple users with different permission levels, and ensuring that the results shown are accurate, and that users are only seeing content that they should be seeing.
You can also do this with configured connectors by clicking the “Add Staging” link from the main Data Sources screen.
Connections to Other Microsoft Apps and Services

If your company is using other Microsoft cloud services, such as Dynamics 365, you can create connections to these data sources in the Microsoft Apps and Services sections and these will not count towards your index quota limits.
Get to know Deep Dive into Microsoft Search Part-1
Get to know Deep Dive into Microsoft Search Part-2
Conclusion
And that’s it! While each connector will have a different set of configuration steps, this should at least get you started with setting up new data sources. The next step, to be outlined in Part 4 of our series, will be to create a custom vertical that leverages your shiny new data source.