In recurrence of my earlier post ‘Security Compliance – DLP’, I would like to discuss ways to go ahead with eDiscovery in SharePoint Online.
You have to be an Office 365 global administrator in your Office 365 organization to configure eDiscovery and set up an eDiscovery Center in SharePoint Online. After you set up eDiscovery, users with the required permissions can create eDiscovery cases, place content on hold, run eDiscovery searches, and export search results.
Here are the steps for setting up eDiscovery in Office 365:
Step 1: Create an eDiscovery Center
Step 2: Configure Exchange Online as a result source
Step 3: Create a security group for eDiscovery managers
Step 4: Assign eDiscovery permissions in SharePoint Online
Step 5: Assign eDiscovery permissions in Exchange Online
Step 1: Create an eDiscovery Center
In SharePoint Online, an eDiscovery Center is created as a site collection and is the root site of that site collection. eDiscovery cases are created as subsites in this site collection.
Follow these steps to create an eDiscovery Center site collection.
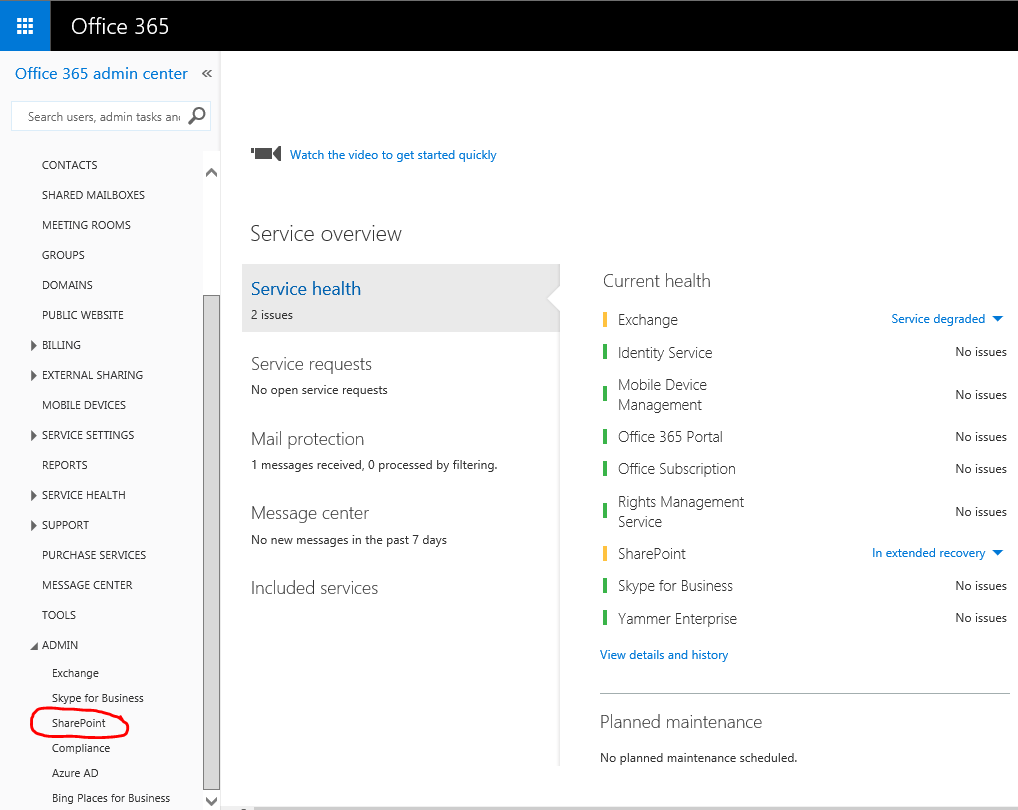
- Sign in to Office 365 using your global administrator account. https://portal.office.com/adminportal/home#/homepage
- In the Office 365 admin center, choose Admin > SharePoint to go to the SharePoint admin center.
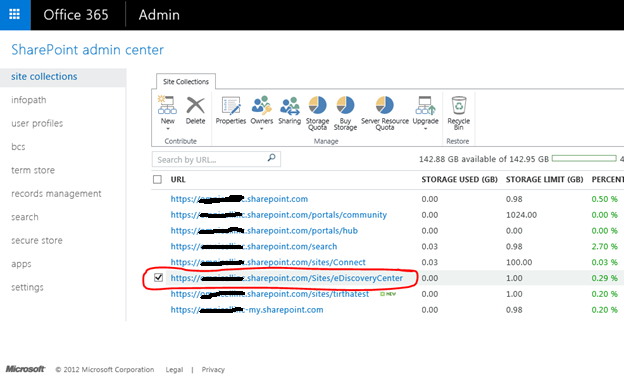
- On the Site Collections tab, click New, and then click Private Site Collection.
- On the New Site Collection page, complete the following boxes or sections:
- Title: Type a name for the eDiscovery site collection; for example, Contoso eDiscovery Center.
- Web Site Address: Do the following to create the web site address for the eDiscovery Center:
- In the drop-down list for the domain name, select a domain name.
- In the drop-down list for the URL path, you can use /sites/ or specify any managed path.
- In the URL name box, type a URL name for the eDiscovery Center; for example, eDiscovery.
- Template Selection: In this section, do the following:
- Select a language for the site collection.
- Under Select a template, click Enterprise, and then click eDiscovery Center.
- Time Zone: Select a time zone from the drop-down list.
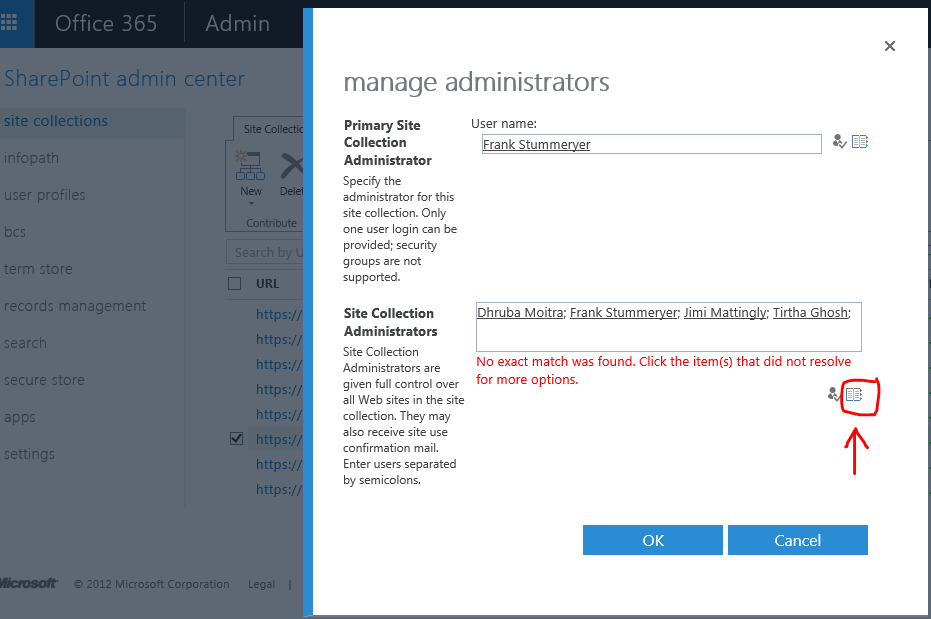
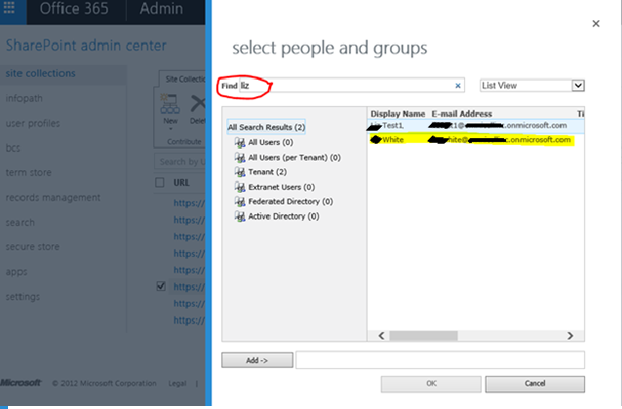
- Administrator: Type the name of a person who will be the site collection administrator for the eDiscovery Center. You can click Check Names or Browse to find a person. Consider selecting a person in your organization who will be responsible for managing eDiscovery holds and search queries.
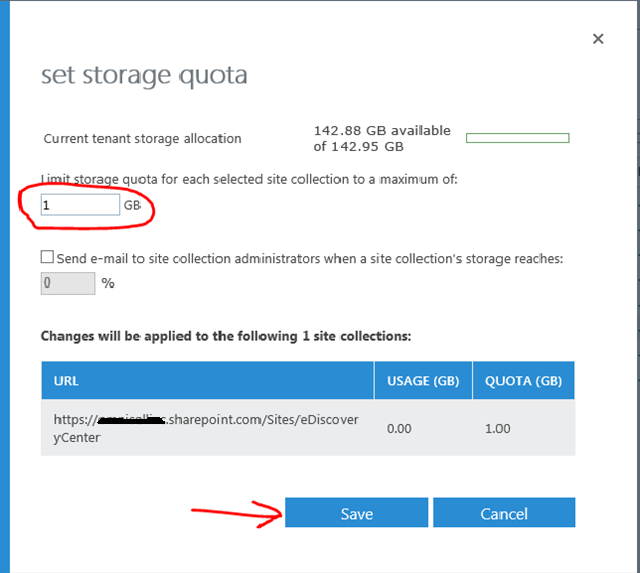
- Storage Quota: Type the number of megabytes (MB) that you want to allocate to this site collection. Only the metadata about eDiscovery cases, search queries, and holds are stored against the site collection storage quota. The actual search results aren’t stored in the eDiscovery Center site collection. One gigabyte of storage (about 1024 MB) is recommended.

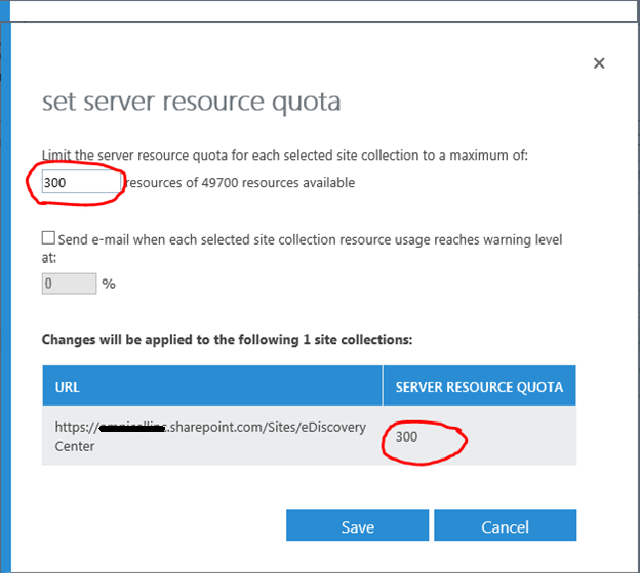
- Server Resource Quota: Keep the default value of 300 for the eDiscovery Center site collection.
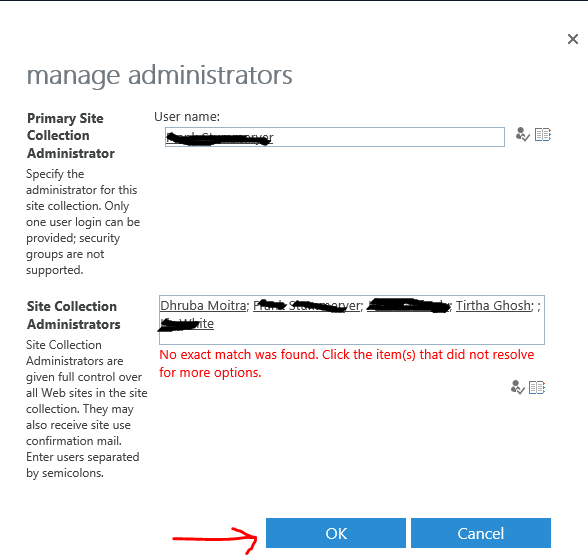
- Click OK to create the new site collection.
You may also like: Learn how to proactively identify and protect your sensitive information
Step 2: Configure Exchange Online as a result source
To search Exchange Online mailboxes from an eDiscovery Center, you have to configure Search to include Exchange Online as a result source for the eDiscovery Center site collection.
Follow these steps to configure Exchange Online as a result source for the eDiscovery Center that you’re setting up.
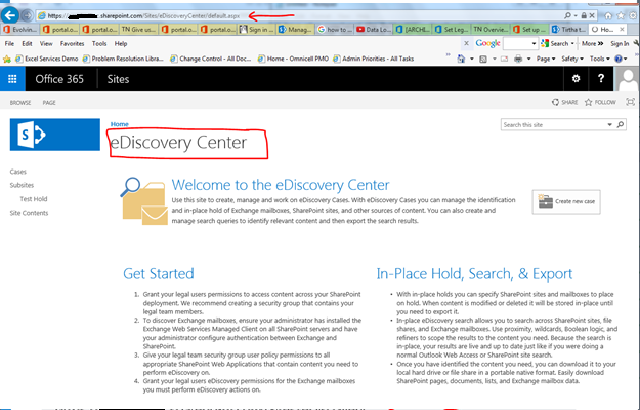
- Go to the new eDiscovery Center that you created in Step 1. Use the Web site address that you specified; https://xxxxxxxxxx.sharepoint.com/Sites/eDiscoveryCenter
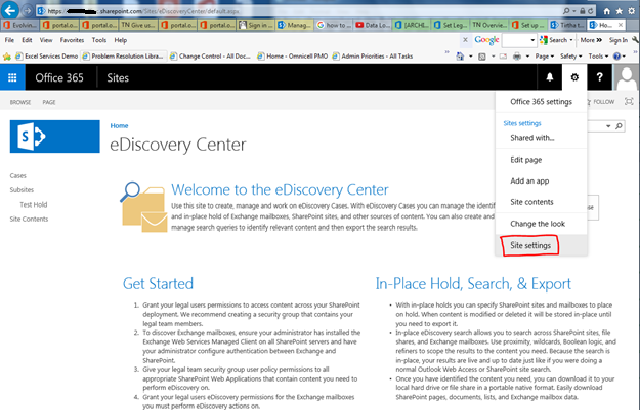
- Go to Settings > Site settings.
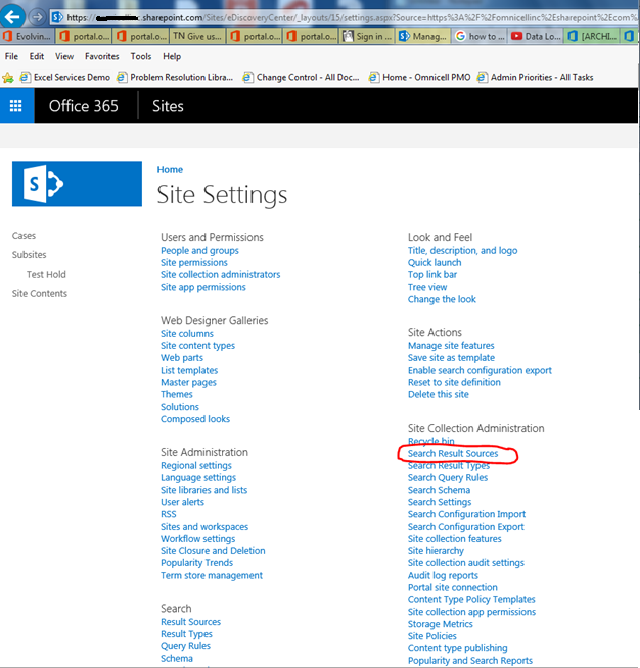
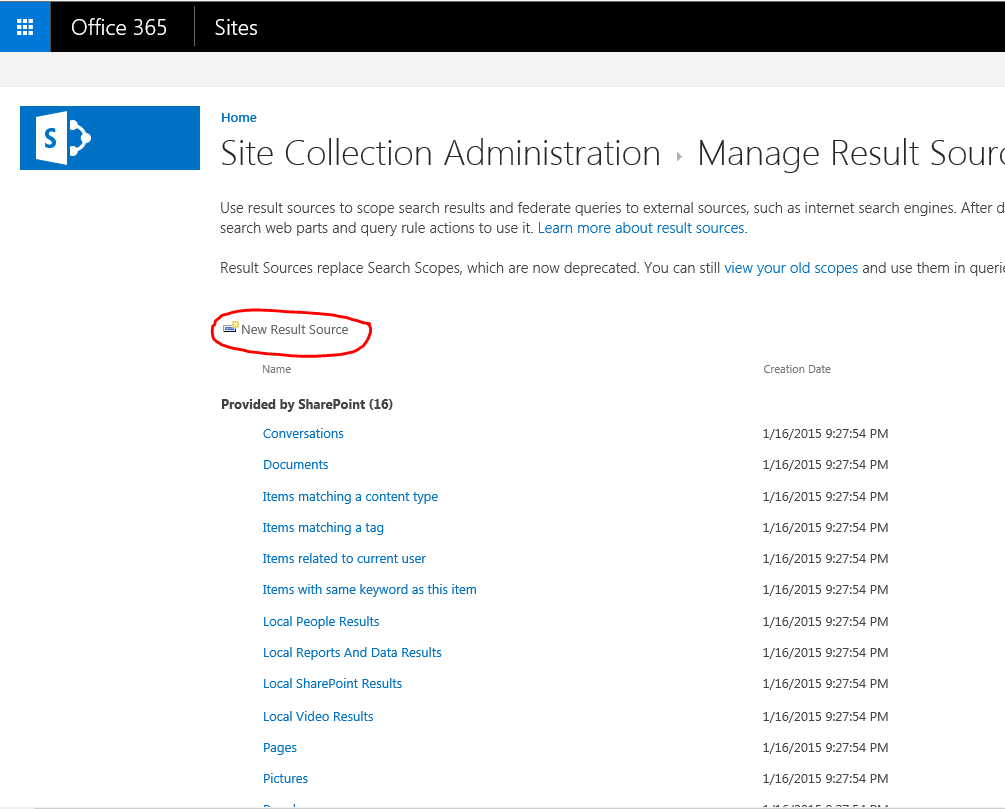
- On the Site Settings page, under Site Collection Administration, click Search Result Sources.
- On the Manage Result Sources page, click New Result Source.
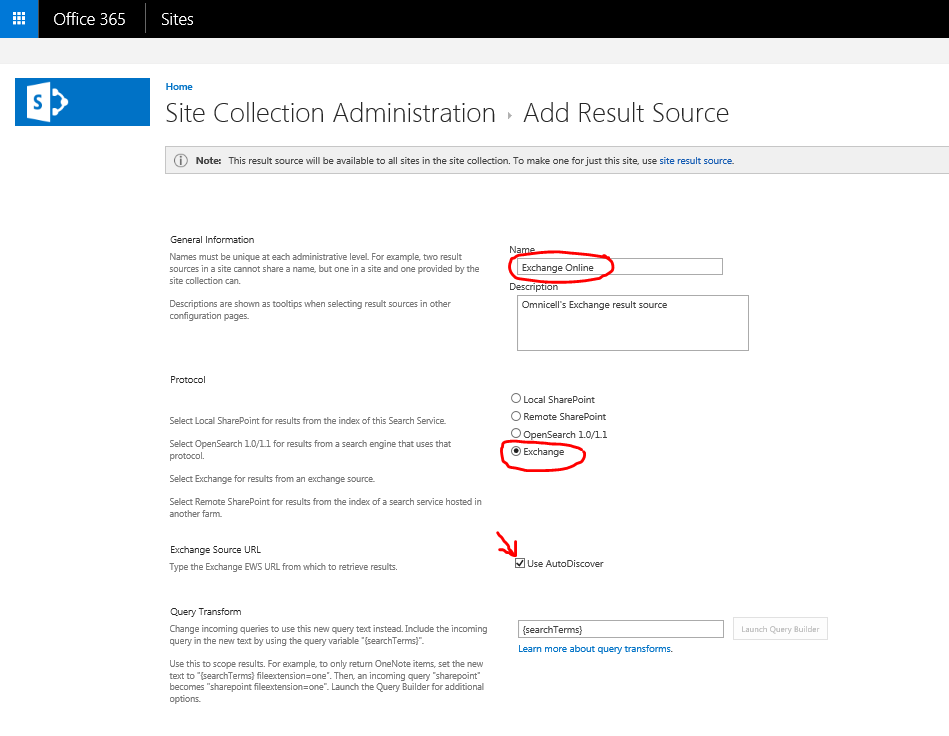
- In the General Information section, in the Name box, type Exchange Online and, optionally, type a description.
- In the Protocol section, select Exchange.
- In the Exchange Source URL section, click the Use AutoDiscover
- Click Save.
After you configure Exchange Online as a result source for the eDiscovery Center, eDiscovery managers can search Exchange Online mailboxes using the eDiscovery Center.
Note: Be sure to configure Exchange Online as a result source for the eDiscovery Center site collection. If you configure it at the subsite or eDiscovery case level, you won’t be able to search Exchange Online mailboxes
Step 3: Create a security group for eDiscovery managers
eDiscovery managers need the necessary permissions to search for content in SharePoint Online sites and Exchange Online mailboxes, place content on hold, and export the search results. A good way to assign permissions to a group of people is to create a security group in Exchange Online, add members to the security group, and then assign eDiscovery-related permissions to the security group in SharePoint Online and in Exchange Online.
Follow these steps to create a security group in Exchange Online.
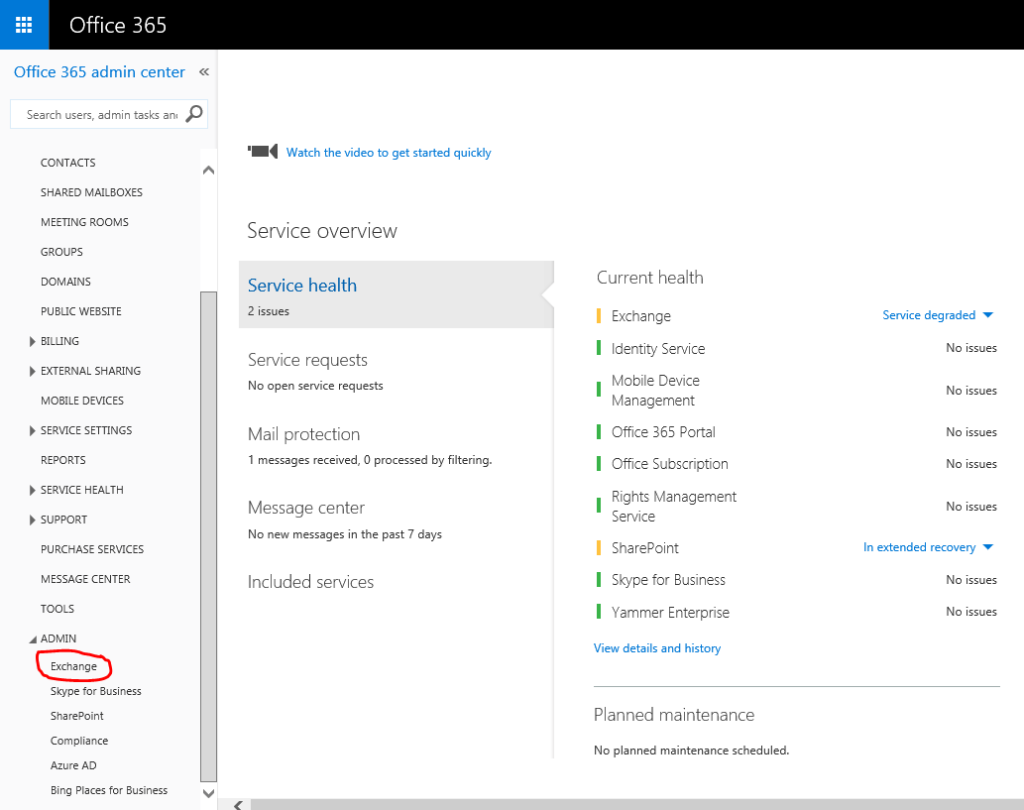
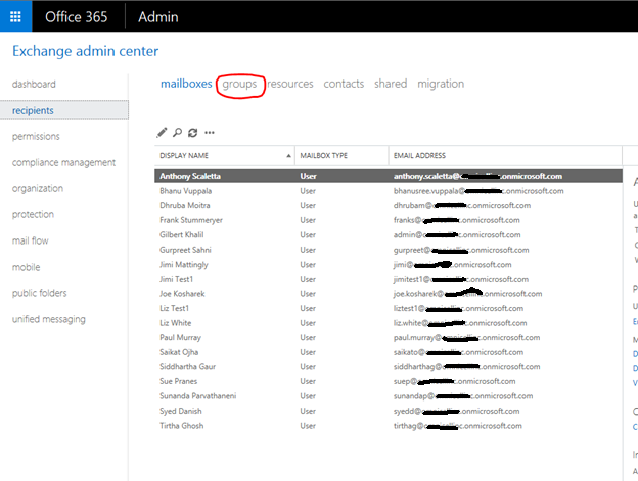
- In the Office 365 admin center, choose Admin > Exchange.
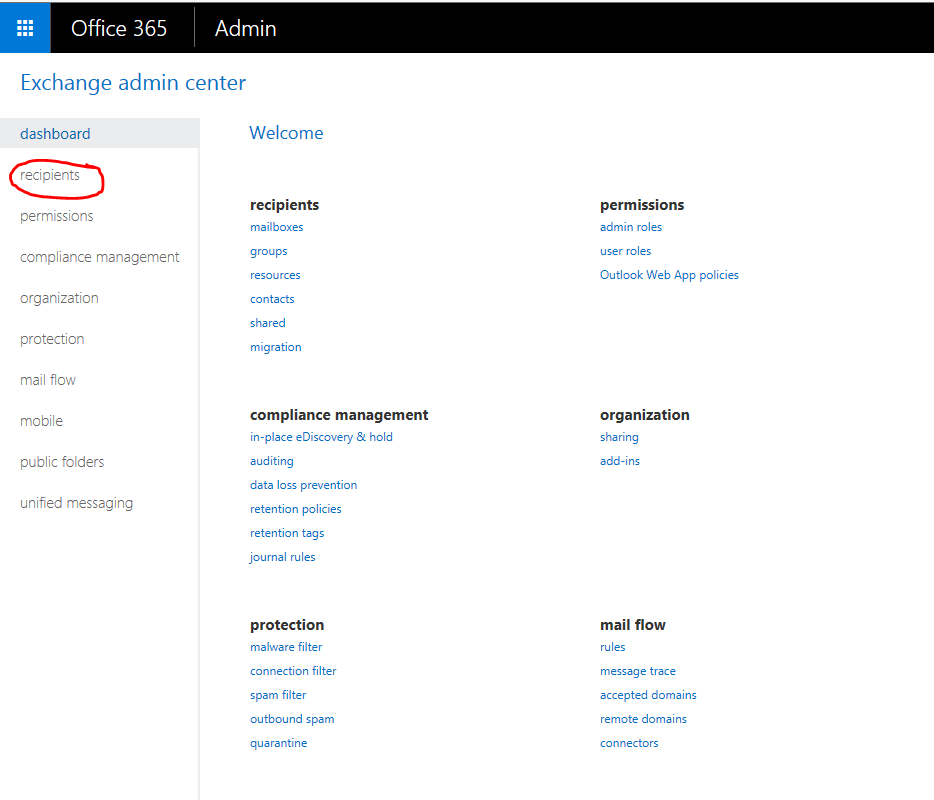
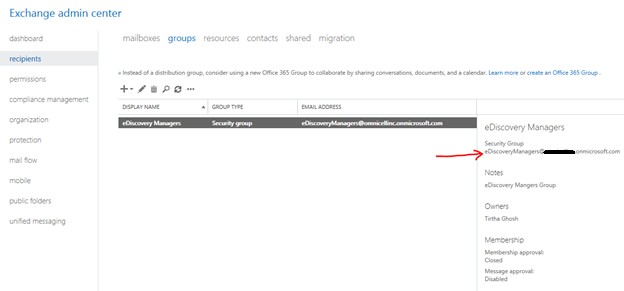
- In the Exchange admin center (EAC), go to Recipients > Groups.
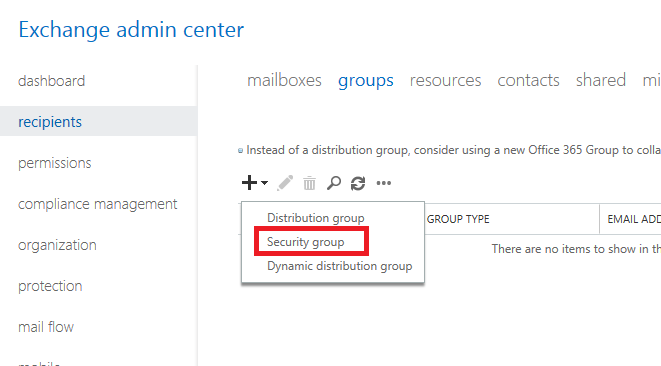
- Click New > Security group.
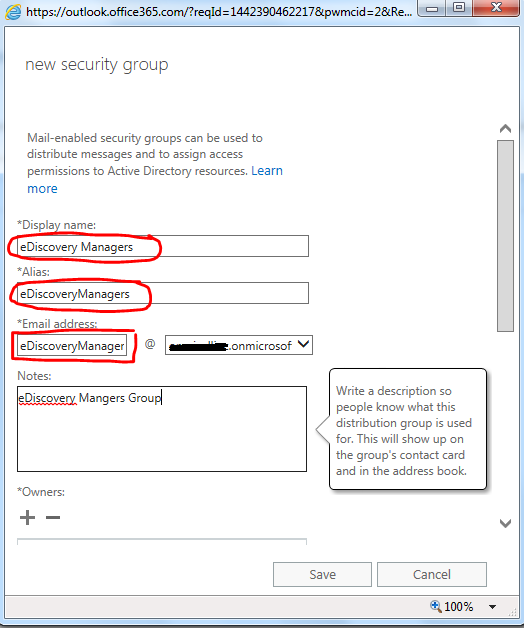
- On the New security group page, complete the following boxes:
- Display name: This name appears in the shared address book and in the Groups list in the EAC. Use a name that identifies the purpose of the group; for example, eDiscovery Managers.
- Alias: Type the alias for the security group. It must be unique in your Office 365 organization.
- Email address: The name that you typed in the Alias field is used to automatically generate the portion of the email address that appears to the left of the @ symbol. You can change the alias portion of the email address if necessary.
- Description: You can use this box to describe the eDiscovery-related purpose of the security group.
- Under Members, click Add.
- Select people that you want to be members of this group and click Add. When you are finished adding members, click OK to return to the New security group
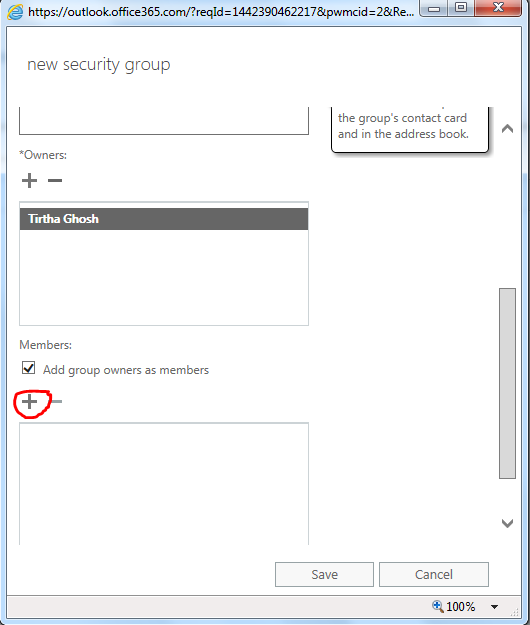
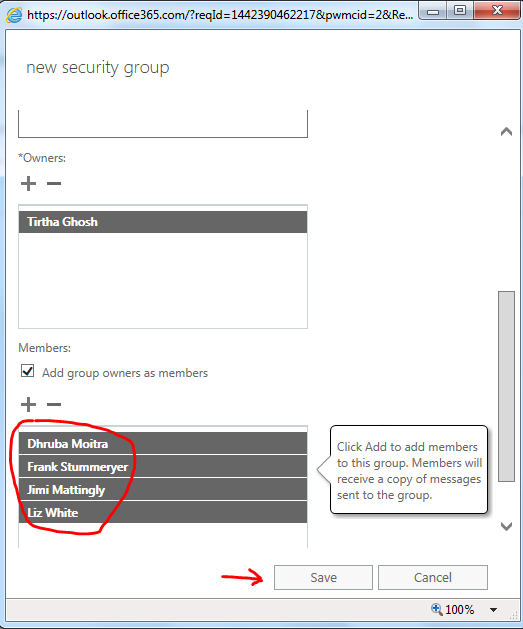
- Click the Owner approval is required checkbox so that you can manage the membership of this group and control who can use the eDiscovery Center.
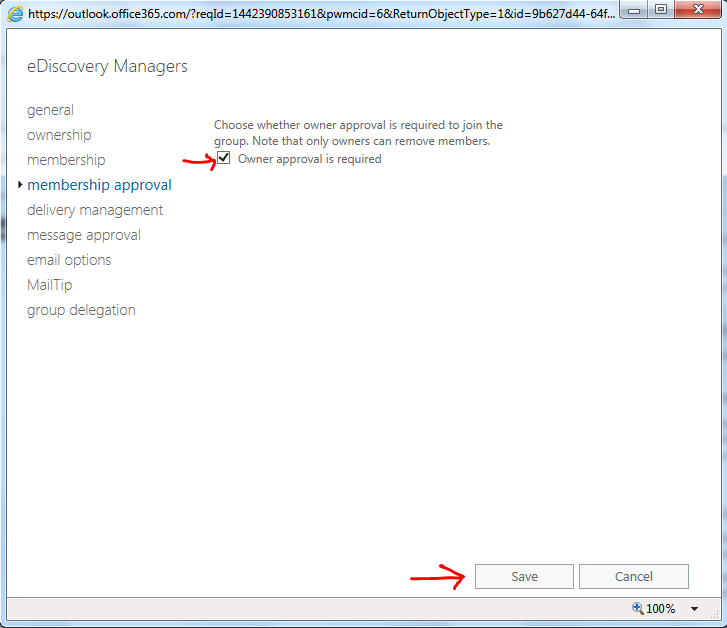
- Click Save.
Step 4: Assign eDiscovery permissions in SharePoint Online
The next step is to assign permissions to the members of the security group that you created in Step 3 so they can use the eDiscovery Center and search for content on SharePoint sites. This requires three different permissions assignments:
- Assign owner permissions to the eDiscovery managers security group for the eDiscovery Center created in Step 1. As site collection owners, eDiscovery managers will be able to create cases, place content sources on hold, and export search results. Site collection owners can also give other users access to specific eDiscovery cases.
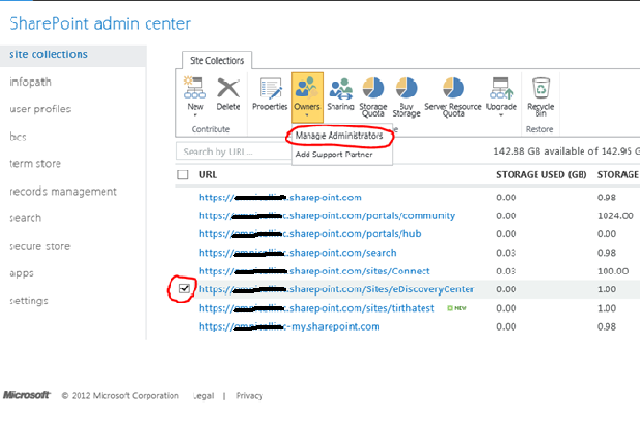
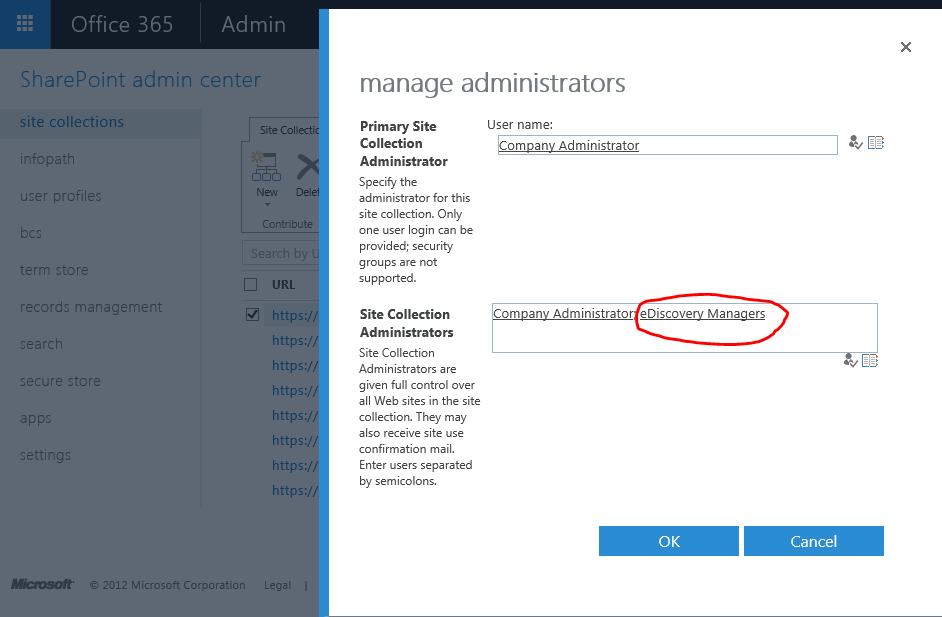
- Make the eDiscovery managers security group site collection administrators for all site collections in your SharePoint Online organization that contain searchable content. This lets eDiscovery managers have access to all content in your SharePoint Online organization and view the search results in the eDiscovery Center.
- Go to the top-level site in the site collection, and then click Settings > Site settings.
- On the Site Settings page, under Users and Permissions, click Site Collection Administrators.
- Type the name of the eDiscovery managers security group in the Site collection administrators box and then click OK.
Follow these steps to make members of the eDiscovery managers security group site collection administrators for a site collection. Repeat these steps for each site collection in your SharePoint Online organization.
- Give the eDiscovery managers security group read permissions to the crawl logs for your SharePoint Online organization. This lets eDiscovery managers view any crawl log errors, which are included in a report when eDiscovery search results are exported.
Grant users permission to view the crawl log information
- Sign in to the Office 365 Admin Center.
- Choose Admin > SharePoint. You’re now in the SharePoint admin center.
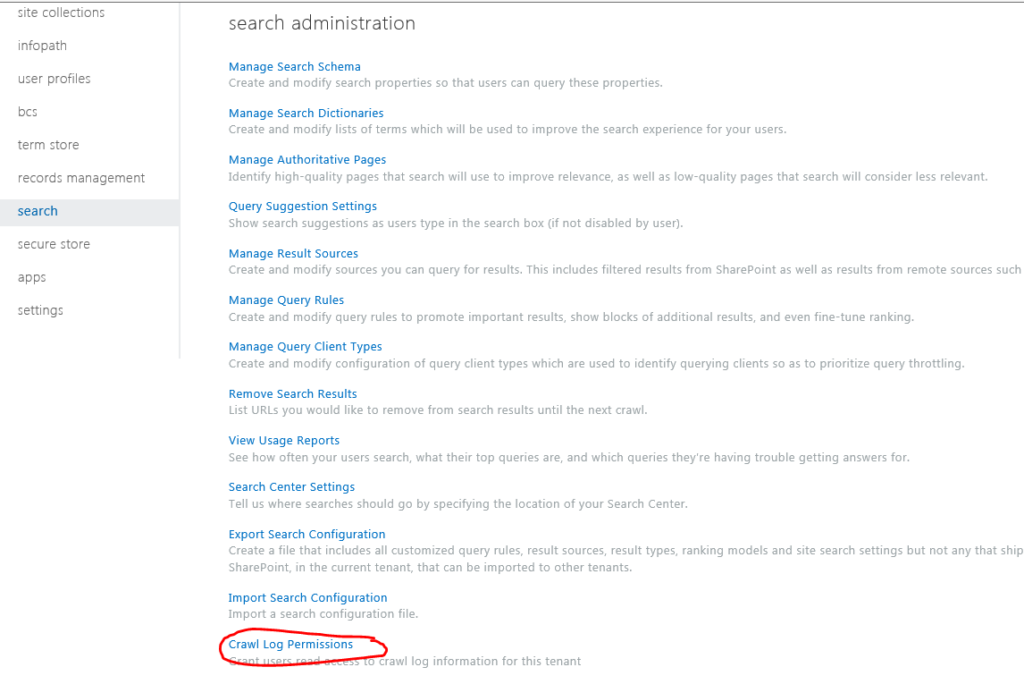
- Choose search.
- On the search administration page, choose Crawl Log Permissions.
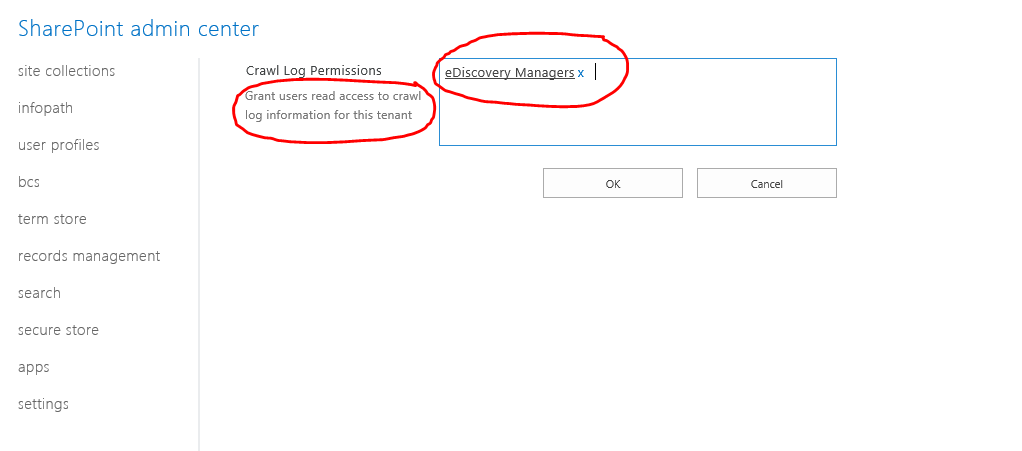
- In the Crawl Log Permissions box, enter names or email addresses. The names of valid users or user groups are shown in the list as you type letters in the box.
- Click OK.
Important: If you or an eDiscovery manager has to search for content stored on OneDrive for Business sites, you need to assign specific permissions for that task. For step-by-step details.
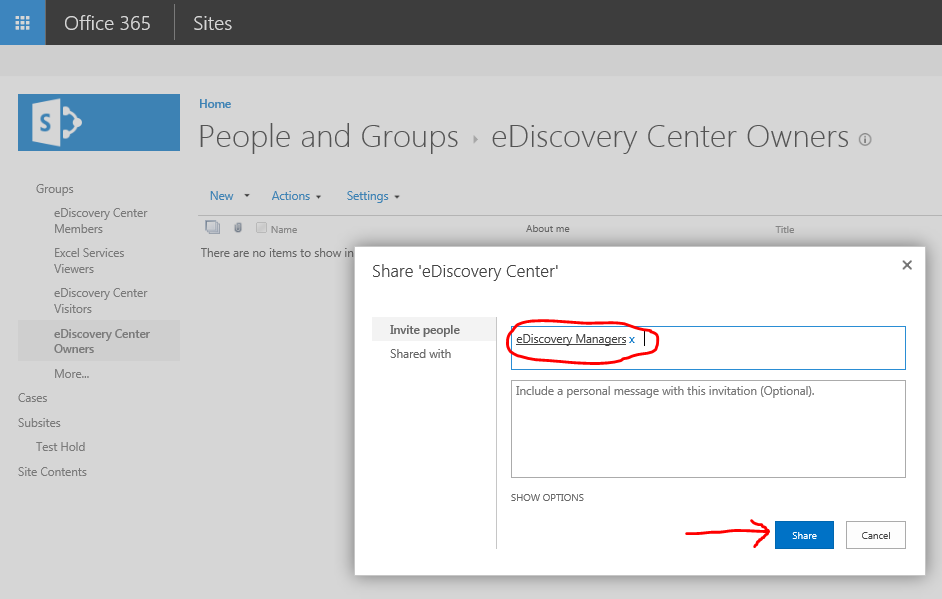
Follow these steps to make the members of a security group the site collection owners of the eDiscovery Center.
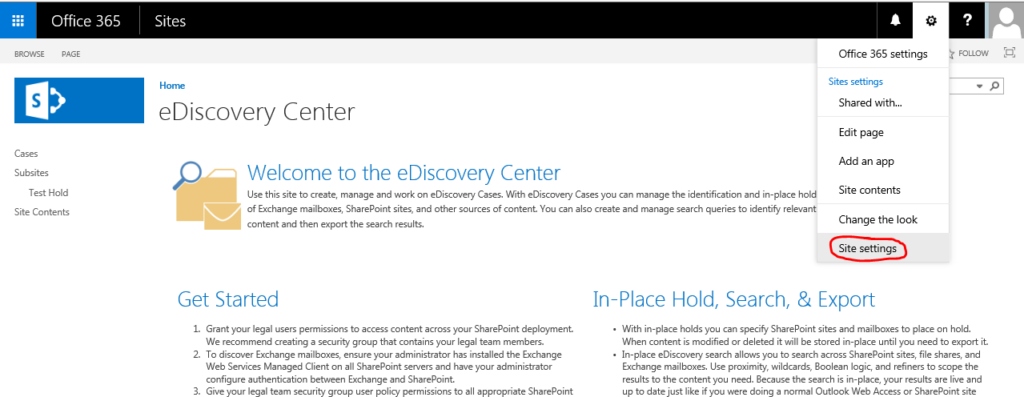
- In the eDiscovery Center, go to Settings > Site settings.
- On the Site Settings page, under Users and Permissions, click Site permissions.
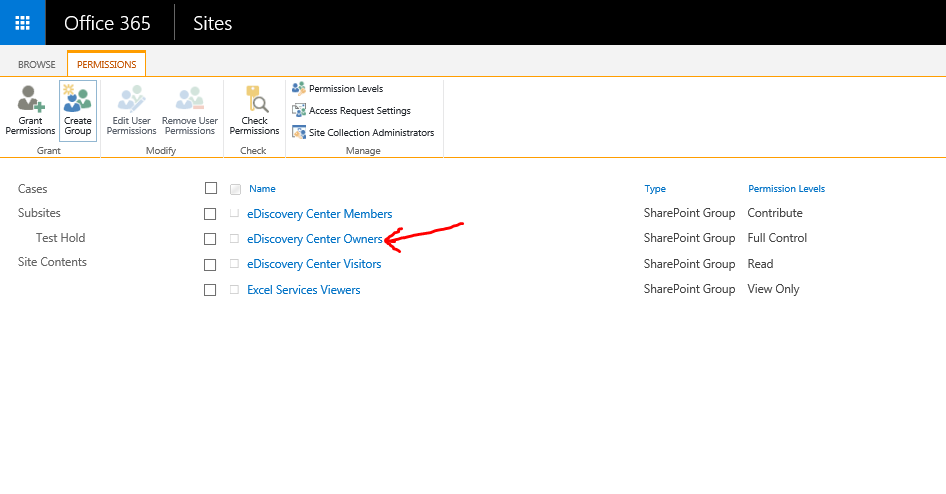
- Click the <name of site collection> Owners group for the site collection.
- In the New drop-down list, click Add Users.
- In the Invite people box, type the name of the eDiscovery managers security group, and then click Share.

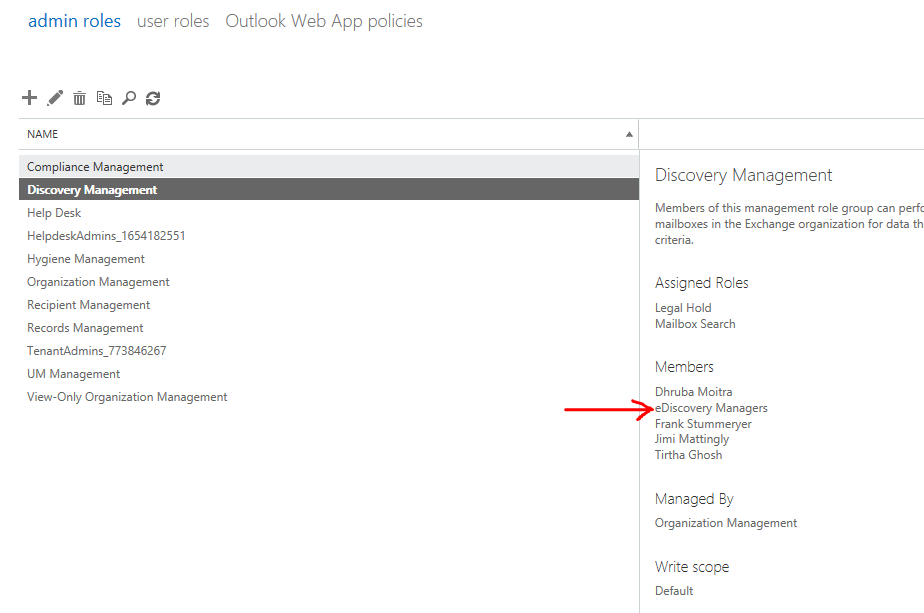
Step 5: Assign eDiscovery permissions in Exchange Online
The last step is to assign eDiscovery permissions in Exchange Online to the security group that you created in Step 3. You do that by adding the security group to the Discovery Management admin role group in Exchange Online. This will let members of the security group use the eDiscovery Center to search mailboxes, place them on hold, and export mailbox search results.
Follow these steps to assign eDiscovery permissions in Exchange Online to the eDiscovery managers security group.
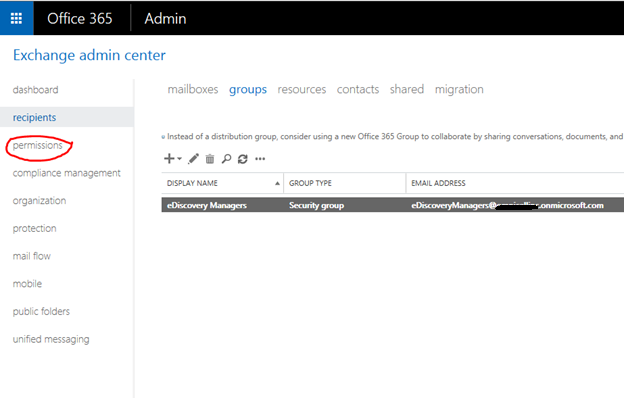
- In the Office 365 admin center, choose Admin > Exchange.
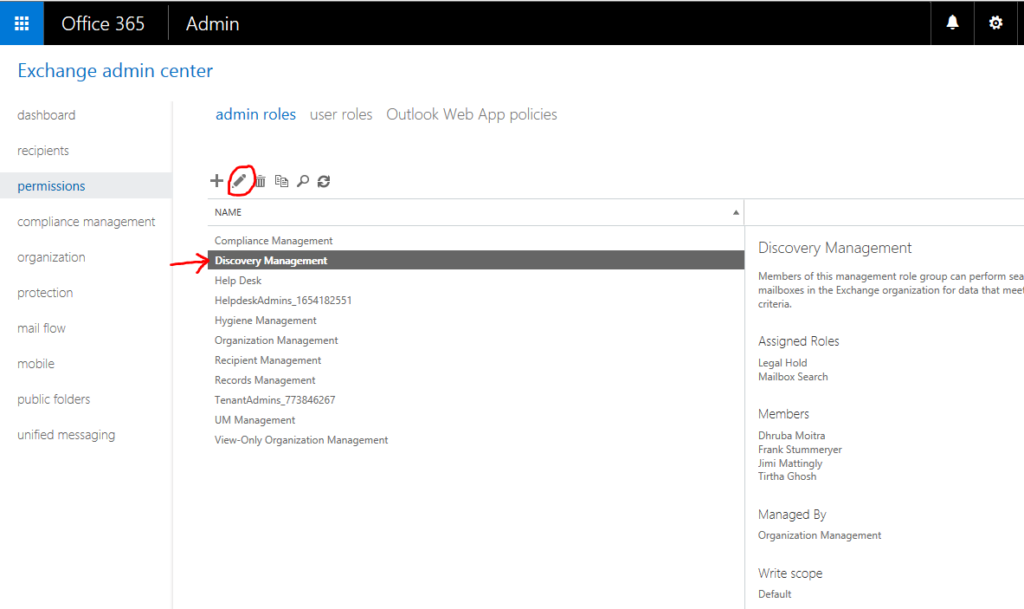
- In the EAC, go to Permissions > Admin roles.
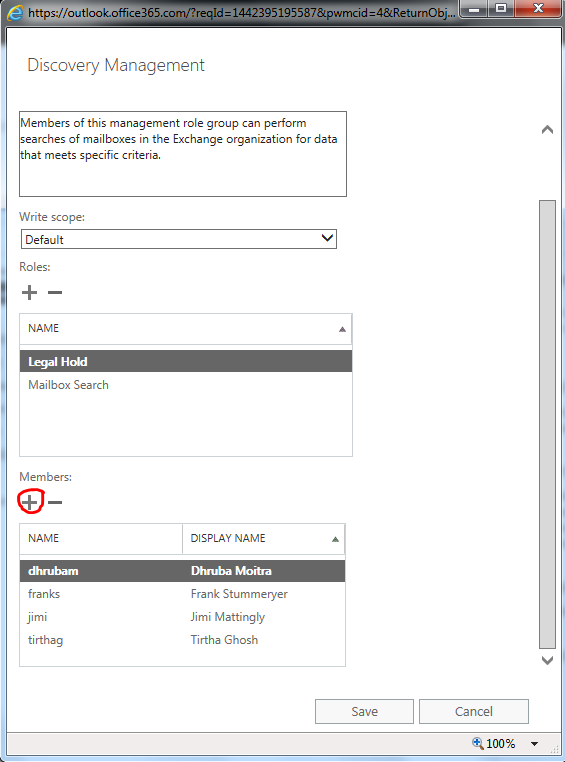
- Click Discovery Management, and then click Edit.
- Under Members, click Add.
- Select the security group that you created for eDiscovery managers, click Add, and then click OK.
- Click Save.

The eDiscovery managers security group is listed under Members in the details pane.
Download the Datasheet to learn more about Netwoven’s Information Protection and Compliance service.
Download the Solution Brief to learn how Netwoven’s solution proactively identifies and protects your sensitive data.