This blog explains different methods to export data from Excel to a SharePoint List. To export data to a list, make sure you have necessary permissions in SharePoint Site. Also, make sure you have added the sites as Trusted sites.
There are cases where after you create the excel sheet, you would like to share it the team or set of peoples. Exporting Excel to SharePoint can be easier for viewing as well as for editing the data. Once the data is analyzed in SharePoint, it can be brought back into Excel.
Approach 1: Using Import Spreadsheet App.
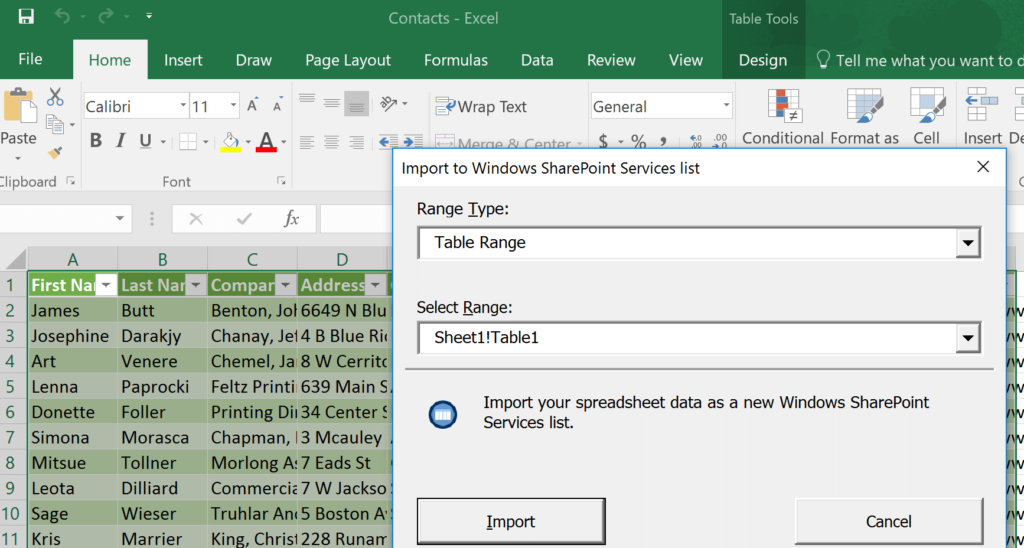
- Go to SharePoint. Click on Add an app and look for Import Spreadsheet

- Give it a name, browse the file and click on Import
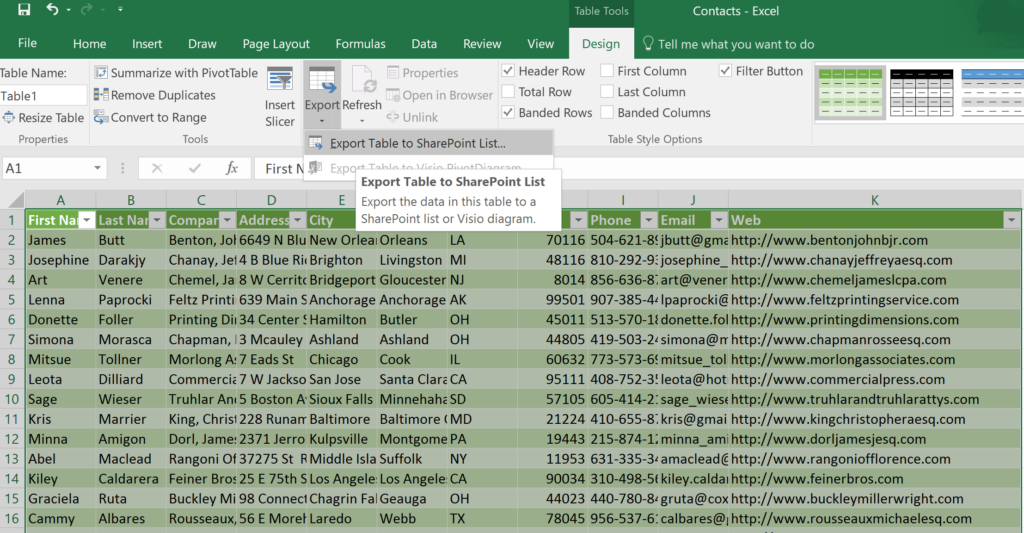
Approach 2: Using Excel “Export Table to SharePoint List” option.
- Under Design—Export, click on “Export Table to SharePoint”
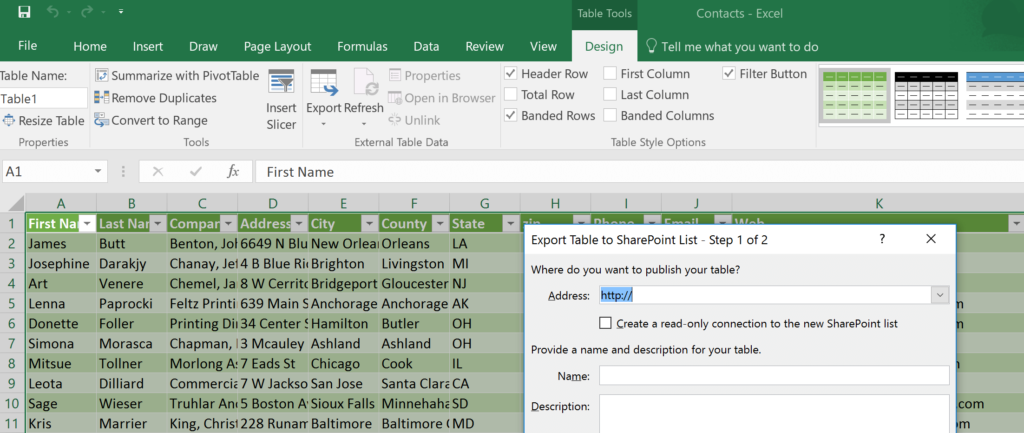
- Provide the SharePoint URL and the Name.
With approach 1 and 2, you will see number issues in SharePoint.
Most of the columns in SharePoint list maps to a single line of text. Like dropdown columns are converted to single line of text. There is no way to change this during the import process.
Second issue is, the views are completely messed up. Views always takes you to quick edit mode. Also, the views show additional columns like icon.

Approach 3:
This is a much better way to import Excel data. This uses combination of Microsoft Access along with Excel. In this approach, you create a list with all the necessary schema and use MS Access to map the data from Excel to SharePoint List.
- Create a custom list. In my case, I am going to create it from Contacts List as it contains most of the columns which I need.
- Remove the columns which are not required. Add drop down and other columns taking values from Excel dropdown.
You can follow the below steps to get unique dropdown values from Excel. Click on any cell and select ‘’Summarize with Pivot Table”
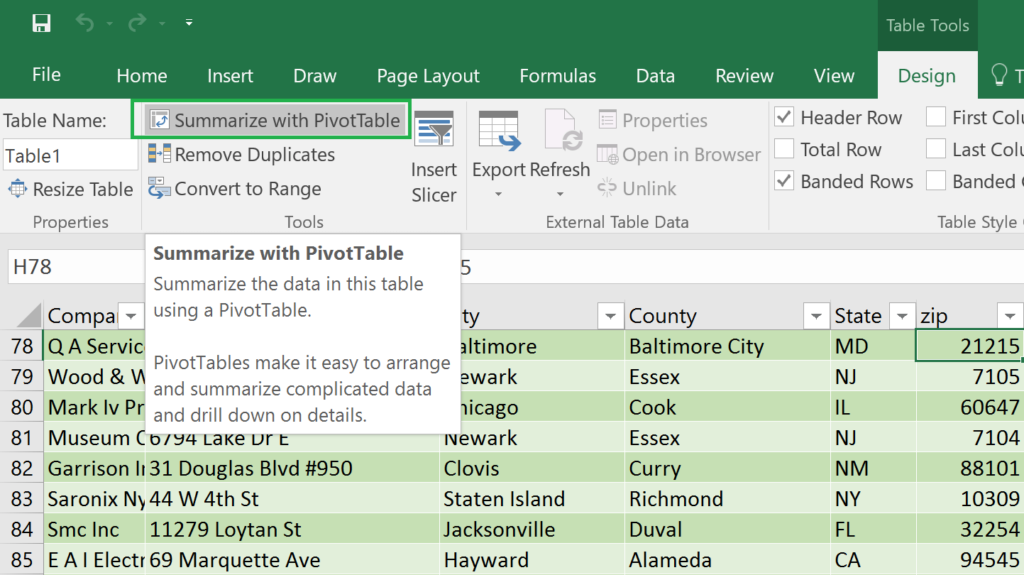
- This creates a new worksheet. Add the dropdown column in Rows section. In my case it is State This will display all the unique dropdown values in ascending order. Copy the values and paste it in SharePoint drop down list column.
- Once the List is ready. Click on “Open with Access” from the ribbon.

- This creates new local Access database, Give it a name. Make sure to select radio button ‘’Link to data on the SharePoint site” and click on Ok.
- Next, we need to get the data from Excel and the map it to each column in SharePoint. Click on ‘’Excel’’ under “External Data’’ tab. Look for the Excel file and make sure you select last radio option “Link to the data source by creating linked table”.
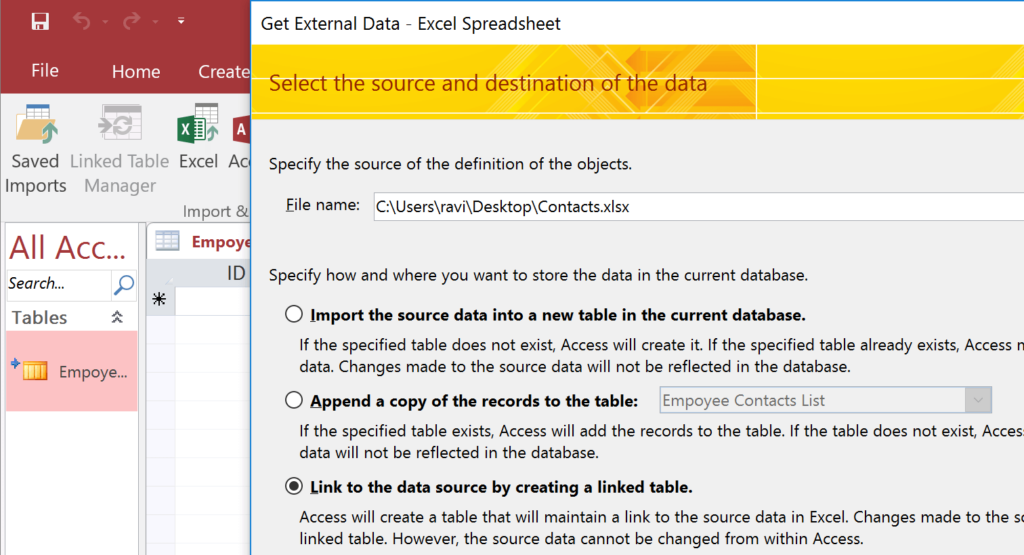
- Check “First Row Contains Columns Headings”

- Give it a name to the Linked table and click on Finish
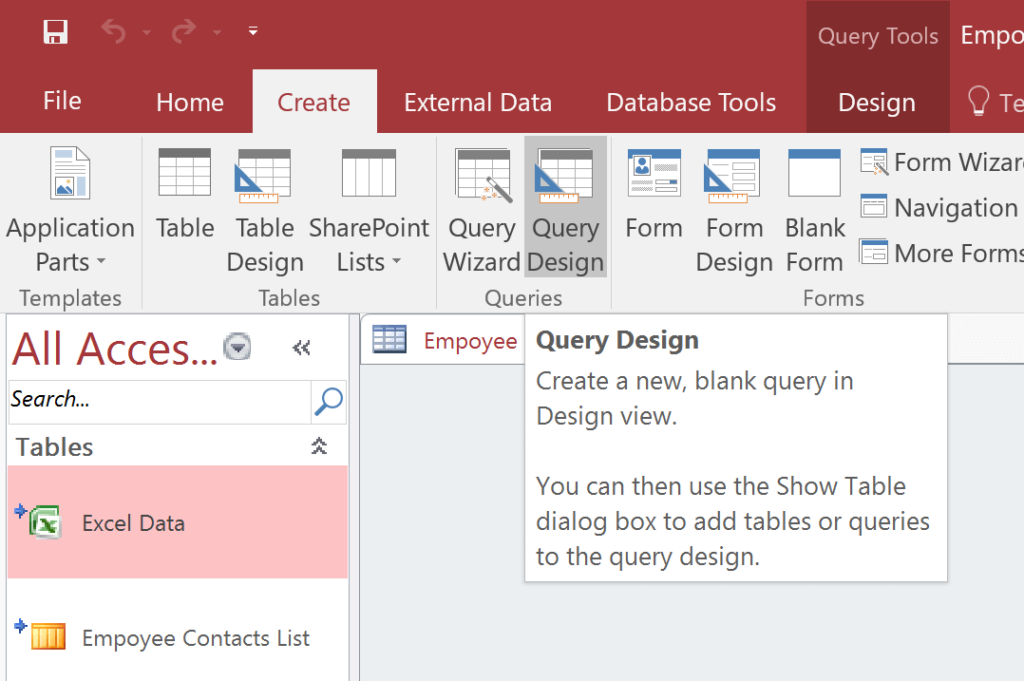
- Click on Query Design under Create tab, Select the Excel source, in my case it is called “Excel Data”. Click on Add followed by Close
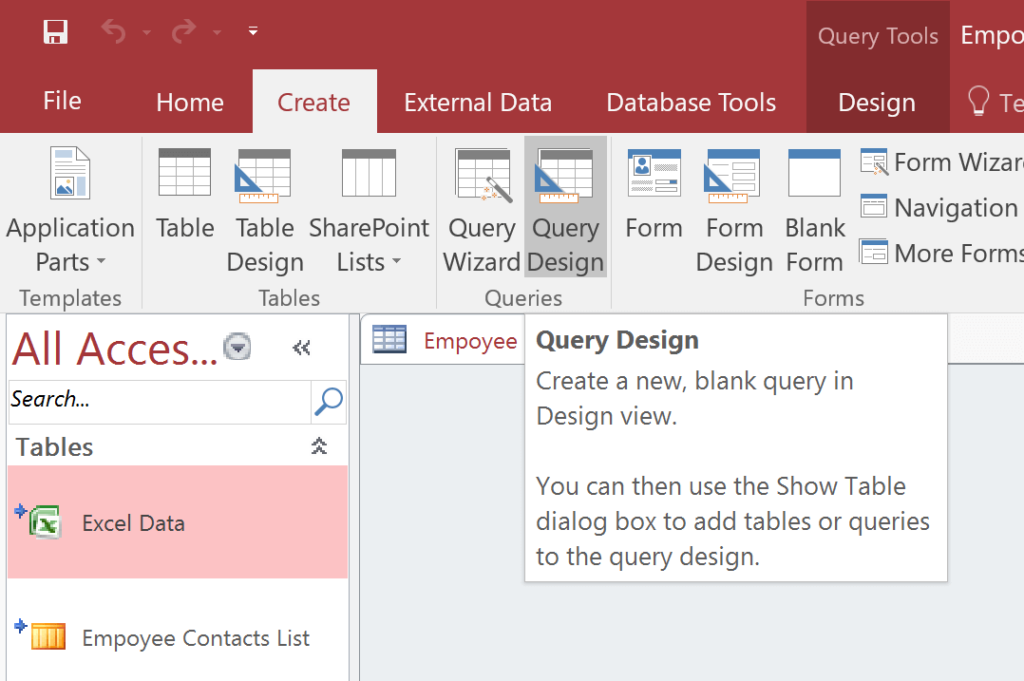
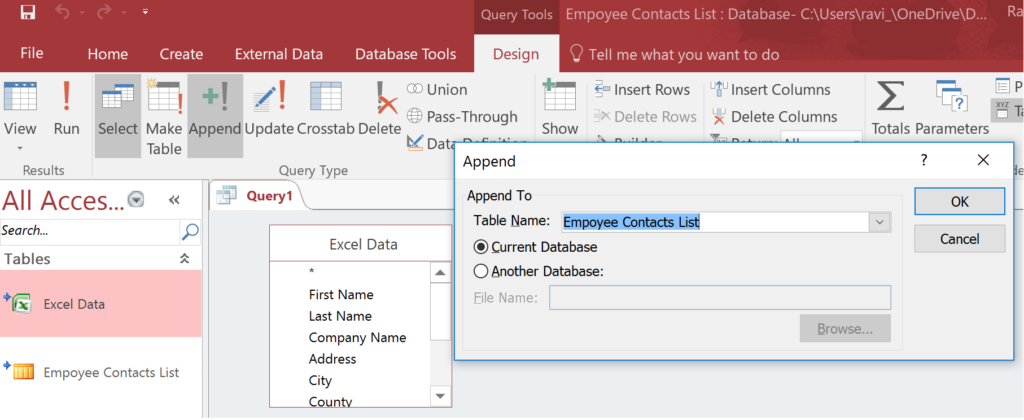
- Click on “Append” under Design tab, select SharePoint List under Append to Dropdown.
- Select the Excel column and map it to equivalent SharePoint List column (under Append To). Repeat the procedure for all the columns.
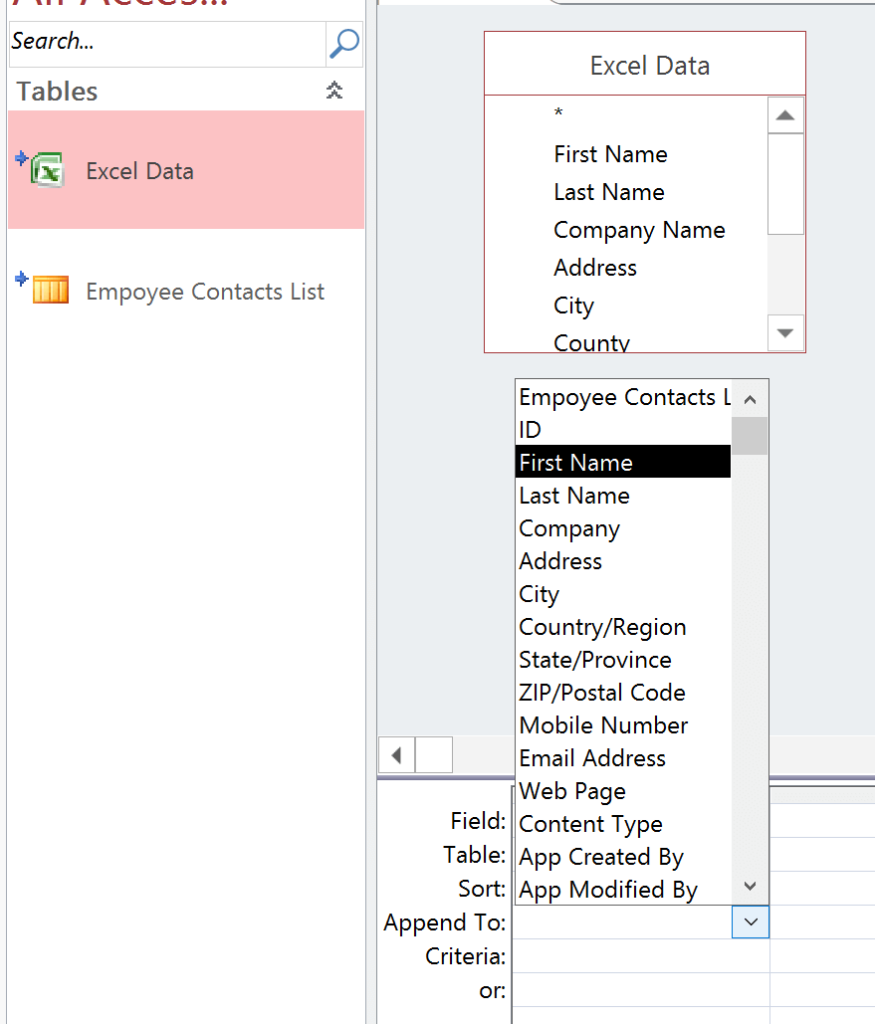
- Below is the final screen after all the mappings.
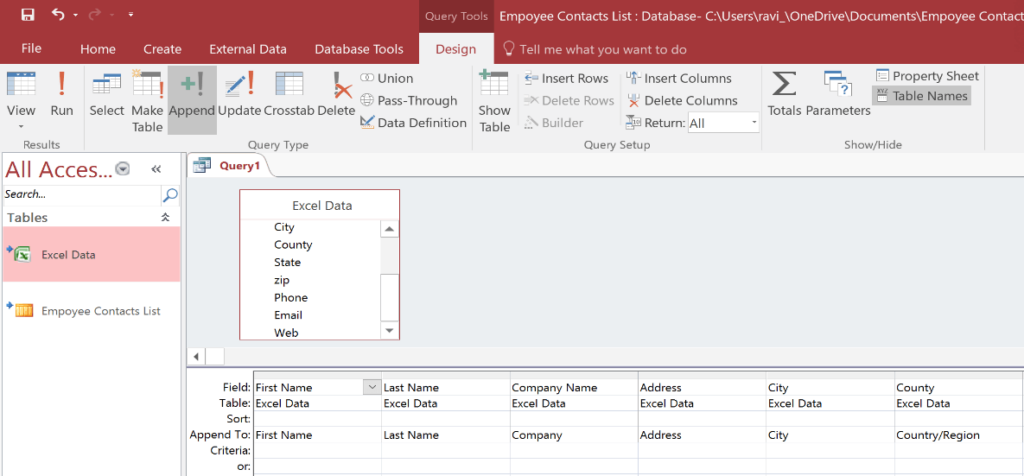
- You are almost done. Click on Run from the ribbon. This step will insert all the rows to SharePoint List. Once completed, you will see the SharePoint list is populated with values along with the same schema as Excel file.
Hope this helps someone out there.Also, there is a very good video tutorial from Peter Kalmström available in YouTube.
Ravi


thank you very much you really save my day , i can not thanks you enough for the last option using access , really i was having the messy list you had mentioned using the first two options .